
Here are the steps I took during my live 5-minute challenge, along with a couple of tips about the maybe less-obvious things you need to remember or avoid in order to not bump your nose going up a blind alley, whatever that means. If you didn't read/watch the first blog, here it is : 5-Minute Entry-Level Track Swapping Challenge
So, first, download my .WAV files from here.
And if you haven’t already, you’ll need to download my six music .WAV files from here, and download and install Wwise.[not shown in the video.] They make it easy for you. If anything seems scary, just click what seems like the default value or the OK button. Maybe it looks tricky because of the fine print, but it's hard to go wrong. If you feel like you'd like a deeper dive, the documentation is thorough and can be found here.
Now start up the video, and along with me Open and start a new Wwise project. It's intuitive. You Can Do It.
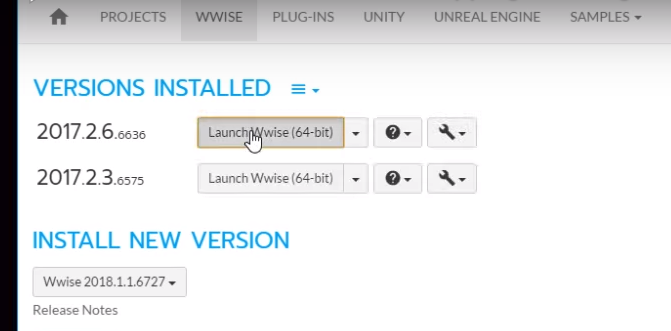
In the Wwise Launcher, click the “Launch” button for pretty much any old version of Wwise.
You will be in the Designer Layout.
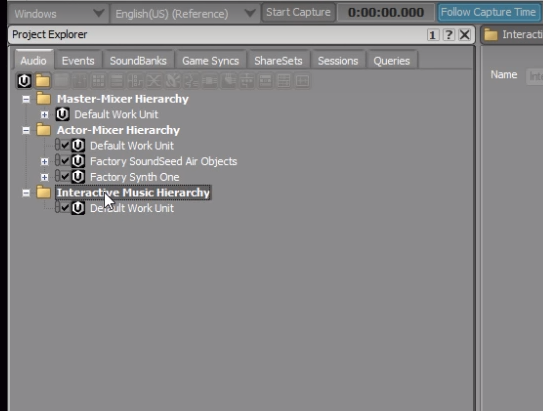
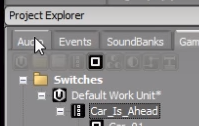
Click the Audio tab
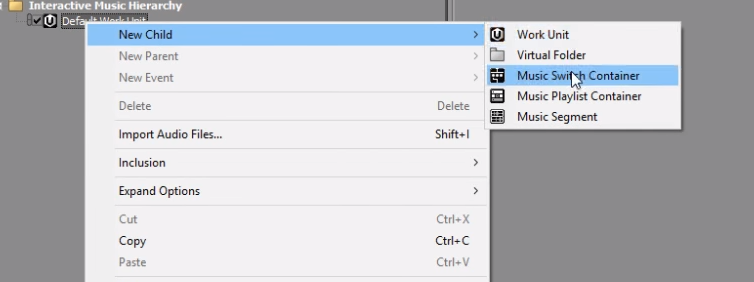
Under Interactive Music Hierarchy/Default Work Unit,
Create a new Music Switch Container and name it.
Drag the project’s .WAV files (which you’ve just downloaded) from an Explorer folder into the Music Switch Container.
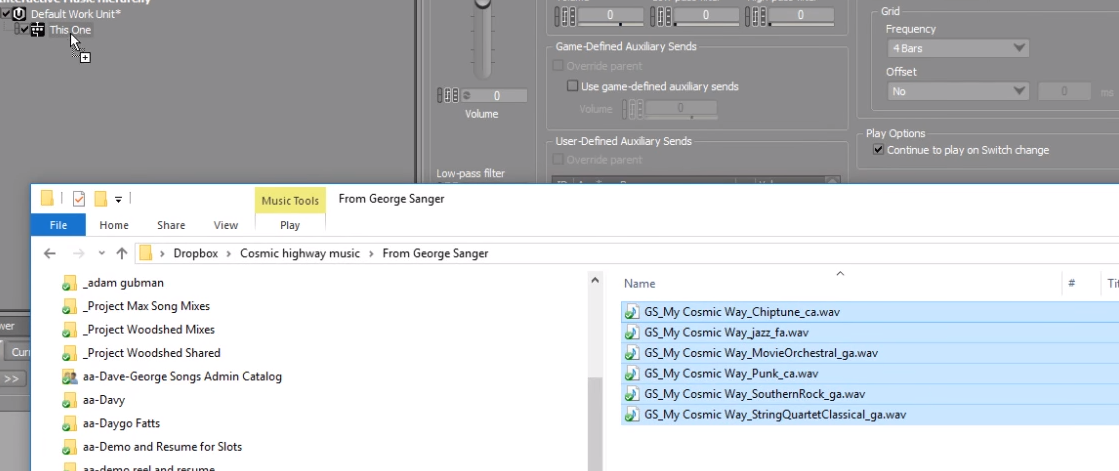
When the dialog box appears, just click the “Import” button using the default settings. The .WAV’s will automatically be placed into Music Segments, which will appear in the Music Switch Container.
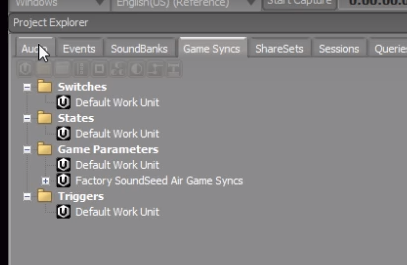
Now, under the Game Syncs tab,
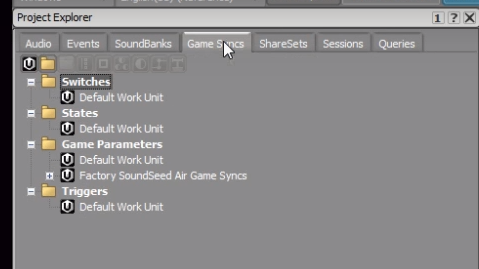
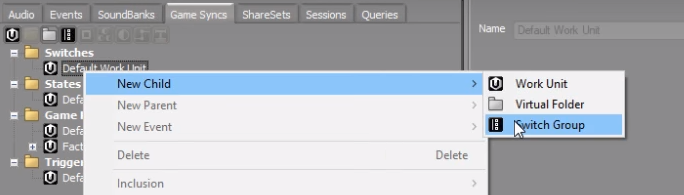
In the Switches folder, create and then name a New Child > Switch Group.
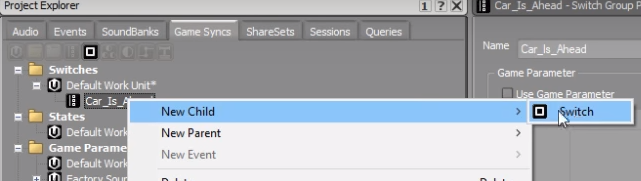
Create and name 6 switches under that Switch Group.
Go back to the Audio tab,
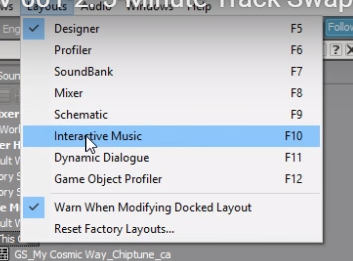
Under the Layouts tab change to Interactive Music Layout—
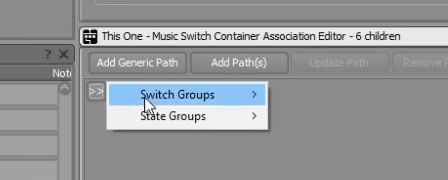
Now the Music Switch Container Association Editor shows up.

Use the “>>” button, to bring in the switch group you just created.
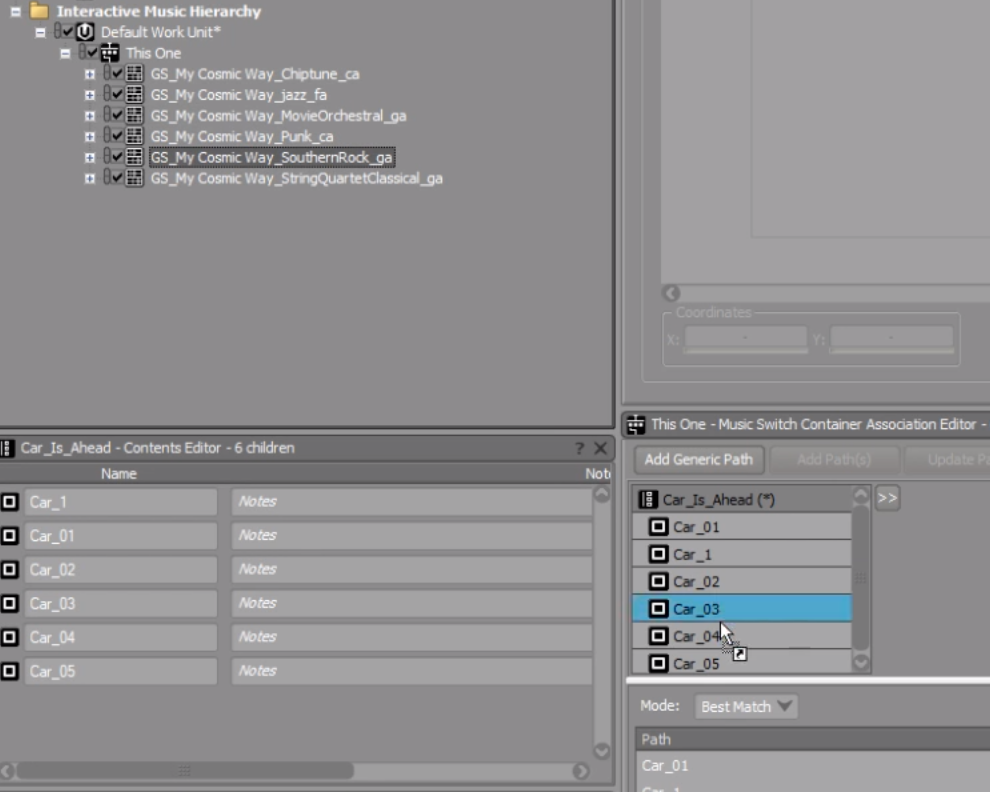
One at a time, drag the Music Segments you created earlier from the Project Explorer to the appropriate switch.
You can test if you want using Transport Control.
Click the “pin” so that the transport doesn’t focus on some other object accidentally (1.)
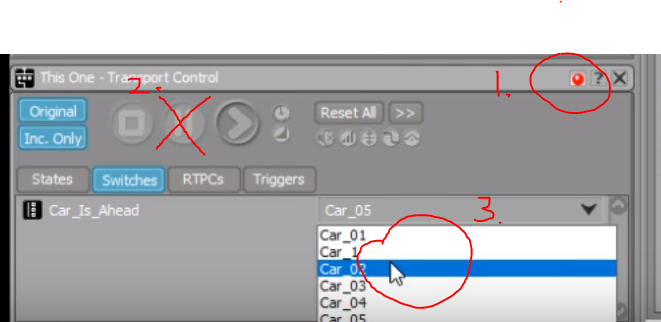
--NOTE: After having hit “Play,” make sure you use “Stop” rather than “Pause (2.)”... Certain editing functions are disabled when the playback engine is paused rather than stopped, and you can lose precious minutes tracking that down!--
Now, clicking the Play button, you'll find that you can use the pull-down menu to change switches (3.) and that will switch tunes. That’s a good start, but they don't quite behave the way you'll want them to. We don’t want our tunes to start at the beginning, we want all the tunes to be in sync with each other, like the tracks on a tape or in a DAW.
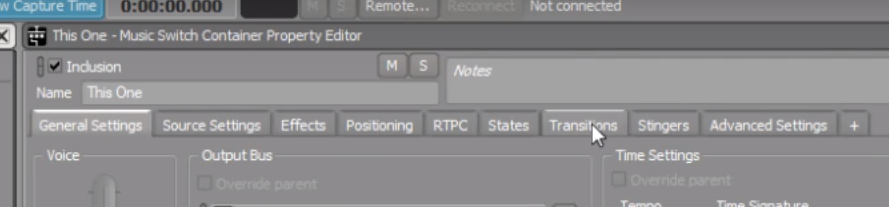
To solve this, under the Transitions tab of the Music Switch Container Property Editor.
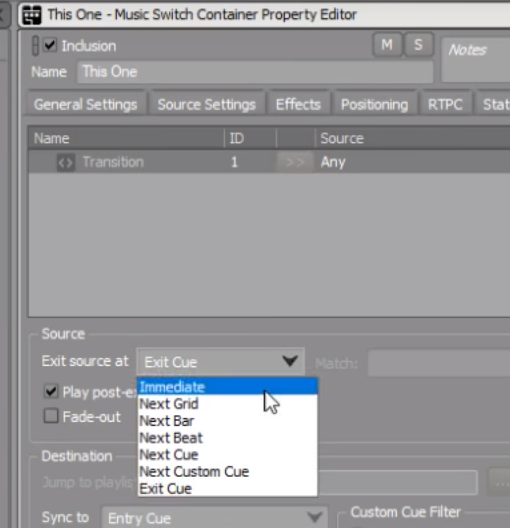
Highlight the “Any to Any” transition.

To make your transitions happen quickly rather than waiting for a musically appropriate time, set "Exit source at:" to “Immediate.”
Then to “line up the tracks,” set "Sync to:" to “Same Time as Playing Segment.”
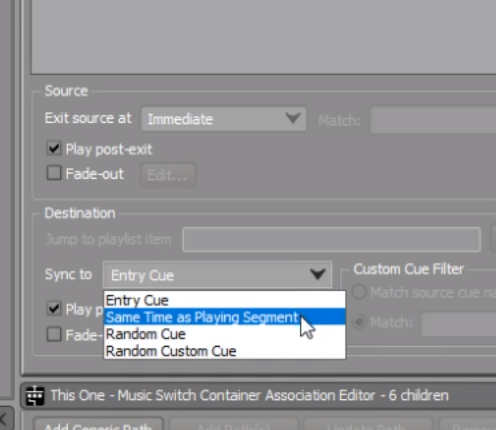
Now you’ve officially achieved success at the five minute challenge—you can test it by clicking “Play” in the transport and changing switches as you did before. Enjoy a self-congratulatory yoga break now, OR let's do one better and make smooth cross-fades.
Check "Fade-Out" (1.) and then click the “Edit” button (2.)
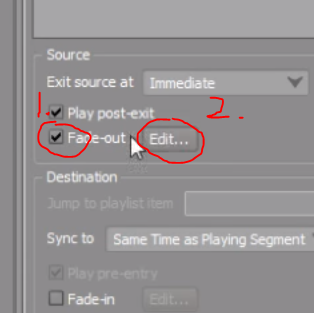
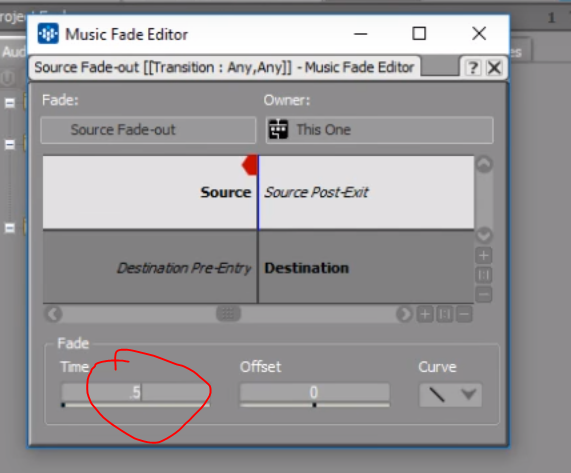
Give the fade out a time of .5 seconds.
Check "Fade-In (1.)" and “Edit (2.)”
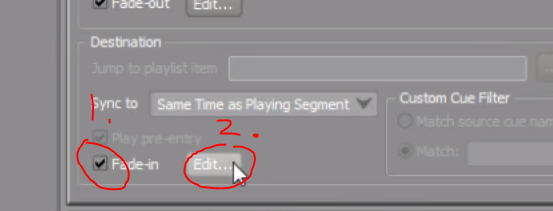
Give it a time of .5 (1.) and an offset of -.5 (2.)

(Without the offset, a new segment’s fade-in would begin at the end of the older segment’s fade-out. By offsetting, we overlap the two segments and allow the new segment to start fading in at the _beginning_ of the older segment’s fade-out.)
The rest of the video shows me going down a dead-end trying to hook up the control surface—To continue this lesson, go to the “001-4: Cleanup” video to see where I went wrong and how to do it even better!
But do that later. Because you TRANSCENDED THE FIVE MINUTE CHALLENGE!! You deserve a celebration break. (And also I haven’t created notes for that video yet at the time of this writing. If I still haven’t when you’re reading this, request it in the comments and I’ll make it happen Just For You!) So for now, try out what you just did, and GRIN.
Oh, wait, what’s that? I think I hear your theme music--Your car must be ahead!
CONGRATULATIONS--you’re a WWINNER!!
댓글