Last year, I started exploring various approaches to spatialization using Unreal Engine and Wwise as part of my final project for my degree at the University of Edinburgh.This unearthed some exciting results that I’d like to share with you in this blog.
From audio files to endpoint (Audio Objects, Main Mix and Passthrough Mix)
First, let’s discuss the three bus configurations and how I have approached using these for the project. The option to have this level of accessibility is compelling, as you can pick and choose the sounds you want to have more detailed localization and experiment with what sounds work best in a different configuration. Regardless of the configuration, the final point of delivery for buses is the cross-platform Audio Device. This is the point after which the audio is delivered to the endpoint. This is also the stage where I have used the Mastering Suite for some final touches.
Object-based Bus
The object-based audio pipeline in Wwise can be beneficial in using spatialized effects rendered by the endpoint when and if available. The audio buffers are delivered to the endpoint with metadata, including information like azimuth, spread, distance, elevation, focus and spatialization type. If available, this could be further enhanced at the endpoint using customized HRTF profiles. Setting up Audio Objects is pretty straightforward. However, one needs to be mindful of the number of audio objects supported by the endpoint, which would differ based on the platform one is dealing with. To hear the pipeline's effect, a spatial audio profile must be selected in the sound properties of the endpoint. The number of audio objects available at any point can be checked under the Device Info section in the Audio Device Editor in Wwise.
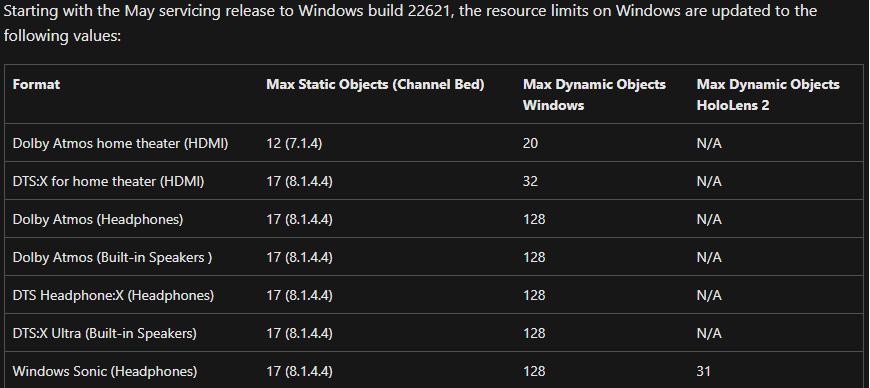
Spatial Audio Configurations and Dynamic Object Limits for Windows. Source: https://learn.microsoft.com/en-us/windows/win32/coreaudio/spatial-sound
Check out this example from the project. Try to pay attention to the mix as we switch between 2.0 and object-based configurations. In this situation, there are three spatialized sounds to look out for: A speaker in an adjacent room on the left side, a speaker in the same room as the player on the right side of the player, and a distant train passing a bit further on the right side, behind the player. The speaker's sound on the left and the train on the right are travelling through portals into the room. Notice how closed everything sounds when 2.0 format is selected vs when audio object configuration is selected. The audio object configuration results in much better spatialization of the room and gives a better sense of sound around the player, rather than them feeling cramped up. I would recommend listening to the examples on a pair of headphones.
Main Mix (Virtualized Bed)
The Main Mix configuration represents channel-based audio formats, which can be further virtualized and binauralized. I am using first-order ambisonic source files in the project, which have been routed through the main mix configuration. The bus configuration is set to 3rd-order (16 channels representation) to use the virtualization. This is also the case for the Convolution Reverb aux buses, where I use first-order ambisonic IRs.
Passthrough Mix
Passthrough (2.0 Channel-based format) mix can be a strong stream when sending sounds or music to the endpoint without any spatial processing. It preserves the frequency content by avoiding added filtering and holds the original sound and channel configuration. I am using a bunch of layered non-diegetic drones that are routed through a bus with the passthrough configuration.
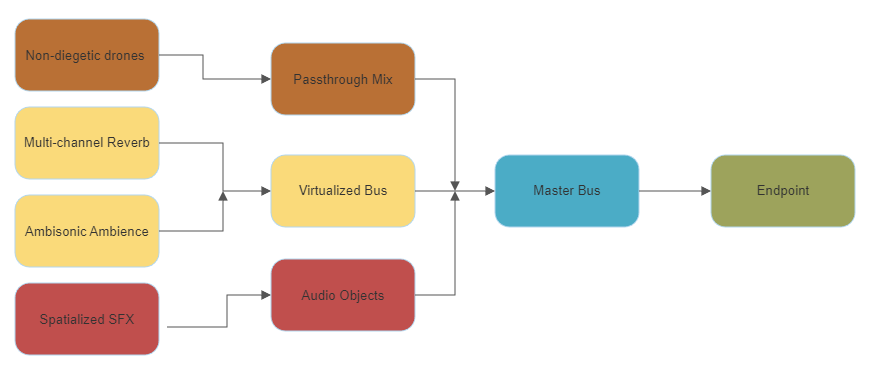
Flowchart of bus routing
Reverb Setup
Now, let's get onto the Reverb Setup. I am using a combination of Wwise Reflect and Convolution Reverb for all rooms. This approach helped to build a nice reverberation bed where Convolution Reverb does the actual heavy lifting. Reflect adds a great sense of dynamic, geometry-informed early reflections based on the listener's distance from different acoustic surfaces.
Here, I have spatialized the Convolution Reverb, converting it into a 3D bus. This ensures a nice crossover of reverbs leaking between different rooms. All the Convolution Reverb aux buses use 3D spatialization to retain the reverb's positioning. This helps in tying the reverb to the world. Although Listener Relative Routing is enabled on the early reflection bus, the 3D spatialization is kept to None so that Wwise does not pan and attenuate the sound further. The attenuation for Reflect can be set from the Reflect Effect Editor. Do note that for all of this to work correctly, one needs to use Wwise Spatial Audio Rooms and Portals.
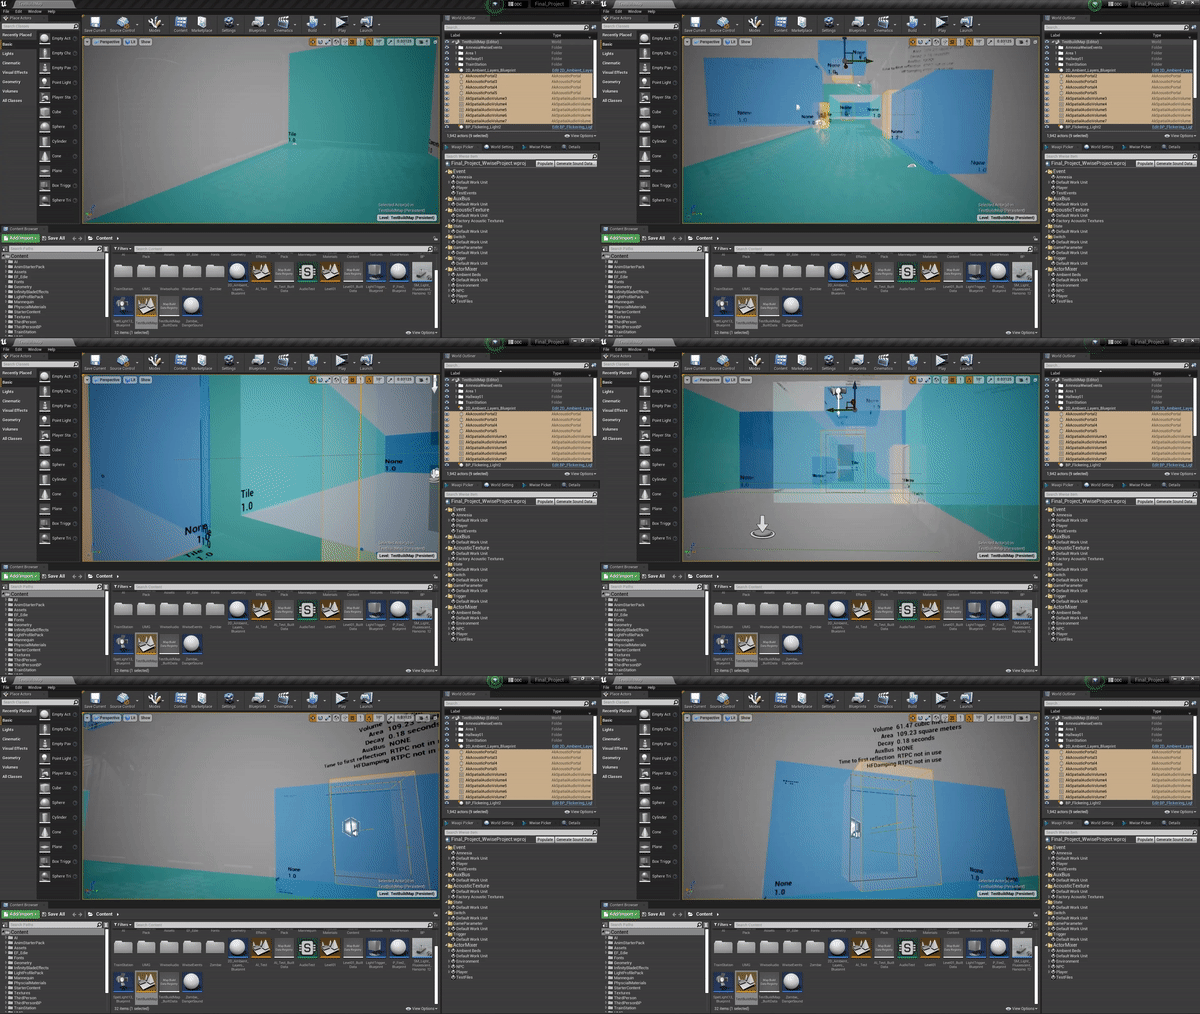
For Reflect, different acoustic surfaces can be attached by clicking the Enable Edit Surfaces option in Unreal under the details section of AkSpatialAudioVolume.
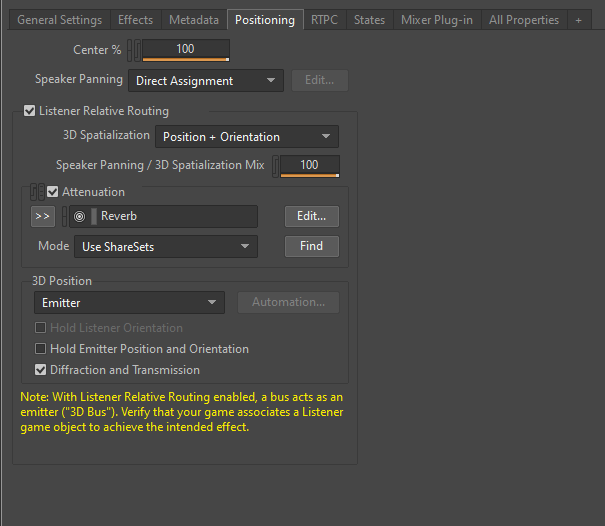
Positioning settings for Convolution Reverb
Here is an example of an isolated reverb aux. In the video, we can hear the reverb signal travelling smoothly through the portals into different rooms. I am using the Audio Object Profiler window to get a visual cue for how the reverb expands and surrounds us as we go closer to the room and how it becomes narrow and more directional as we walk away. Do note that this is an example of the isolated reverb bus, and I have increased the audio level a bit, so you don’t have to worry about fiddling with that volume knob on your interface.
Crucially in all of this work, I have found that when testing out the effects of any spatial process, it is better to do it with a single sound so our ears don’t trick us and can’t manipulate our perception of what is actually happening. Here is a short video demonstrating Audiokinetic’s Reflect in practice, with the flashlight sound and the Reflect bus isolated. I decided to showcase this specific room transition as a significant effect can be heard when travelling from a smaller room to a bigger space and vice-versa.
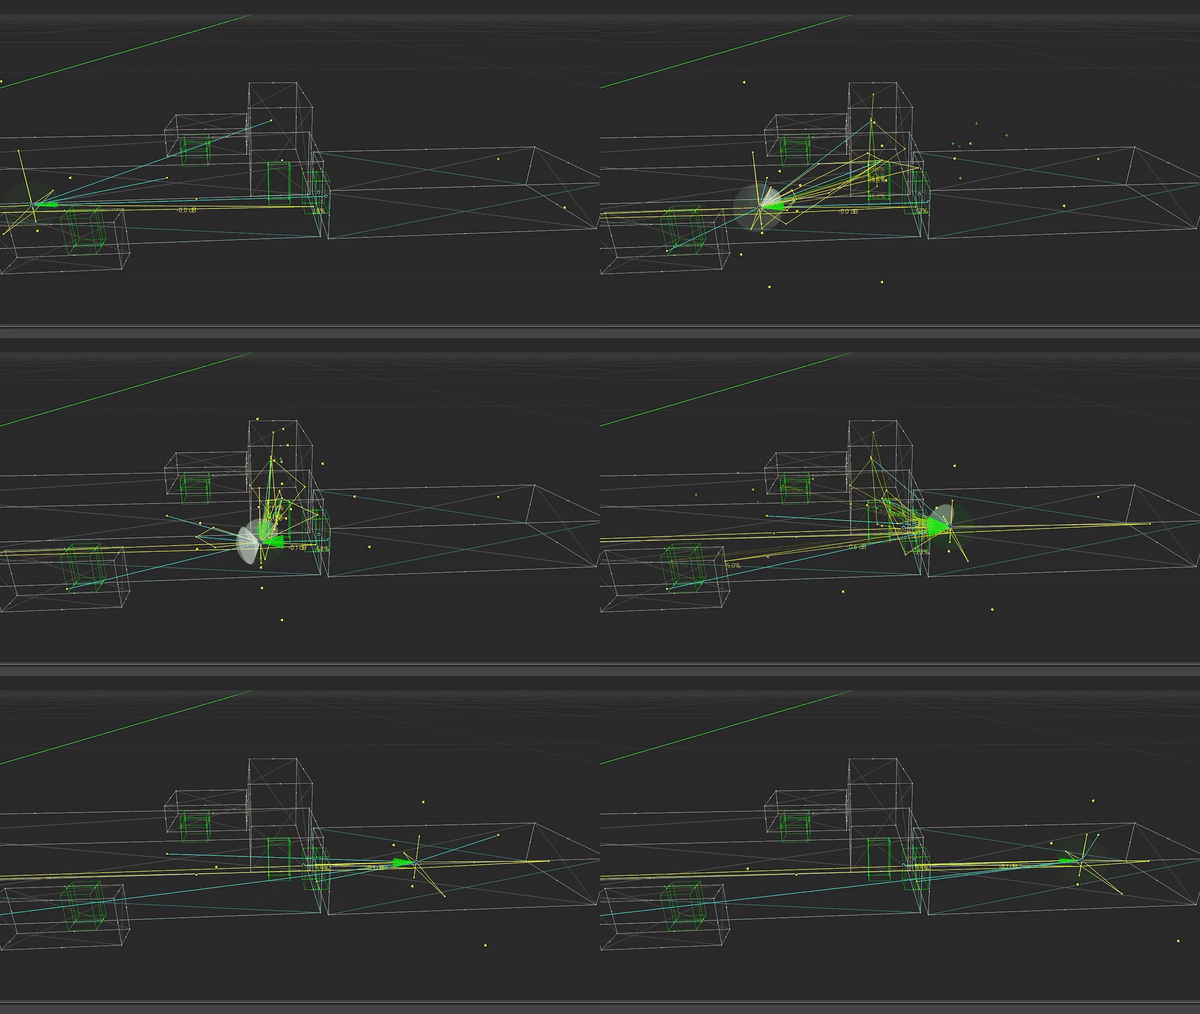
Wwise Reflect
Spatialized foley and its implementation
All player sounds like flashlights, footsteps, floor creaks, breathing and bag movements are spatialized, which affects how the foley sounds to the player based on orientation. This results in things like the footsteps and flashlight sounding brighter when looking at the floor and the bag sounding like it is behind the head because of its positioning. The emitters have been positioned at estimated spots from which we expect these sounds to play.
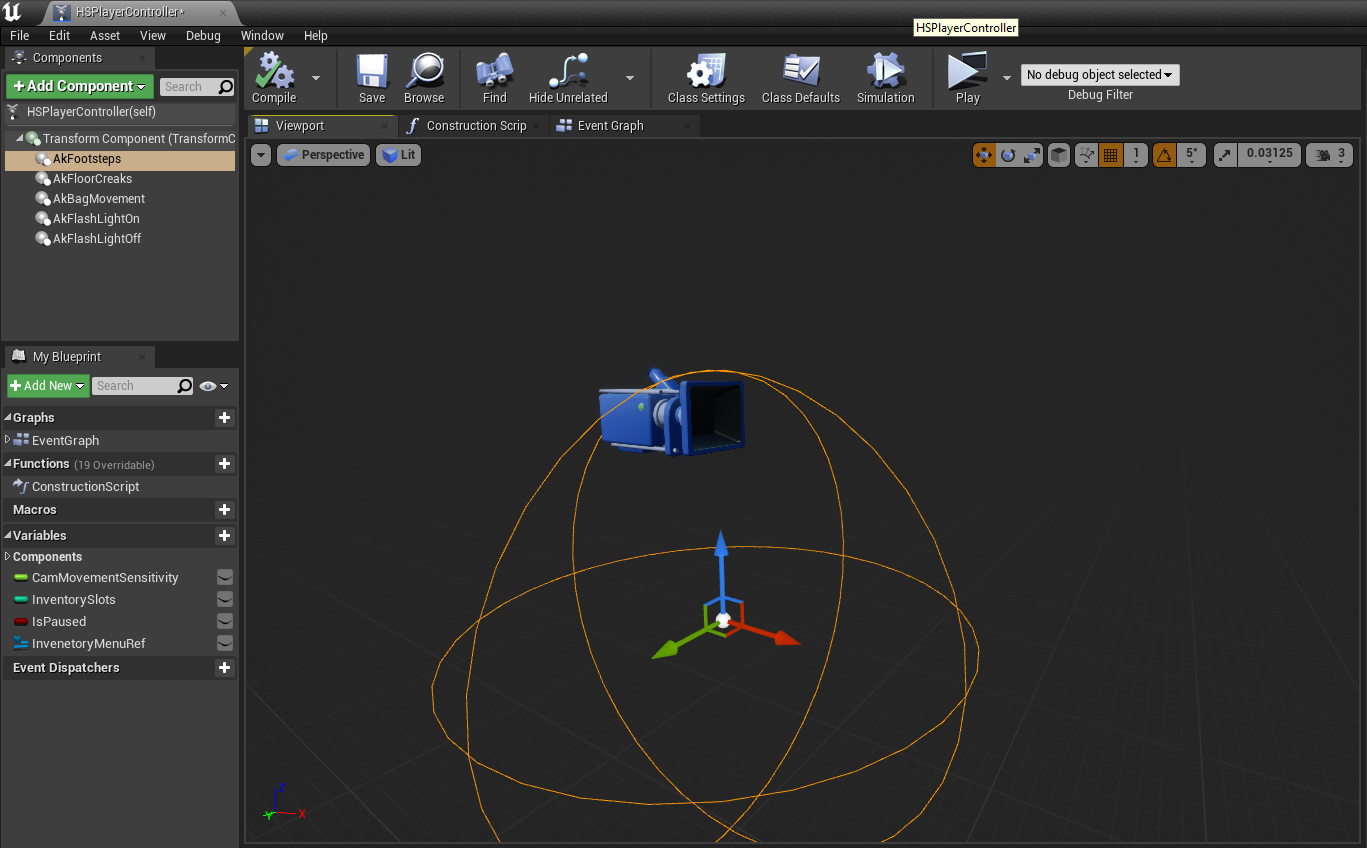
Positioning of different foley emitters
Listener Relative Positioning for ambiences
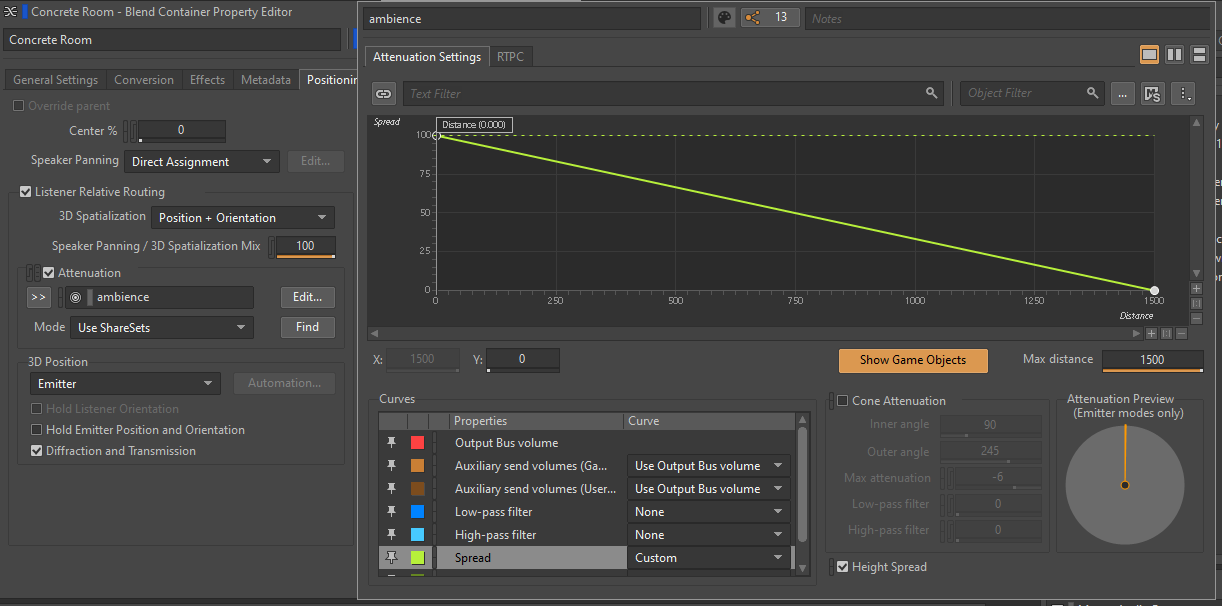
When using a loud ambience in certain parts of the game, it could feel weird if the positioning of the sound source moves with you. Just like we did for the Convolution Reverb, the stereo and ambisonic ambience in the project retain their position in the game world. I have added a spread based on the distance parameter. This allows the recording to surround us when we are in the room, and as we walk away from it, the spread narrows and the portals help emit a point source. This is crucial in creating a nice overlap of ambience between rooms.
Baked-in movement and random-positioned sound spawning
I loved playing Hellblade: Senua’s Sacrifice and was super impressed with its audio. Ninja Theory, the studio behind the game, worked closely with neuroscientist Paul Fletcher from the University of Cambridge and psychologist Charles Fernyhough from the University of Durham, who is an expert in “voice hearing” [1]. Throughout the game, the main character goes through various stages of Psychosis. Sonically, this is portrayed with the help of binaural recordings representing the voices the character hears in her head. I wanted to try out a similar spatialization approach to add a contrast to the techniques discussed earlier. I approached this on two levels, first with voice recordings and second with sounds spawning at random points around the player.
Voice Recordings
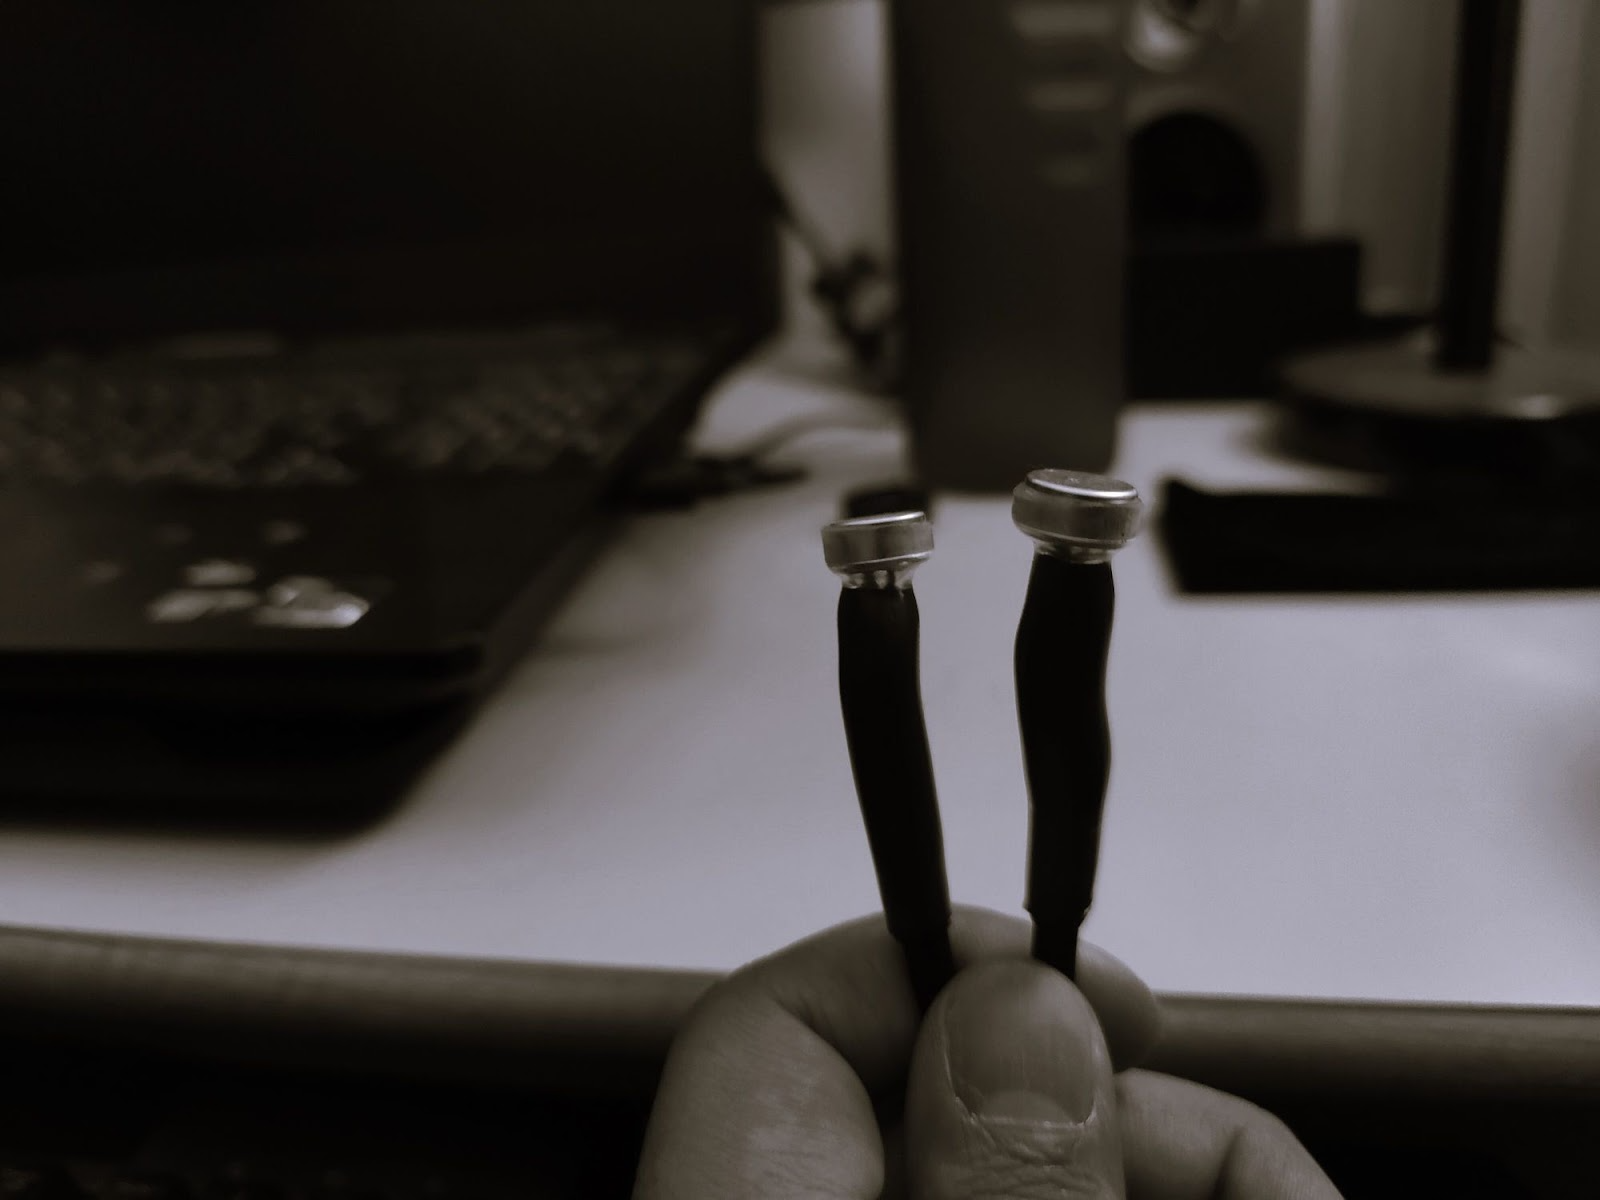
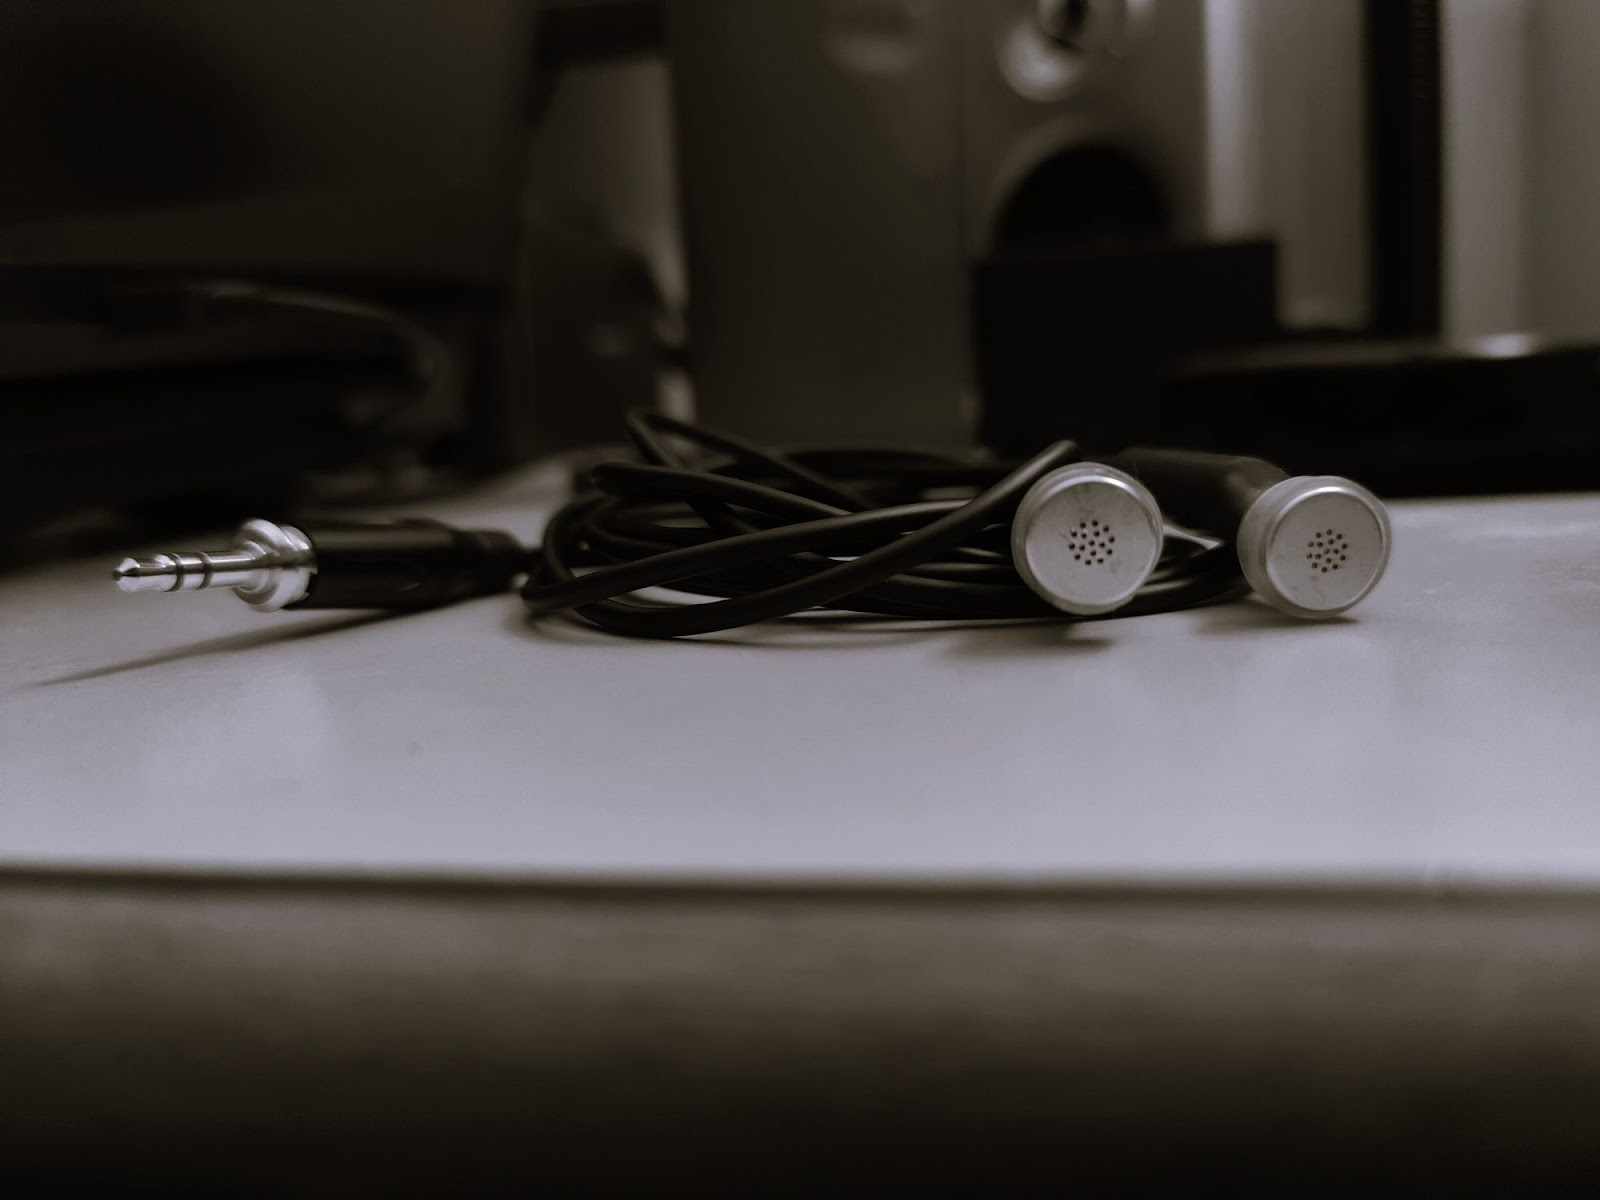
I used a pair of custom-built omnidirectional microphones (built with EM272 capsules) and used them to record the lines for this section. I stuck the earphones onto my ears and then asked voice actors to perform their lines while moving around. I wanted to add baked-in movement in the recordings and contrast them with randomly positioned spawned sounds around the player inside the game as well as the spatialized audio emitters. I liked the contrast this approach added.
The aforementioned microphones
Metal screeches and synth one-shots
The second layer consists of a collection metal thuds and synth hits. In contrast to the close-miked voices, these sounds have a large amount of reverb on them and are filtered to give a sense of distance. They are placed in Random Containers triggered using a random value between one and five seconds. This, in contrast with the randomly triggered voices, comes together to create an exciting soundscape.
Woah, you made it!! Thanks a lot for reading. If you like, you can check out a screengrab of the project using the link below.
Itch page: https://harleensingh0427.itch.io/natural-selection
References
- “Hellblade: Senua's Psychosis | Mental Health Feature” - YouTube. Accessed August 30, 2022. https://www.youtube.com/watch?v=31PbCTS4Sq4&ab_channel=NinjaTheory


コメント