Wwise has many features; but at the start of development when you might not have enough information on how to use it, it may not work as you expect it to. I don't want you to feel that Wwise is difficult to use simply because of an initial hiccup, so allow me to lead you through a process that will work without fail, as long as you follow the steps described here.
In this first blog, I'll go as far as playing sounds with Unreal Engine.
The versions I used to check that this process works:
- Wwise 2023.1.1.8417
- Unreal Engine 5.3.2
Note that if you are using any other version, the behavior may be different.
Table of contents
Create a project
Create an Unreal Project
Integrate the Unreal Integration
Wwise initial setup
Unreal initial setup
Registering sounds in Wwise Project
Creating UAssets
Playing sounds from Blueprint
Final thoughts
Appendix - Sample folder configuration
Putting everything inside the Unreal project
Placing the Wwise project outside the Unreal project
Appendix - How to create UAssets
Appendix – Quick ways to play sounds
Play sounds using AkAmbientSound
Play sounds using BluePrint
Play sounds using C++
Create a project
Create an Unreal project
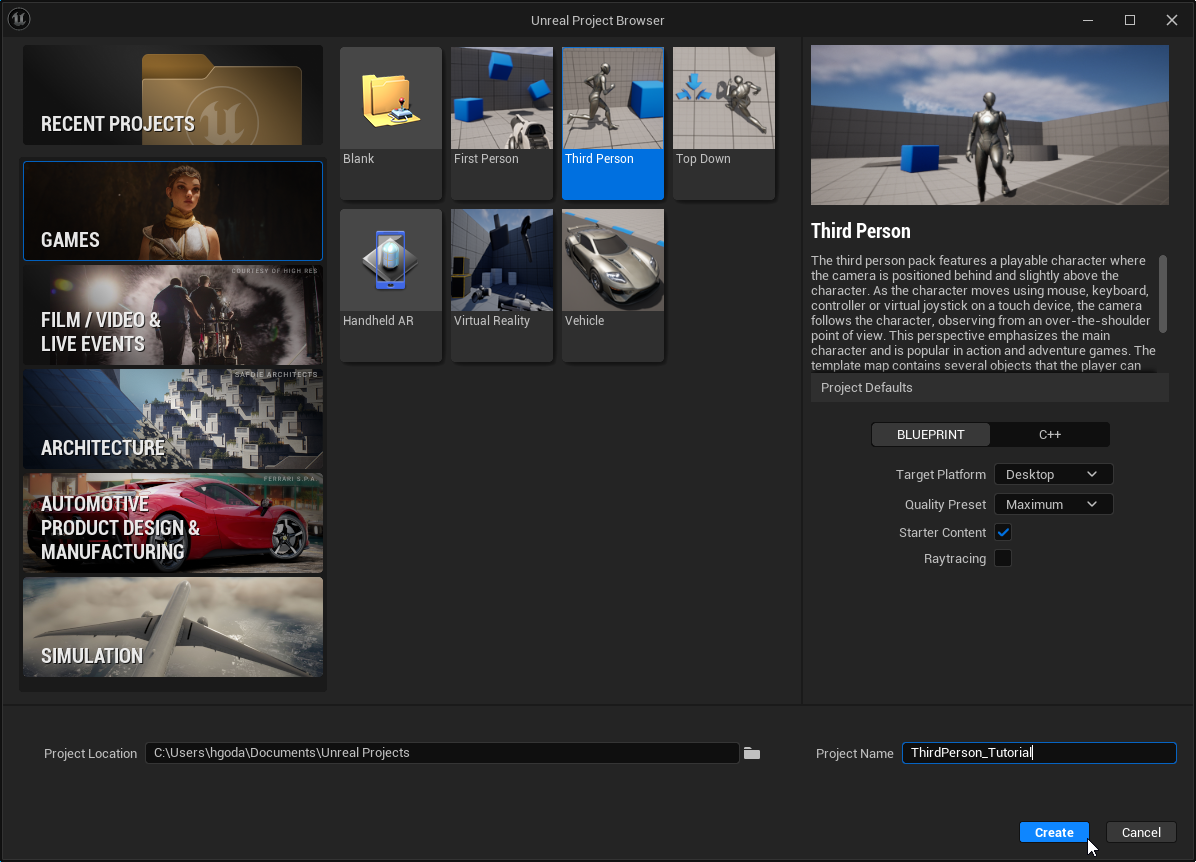
1. Open Unreal Engine and select "GAMES – Third Person".
2. Specify the project name.
• In my example, I named the project "ThirdPerson_Tutorial".
3. Click the Create button to create a new project.
4. After you create the project, the Unreal Engine editor view will open, but let's close it for now.
Integrate the Unreal Integration
1. Open the Audiokinetic Launcher, and open the Unreal tab.
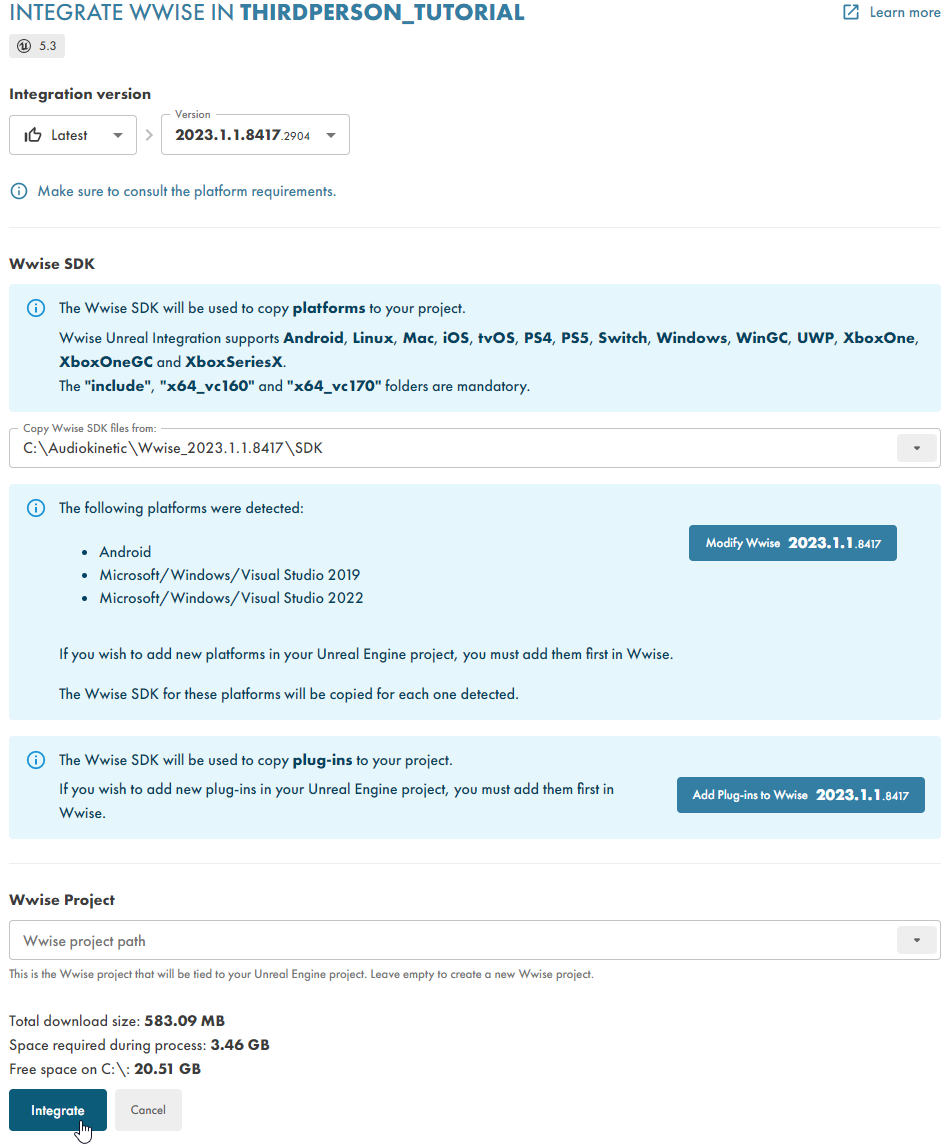
2. Click the "Integrate Wwise in Project…" button of the "ThirdPerson_Tutorial" project you just created.

3. Make sure of the platform you are going to integrate.
4. If you don't specify a Wwise project path, a Wwise Project will be created automatically under the Unreal Project.
• If you have already created a Wwise project somewhere, specify it here to use it.
5. Click the Integrate button.
6. The integration is now complete.
7. Next, in order to update your Wwise Project, click Open in Wwise - Wwise 2023.1.1.8417.

Wwise initial setup
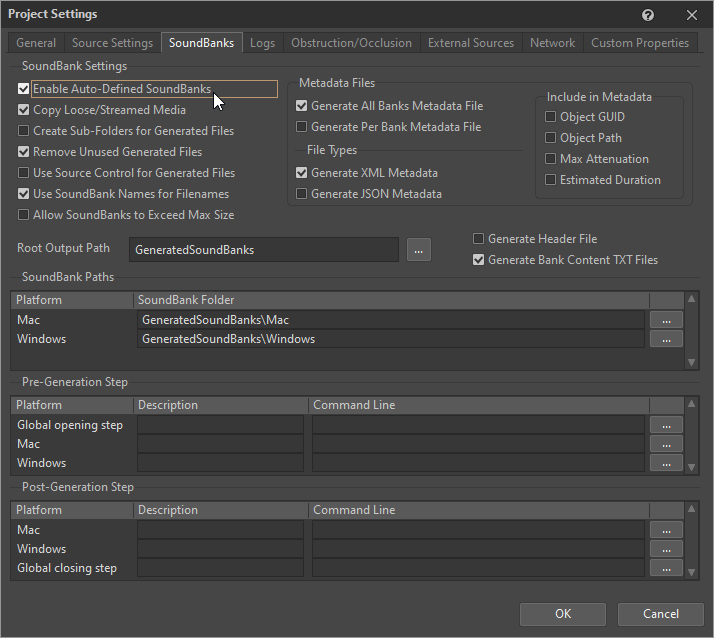
1. Go to Project – Project Settings – SoundBanks, and check "Enable Auto Defined SoundBanks".
2. Save the Wwise Project, and re-open Unreal Engine.
Unreal initial setup
1. Open Edit – Project Settings….
2. Go to Wwise – User Settings – WAAPI, and enable "Auto Connect to WAAPI".

3. Go to Wwise – Integration Settings – Installation – Root Output Path, and specify your Wwise Project's "GeneratedSoundBanks" folder.
• If you leave this field blank, it will reference the Content folder and will not be able to play the sounds correctly.
![]()
4. When you open Unreal Engine, the Wwise Authoring Tool will display the "External Project Changes" warning dialog, so click the Reload button.
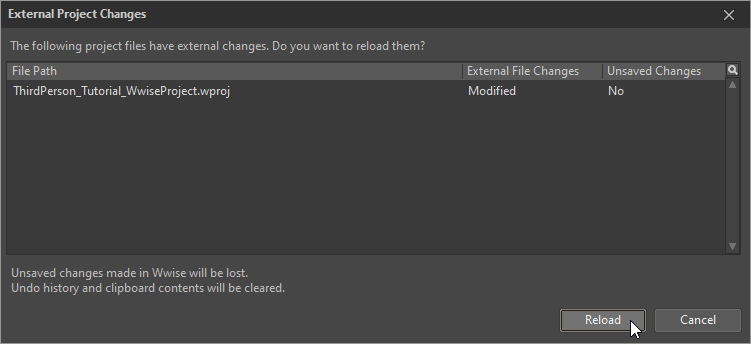
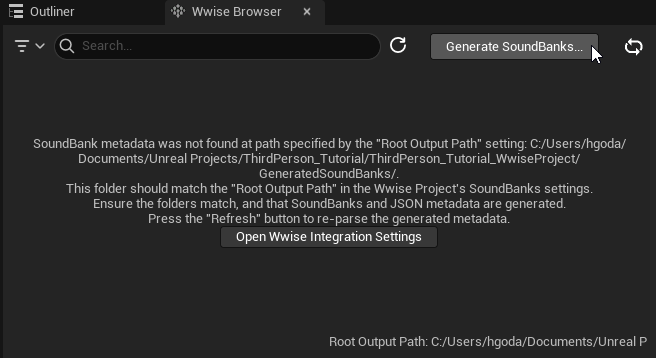
5. There will be a warning in the Wwise Browser telling you that SoundBank metadata was not found, but don't worry, and just click the "Generate SoundBanks…" button.
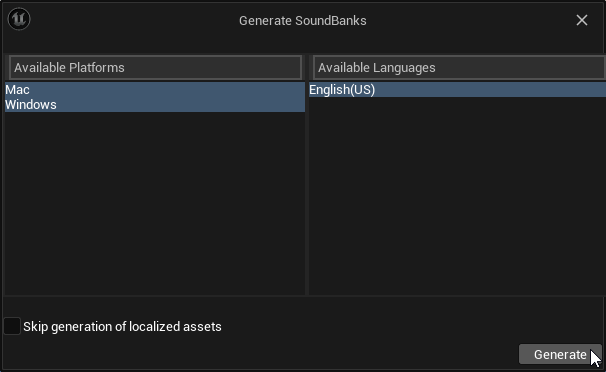
6. In the "Generate SoundBanks" dialog box, click the Generate button so that SoundBanks are generated, and the directory configuration is displayed in the Wwise Browser.
Registering sounds in your Wwise Project
Now let's try playing an ambient sound.
We'll take advantage of a sound in the IntegrationDemo folder:
•<Wwise>\SDK\samples\IntegrationDemo\WwiseProject\Originals\SFX
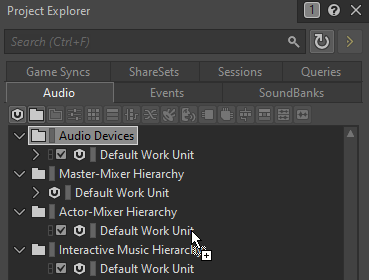
1. Drag & drop the waves.wav file from this folder to the Actor-Mixer Hierarchy's Default Work Unit, and the "Audio File Importer" dialog box will open.
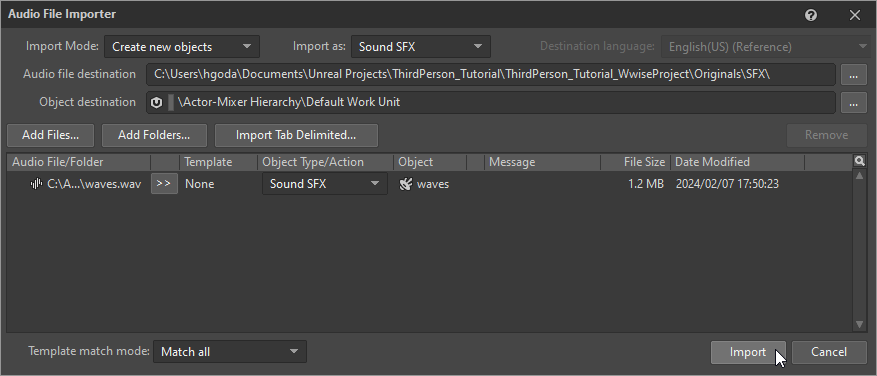
2. Click the Import button, and it will be registered as a Sound SFX named "waves".
3. In the Project Explorer, select the "waves" Sound SFX you just registered to show information regarding the object on the right.
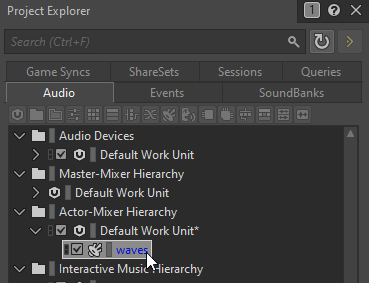
4. In the General Settings tab, there is a Loop setting. Enable this.

5. Right click the "waves" Sound SFX, and create these Events from the menu:
•Play_waves: Plays the “waves” Sound SFX
•Stop_waves: Stops the “waves” Sound SFX

6. Once you finish these steps, save the Wwise Project and re-open Unreal Engine.
Creating UAssets
In order to play the sound, you need to create an Unreal Engine asset, or a UAsset.
There are several ways to do this, but let me show you how to do it using Reconcile.
1. First, create a SoundBank that includes the added Event.

2. Next, in the Wwise Browser, click the Reconcile button.

3. Check that "UAsset Operation" is set to "Create", and click the "Reconcile Unreal Assets" button.
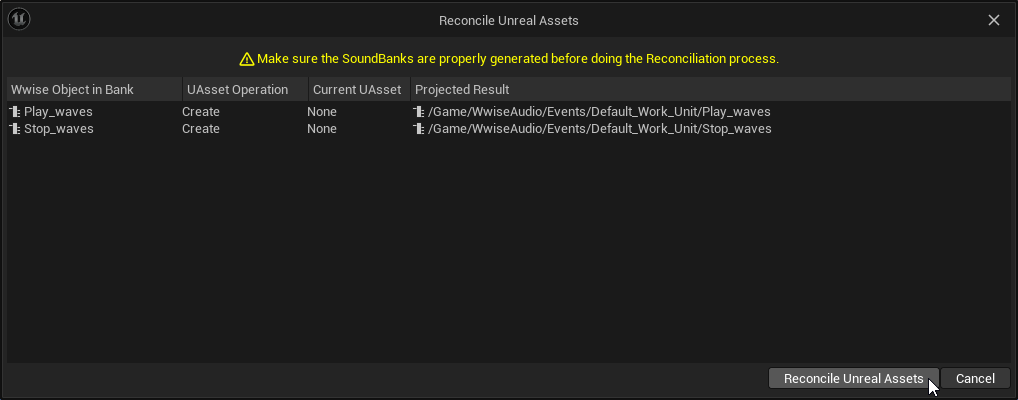
4. The UAsset is generated. In the Wwise Browser, check the "Wwise UAssets Status" column.

Playing sounds from Blueprint
In this article, I will show you how to play sounds from Blueprint.
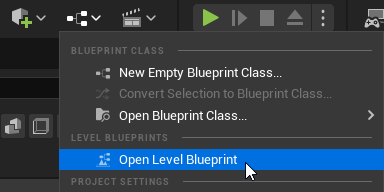
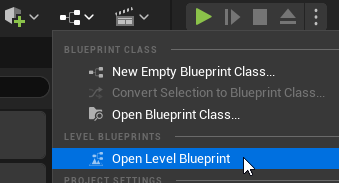
1. Select "Open Level Blueprint" from the menu.
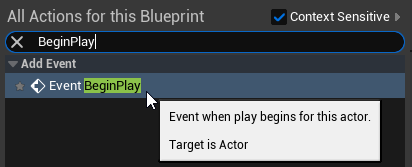
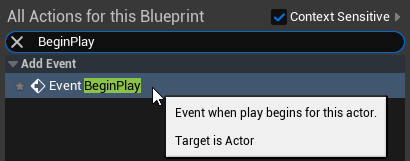
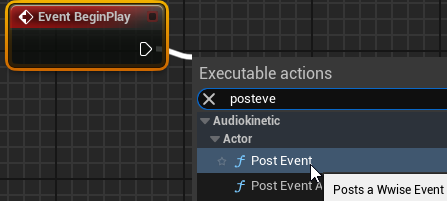
2. Right-click the Blueprint view to create a BeginPlay event.
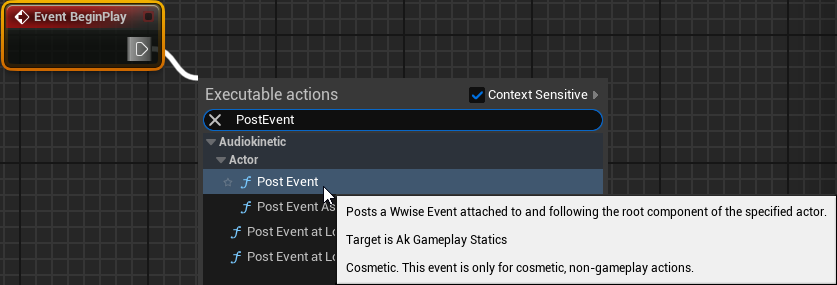
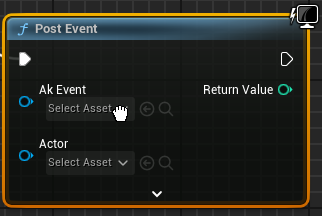
3. Drag a connector from the BeginPlay event to create a PostEvent node.
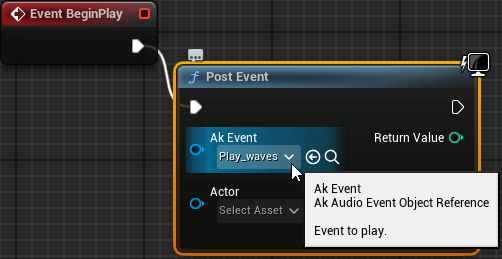
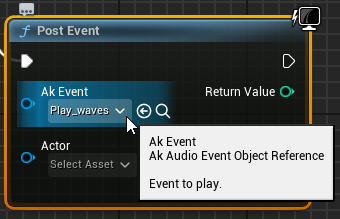
4. In "Ak Event", set Play_waves.
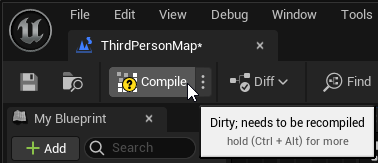
5. Compile.
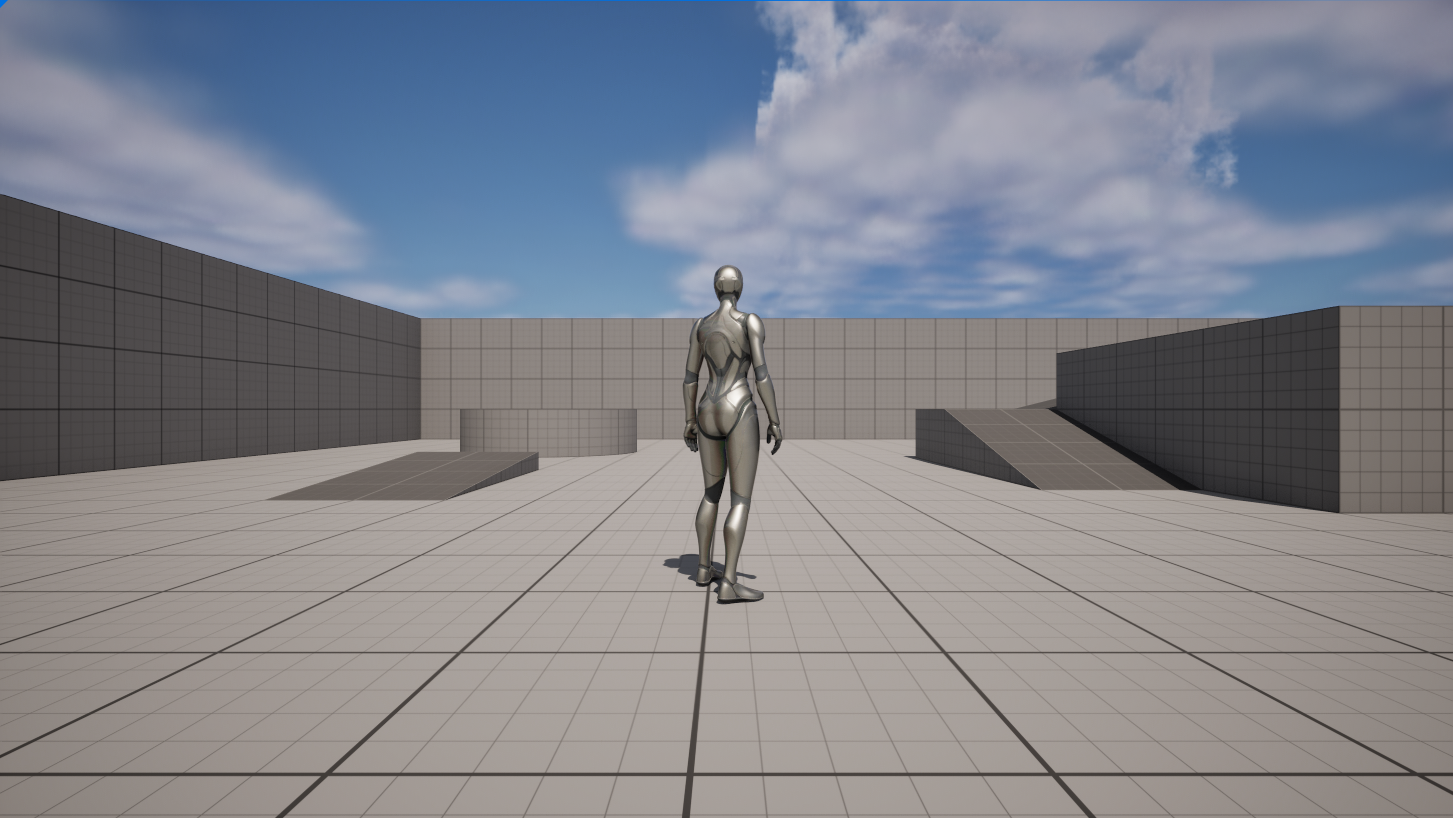
6. Without changing anything else, click the Play button.

7. Now you should hear the sound of waves!
Final thoughts
I have followed the steps in this article myself to make sure they work. However, some of the steps or screenshots may change with future version upgrades, so if you notice any behaviors that are different from what I described here, please let me know in the Comments section.
If there are any other features you would like to read about, please post them in the Comments as well.
Appendix - Sample folder configuration
Putting everything inside the Unreal project
You can include the "Generated SoundBanks" folder in the Wwise project, and place the whole Wwise project inside the Unreal project.
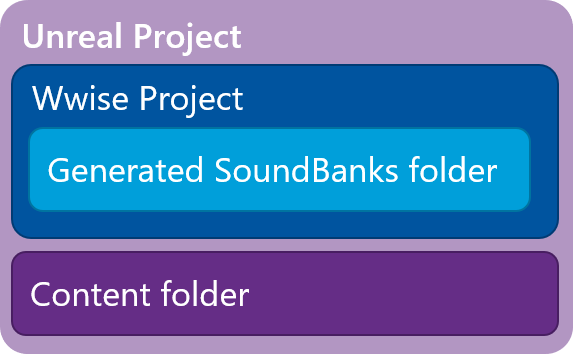
• Pro: Everything is complete in one folder/repository.
• Con: People who are not sound designers also need to download the Wwise project (though they don't need the Wwise authoring tool).
Placing the Wwise project outside the Unreal project
You can place the "Generated SoundBanks" folder inside the Unreal project, and place the Wwise project outside the Unreal project.
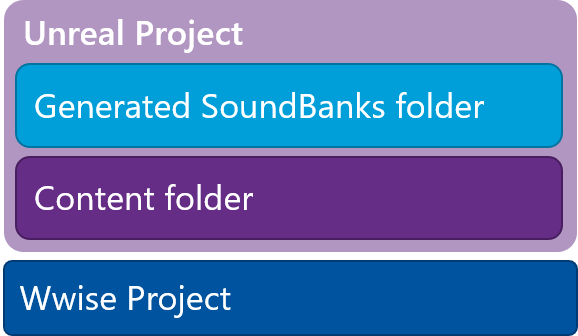
• Pro: People who are not sound designers do not need to download the Wwise project.
• Con: Everything is divided between multiple folders/repositories.
*TIP: In order for this to run on Unreal editor, the minimum required configuration amounts to just the files directly under "Generated SoundBanks", and the Windows folder.
Appendix - How to create UAssets
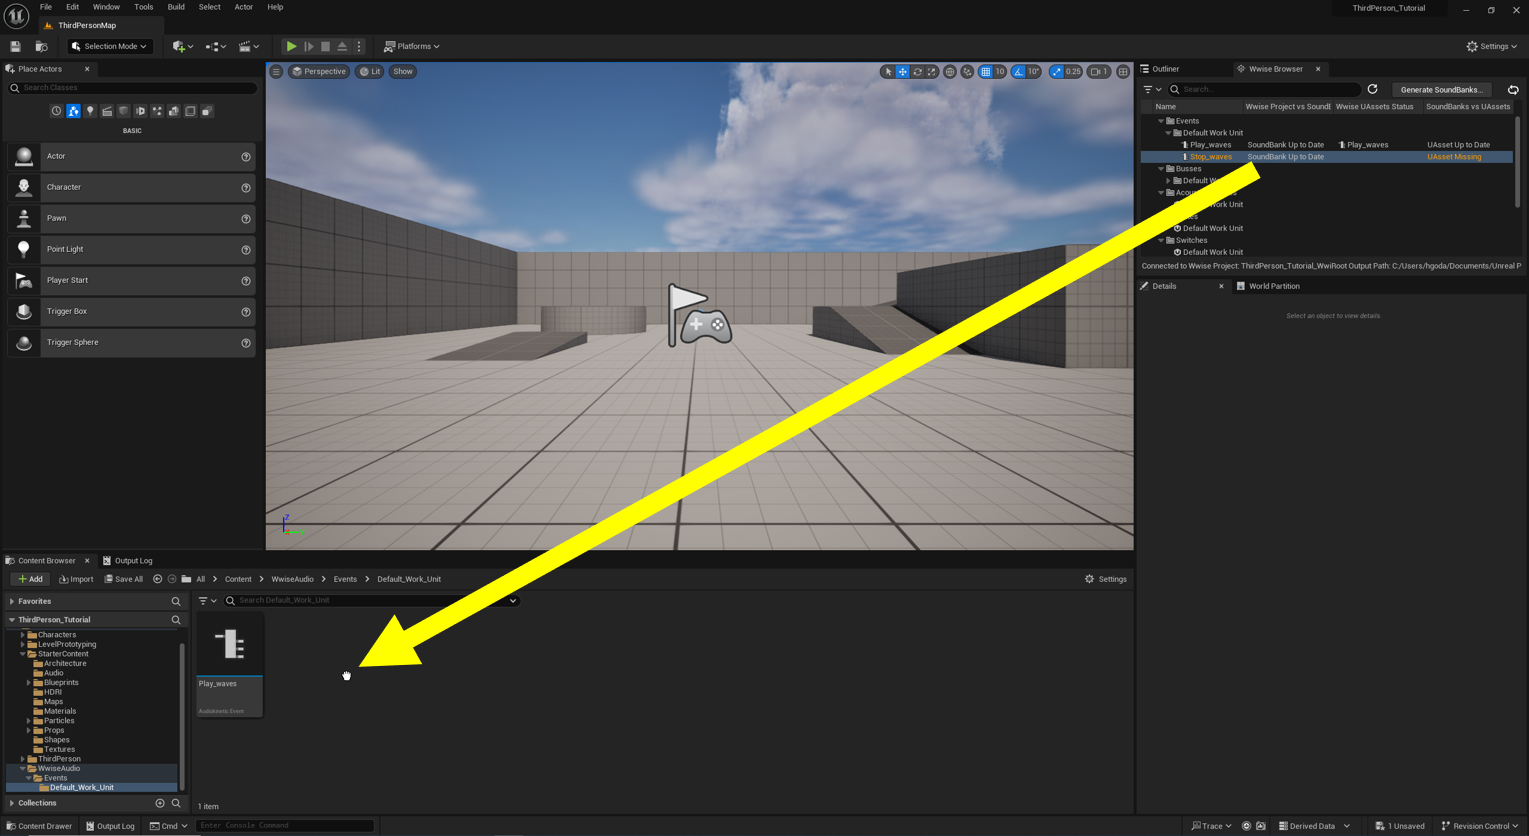
A) In Wwise Browser, drag & drop an Event to the content browser.
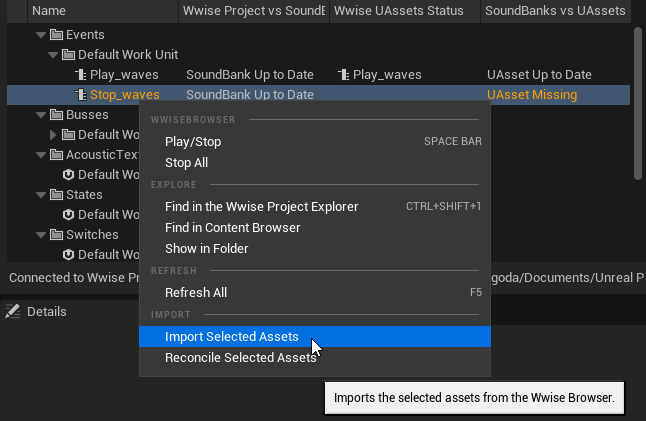
B) Right-click, and select "Import Selected Assets" from the menu.
• You can specify multiple Events or folders.
C) You can also create UAssets by dragging & dropping Events from the Wwise Browser to the actor property, or to the targeted Blueprint component.

D) Only in case of Events, you can drag & drop them from the Wwise Browser to the viewport to generate UAssets at the same time as AkComponents.
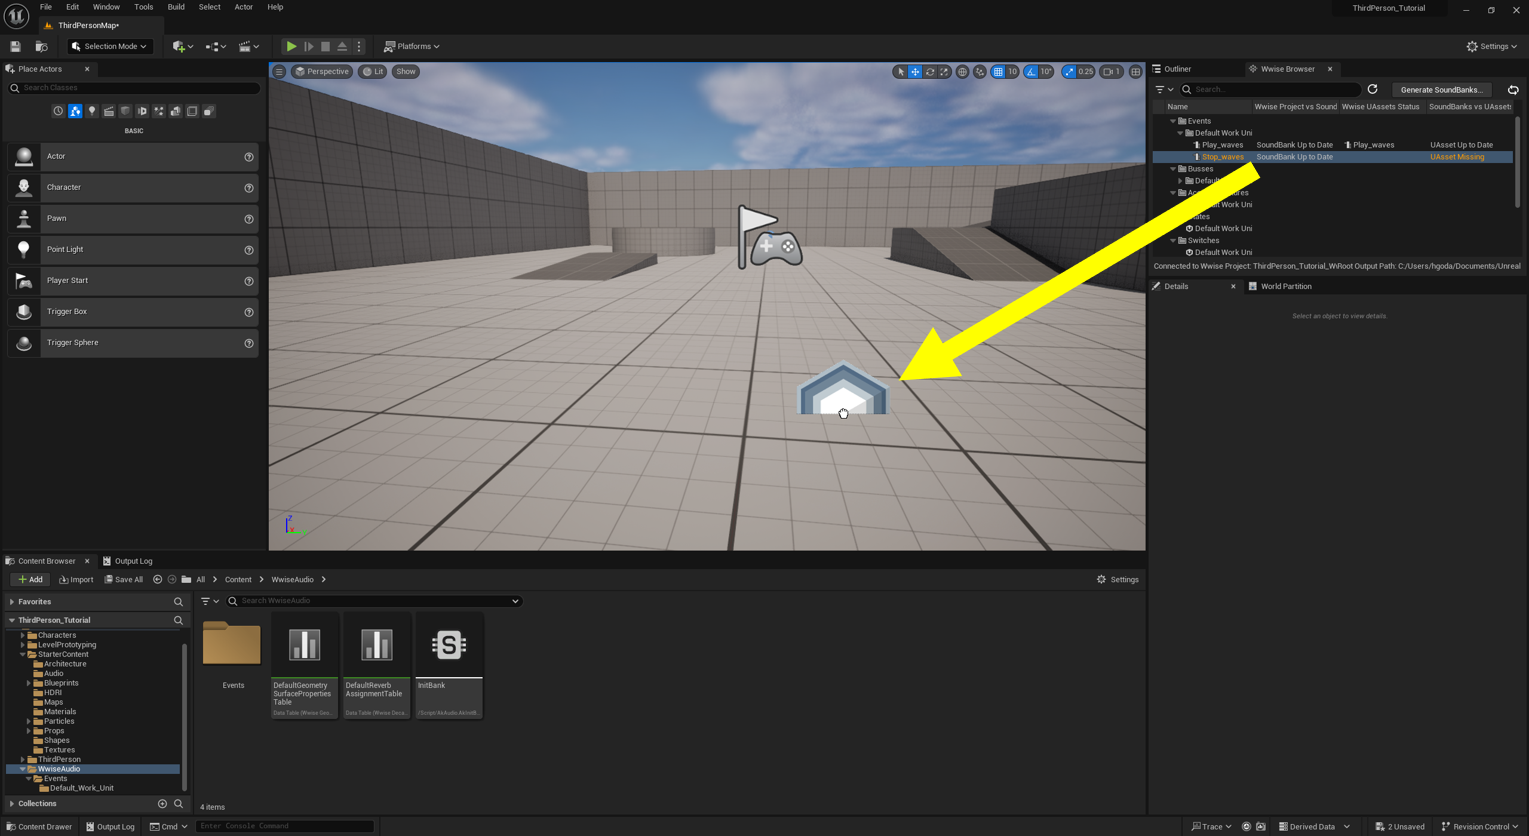
When you carry out steps C or D, UAssets will be generated in the location specified in Edit - Project Setting – Wwise – Integration Settings – Asset Creation – Default Asset Creation Path:

Appendix – Quick ways to play sounds
Play sounds using AkAmbientSound
1. Place an AkAmbientSound actor.

2. Set the event you want to play on the AkEvent.

3. Enable "Auto Post".

4. Set "Obstruction Occlusion - Refresh Interval" to 0.0.

Play sounds using Blueprint
1. Select "Open Level Blueprint".
2. Create a BeginPlay event.
3. Create a Post Event node from BeginPlay.
4. Set the event you want to play on the Post Event's AkEvent.
Play sounds using C++
You can post events using the UAkAudioEvent method, defined in AkAudioEvent.h.
1. You can post an Event to the specified Actor/Component/GameObject.
- AkPlayingID UakAudioEvent::PostOnActor()
- AkPlayingID UakAudioEvent::PostOnActorAndWait()
- AkPlayingID UakAudioEvent::PostOnComponent()
- AkPlayingID UakAudioEvent::PostOnComponentAndWait()
- AkPlayingID UakAudioEvent::PostOnGameObject()
- AkPlayingID UakAudioEvent::PostOnGameObjectAndWait()
- AkPlayingID UakAudioEvent::PostOnGameObjectID()
2. You can use a dummy GameObject.
- AkPlayingID UakAudioEvent::PostAtLocation ()
- AkPlayingID UakAudioEvent::PostAmbient()
3. APIs that manage data loading:
- void UakAudioEvent::LoadData()
- void UakAudioEvent::UnloadData()
- bool UakAudioEvent::IsDataFullyLoaded()
- bool UakAudioEvent::IsLoaded()


Comments