
Dialogue is the heart of many games, carrying the story and connecting players to characters. But how often have you found crucial dialogue buried under the roar of the game's soundscape? Today, we’re diving into “surgical dialogue mixing” - a method that lets your dialogue cut cleanly through the gameplay mix, without sacrificing any parts of the soundscape that are not actually conflicting with the voice.
In other words, this system will only remove certain frequencies, and only when said frequencies are strongly present in the background ambiance.
Setting Up Your Metering System
Before diving into the surgical cuts, we need to gather some crucial information. We’ll set up a metering system to analyze:
- The strength of the voice over (VO) signal.
- The intensity of the background soundscape.
To do this, we’ll create an Ambiance_Pre bus in our Master-Mixer Hierarchy. This bus will provide an unaltered signal, essential for accurate metering. If we were to use Ambiance bus for both metering and modifying, it would create a logical loop - which we want to avoid.
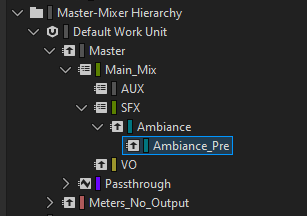
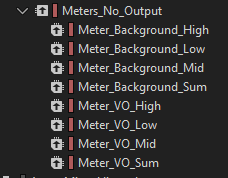
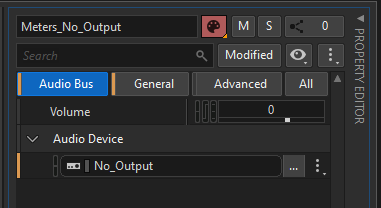
We’re going to create a separate structure exclusively for metering. And as we do not want any signal from it to be audible, Audio Device has to be set to “No_Output”.
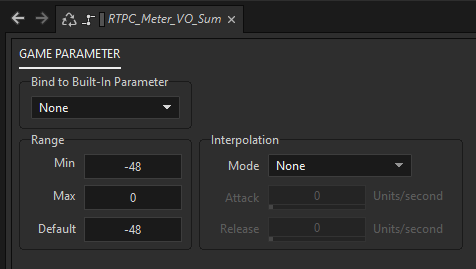
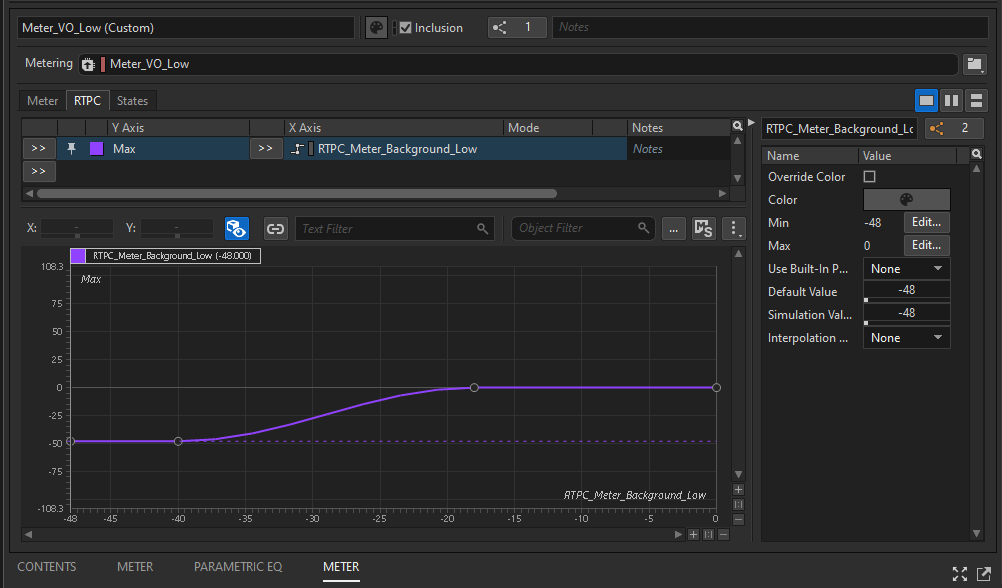
Now it’s time to add meter effects to our buses. The dynamics settings will influence the output signal, which we’ll then want to transform into an RTPC.
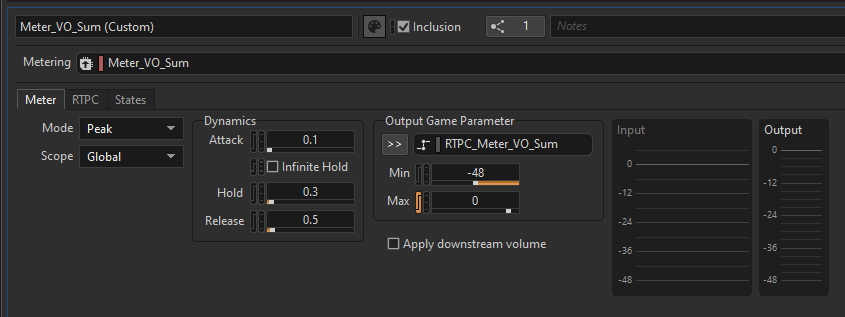
Let’s set a range of -48 to 0 for that RTPC, so it correlates with the actual dB values from the meter.
Controlling Separate Frequencies
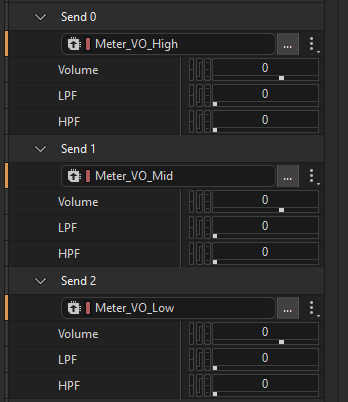
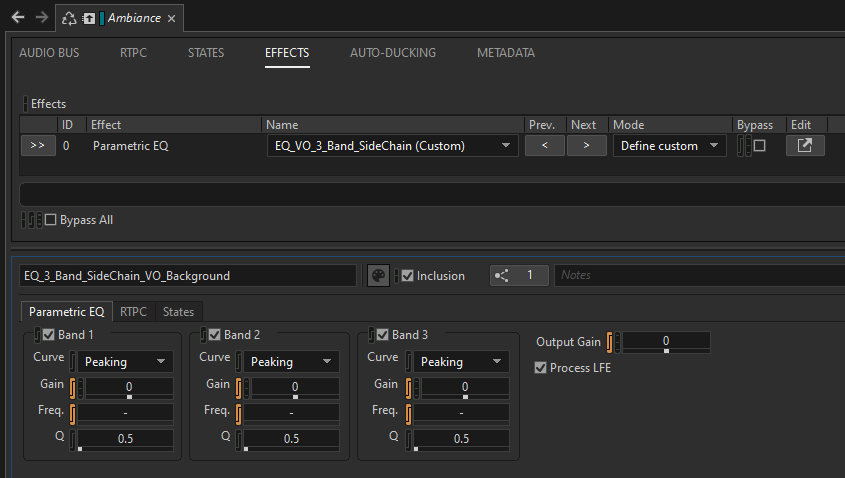
To make this system more precise, we split our signal from the Meter_VO_Sum bus into three bands, each assigned to the low, mid and high frequencies most critical for our voice over. Meter_VO_Sum sends look like this:
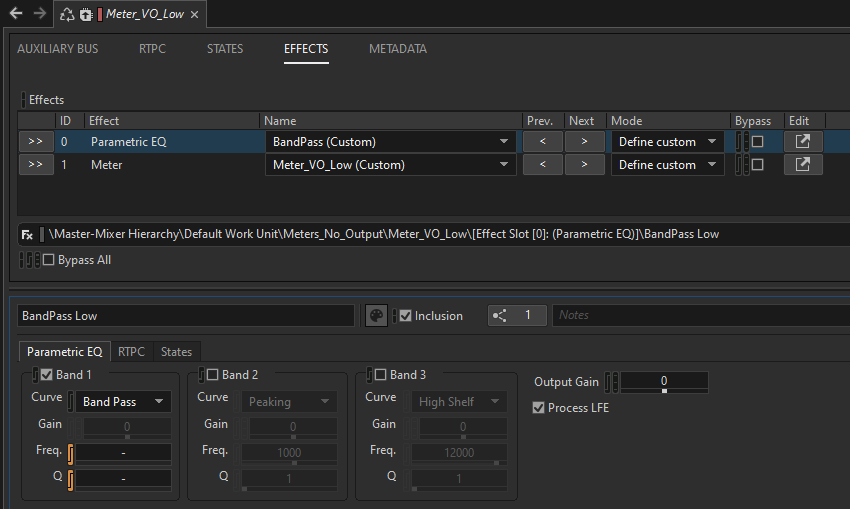
Similarly to our main metering bus, we’ll add a metering effect and an EQ before it. The EQ’s purpose is to isolate the band we want, so we set it to bandpass.
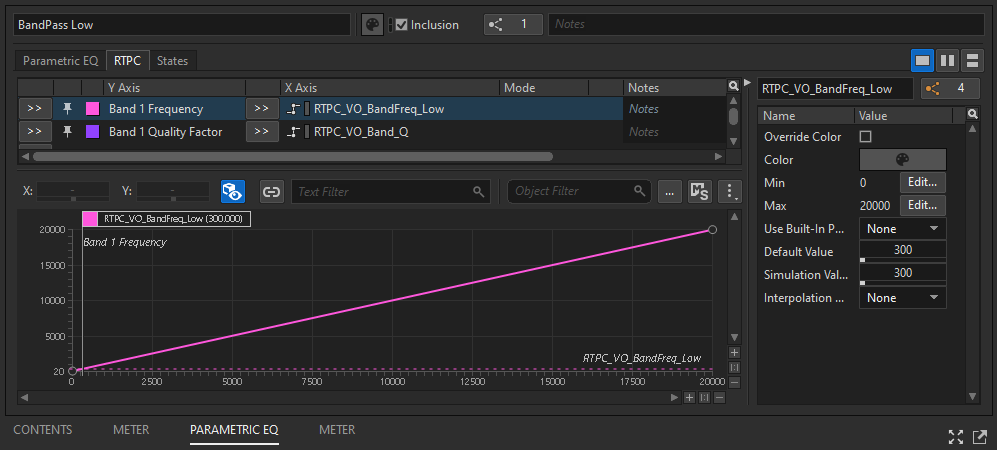
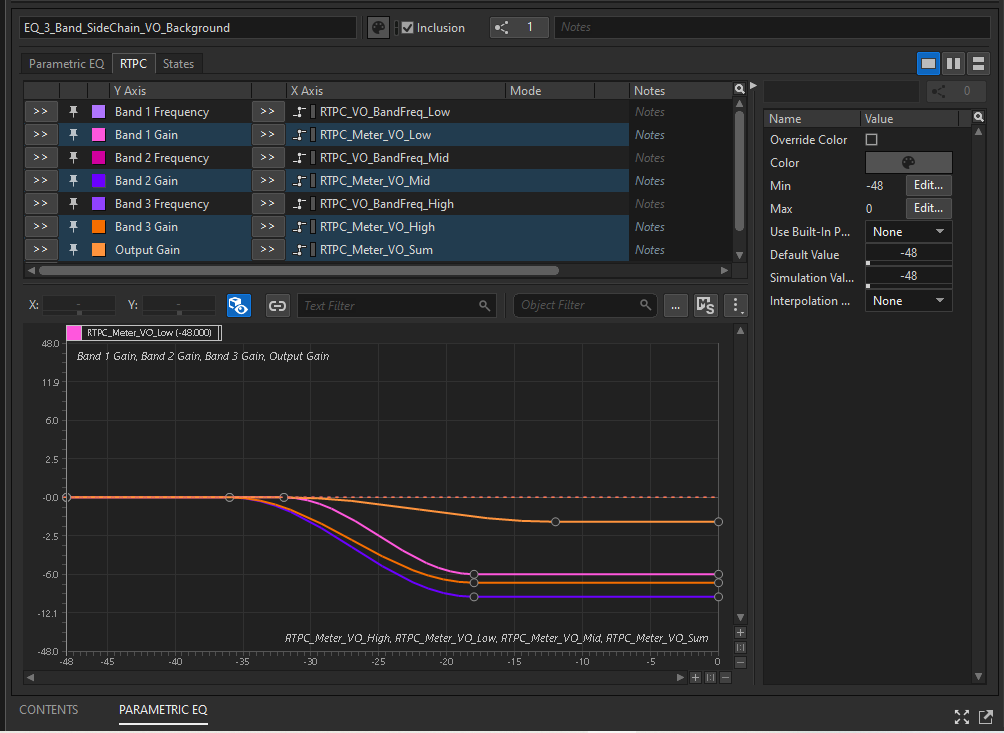
Tip: To avoid the necessity of changing band frequency values in multiple places in our project, we can tie it to a common RTPC for a more convenient control. Furthermore, we can later modify those values on the fly depending on which character is speaking.
VO Metering Dependent on Ambiance Content
Next, we’ll take into consideration the sonic characteristics of the ambiance into our metering. To do that, we’ll assign the RTPC of a certain ambiance signal (let’s say, lows) to the max output parameter of a VO meter of the same frequency. The lower the amount of low frequencies in the background, the lower max output of the VO meter. That way, metering will work properly only if there’s a conflict (both VO and ambiance are rich in certain frequencies) and will not produce an influential output signal if there’s only a subtle ambiance playing.
VO Signal Influencing Ambience
Now that we have our metered VO signal behaving exactly how we want it to across all three frequencies, it's time to set up its influence on ambiance.
Important: This has to be done on a parent of a bus (in our case, called “Ambiance”) that sends a signal to metering. That way, we’re avoiding a signal loop.
We’ll add an EQ effect with the same three frequency bands we established earlier. RTPCs tied to our VO meters will now affect the gain of each band.
Beyond Dialogue
While we’ve focused on VO ducking ambiance in a precise, controlled way, the logic behind this setup can be used on any other combination. Think explosions driving low pass for combat sounds, gunshots slicing thru monster roars - you name it. Go be creative!
Want to see this process in action? Check out the video tutorial that inspired this blog post here.

Comments