Among the new spatial audio features introduced with Wwise 2017.1, the Wwise Reflect plug-in helps users feel the space they are in by hearing real-time computed reflections of sounds bouncing off walls and objects placed in the game. Let's take a first-person game as an example. When your character emits a sound, the sound should reflect from the walls of the room that you are in. These reflections will be different depending on the shape of the room and the position of the listener. Being far away from a wall will have a delayed reflection compared to being near it. This behavior can be simulated with the new Wwise Reflect plug-in. In this blog post, we will guide you through the steps you need to take to get an immersive acoustic rendering with Wwise Reflect using the Unreal integration and the Wwise Audio Lab (WAL). Coming soon, WAL is a first person perspective Unreal game that let's you play and experiment with our features.
Wwise Project
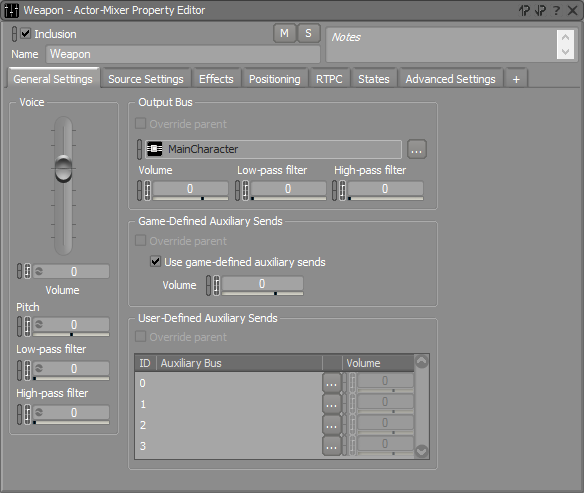
In the Wwise project, we need to configure the sound effect that will be reflected from the geometry. In WAL, the first-person character carries a ball launcher. All of its sounds are in the Weapon Actor-Mixer shown in the image below. The Reflect plug-in is meant to be inserted on an Auxiliary Bus. For the weapon's sounds to be routed to the aux bus with Reflect applied, we need to enable Use game-defined auxiliary sends in the General Settings of the Property Editor.
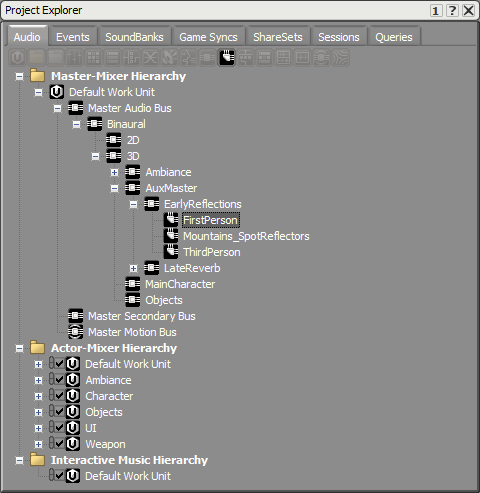
Then, we need to add an aux bus with the Reflect plug-in. In our example, the aux bus is called FirstPerson, as displayed in the image below.
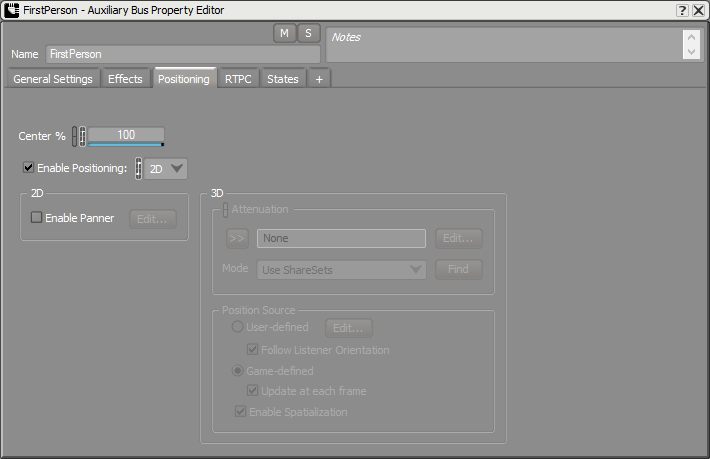
This aux bus needs to have Enable Positioning checked with the 2D option. Reflect already takes care of the positioning in 3D; we don't want Wwise to position it again on top of that.
WAL
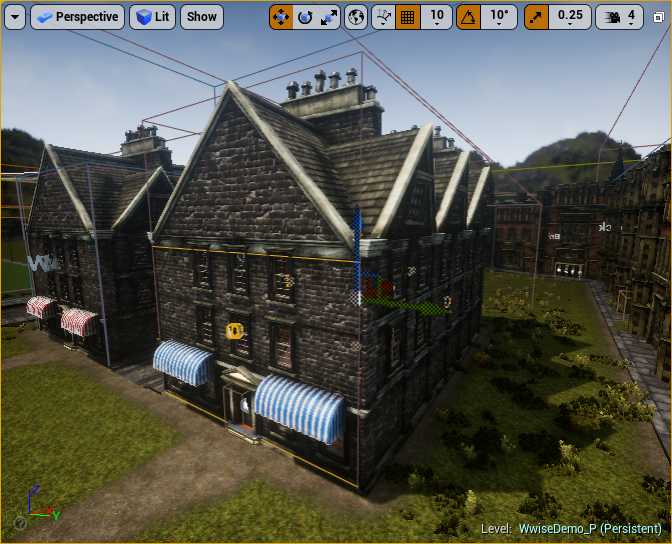
In the game, we need to specify the walls of the room where sound will be reflected. In the Unreal integration, the Surface Reflector component is used for this purpose. For your convenience, the Unreal integration also comes with the AkSpatialAudioVolume, which has this component attached; you need to have at least Enable Surface Reflectors checked. In WAL, we're going to place one of these volumes on a building called the mezzanine, depicted in the next image.
The mezzanine building can be easily represented with a cubic volume. Each reflective surface is numbered, as we can see more clearly in the image below. There is no surface reflector volume for the mezzanine itself yet; we will come back to it at the end of this blog.
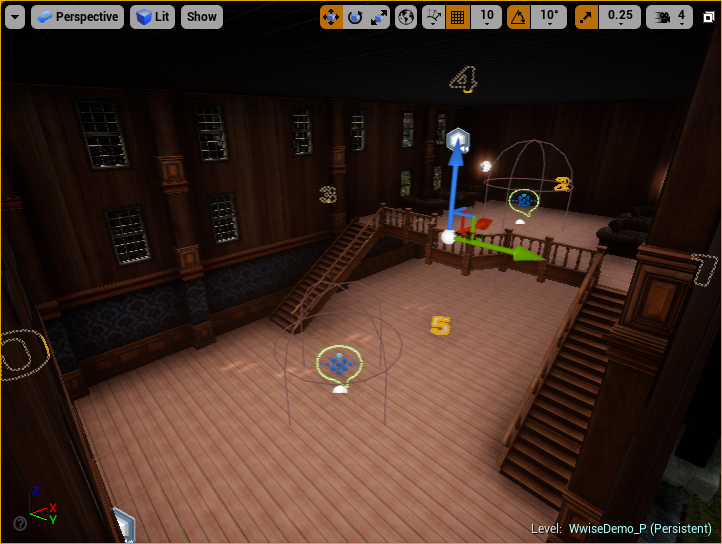
In the Acoustic Surfaces section of the component, you can apply a different Acoustic Texture to each surface. Acoustic Textures are frequency-dependent absorption properties that are modeled using filters and gains. For example, reflections in a metal room won't sound the same as in a wooden room. For the time being, you can leave the Acoustic Texture at None until you are satisfied with the sound design of your early reflection. A None texture will completely reflect all frequencies of the emitted sound; no filter will be applied.
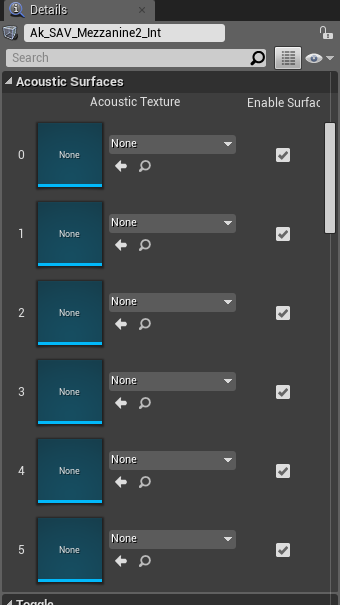
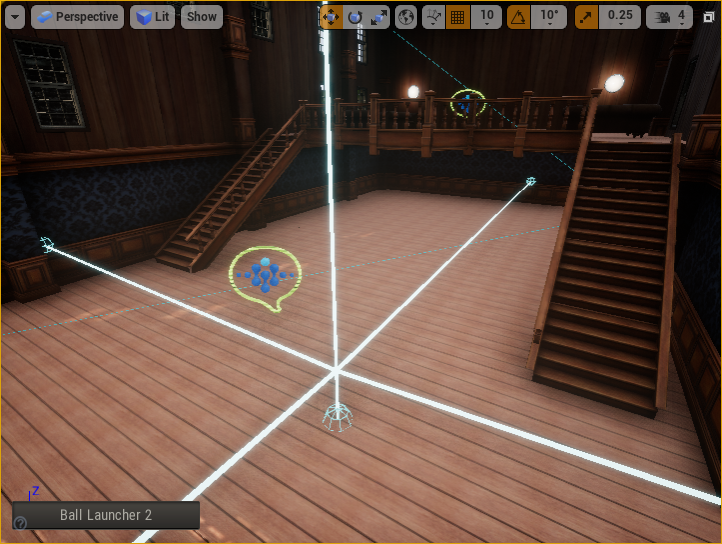
To configure the weapon to use the Reflect plug-in, we need to change the options of the AkComponent attached to the first-person character. In the component's details, under Spatial Audio, we need to add the FirstPerson aux bus to Early Reflection Aux Bus. You can also change the maximum reflection order computed by the algorithm with these properties. A second-order reflection, for example, refers to a sound having bounced on two reflective surfaces. An interesting feature of the component is the Debug Draw options. Enabling one of them will let you see rays going from the component to the non-obstructed reflective surfaces on which the sound is going to be reflected. The surfaces touched by rays will also have their name show up on screen. This can really help when mixing for Reflect; it can help you see which triangles are being sent to the plug-in. More about this in the next section, where we'll present the Reflect Plug-in Editor.
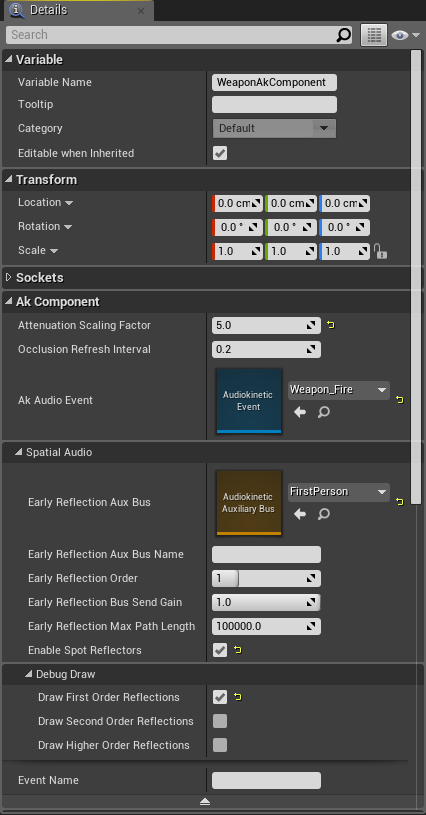
In the following images, you can see first-order reflections drawn for the weapon component in the mezzanine. One image when playing, the other when viewing the player from a third-person perspective.
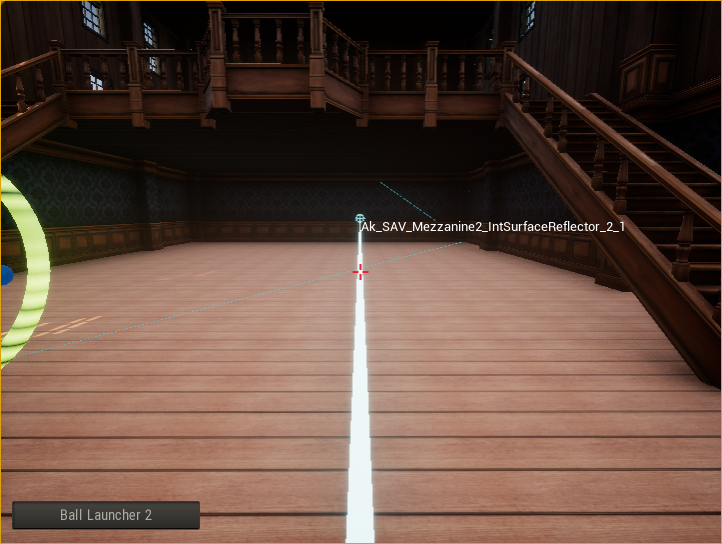
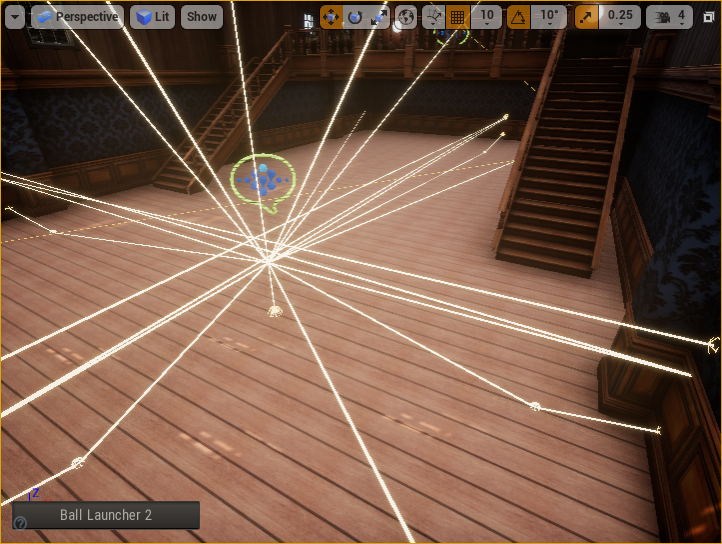
Below is an example of the reflections we would get with second-order reflections.
Wwise Reflect
At this point, we can connect the game to Wwise and start the mixing. Use the Profiler layout's Voices Graph to find the FirstPerson Auxiliary Bus. If the sound you make is too short, you may need to go back in time by moving the cursor in the Performance Monitor. In the mezzanine, the WAL's graph looks something like the picture below.

We will explain this graph in more detail in a future blog but, for now, we want to double-click the FirstPerson Auxiliary Bus, which is marked as using the Wwise Reflect Effect. This will open the Auxiliary Bus Editor and let you open the Reflect Effect Editor. We can now play with the parameters of the plug-in to get a satisfying mix for our early reflections.
As you can see in the image below, reflections in Wwise Reflect are described as image sources. An image source represents an image of the emitter positioned at equal distance behind a reflective surface; as if the surface is a mirror. A direct path between the image source and the listener crosses the wall at the exact place where the sound would have bounced. The distance of this path is also equal to the distance the sound would have travelled when bouncing off the wall before reaching the listener. The curious reader can find more information on Wwise Reflect's use of image sources in the Wwise Reflect documentation and the Wwise SDK documentation.
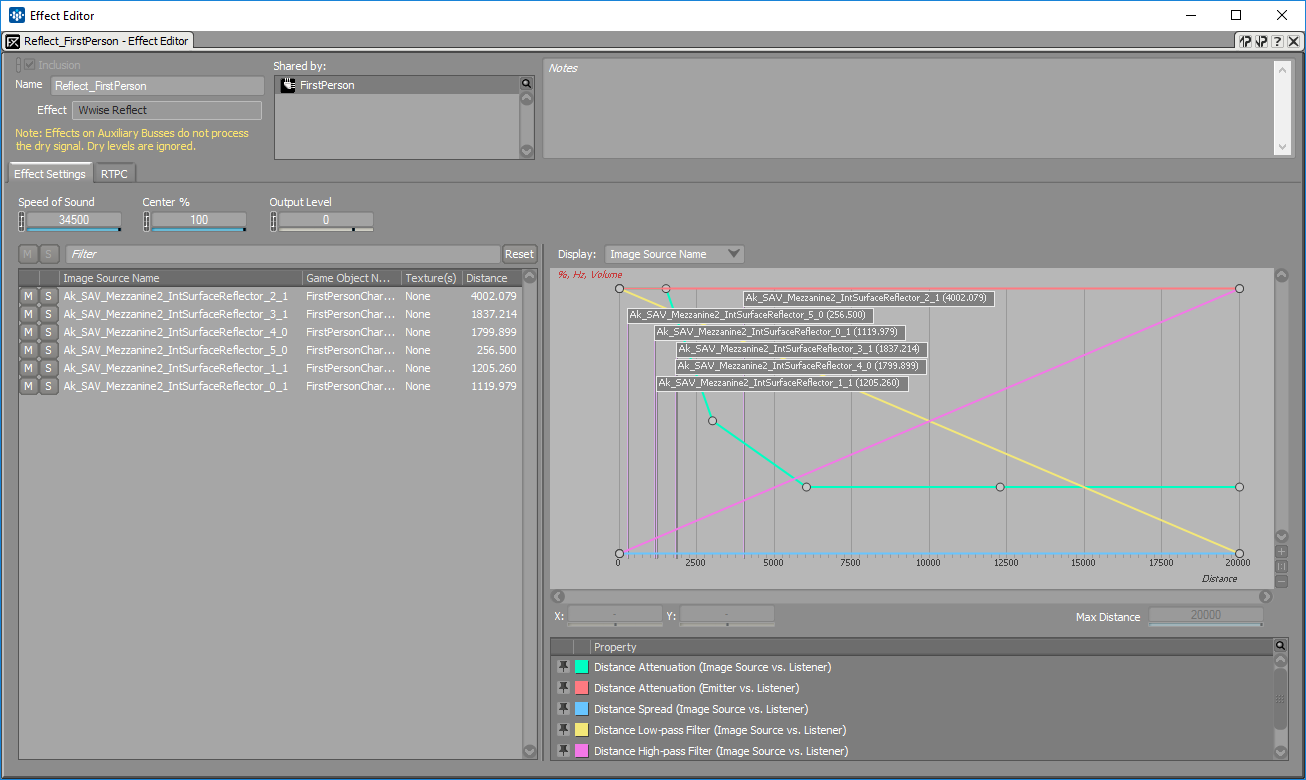
When making a sound from the weapon while being connected to the game and following capture time, you will see reflections appear in the Wwise Reflect Effect Editor's list as well as flags on the curve graph; this means that these reflections are currently making a sound. The different columns in the list show the reflection's name, the name of the game object that emitted the sound being reflected, the texture(s) with which the emitted sound is filtered, and the total distance travelled by the sound before reaching the listener. As you can see in the image above, the name of a reflection is a concatenation of the name of the AkSpatialAudioVolume, the surface's number, and the surface's triangle number. For debugging purposes, you can also enable two other columns, the image source ID, which is unique for each reflection, and the game object ID, which can differentiate two game objects that could have the same name.
Mixing the reflections is done by changing the curves on the graph. As sound travels in space, it loses energy throughout the audio spectrum and we can model it with the Distance Attenuation (Image Source vs. Listener) curve. In our first-person example, this curve will change the volume of the reflection depending on the distance the character has with a wall of the mezzanine. In the Effect Editor's image above, the curve was changed to lower the volume of reflections when the character moves away from a wall. To model air absorption, you can tweak the Distance Low-pass Filter and Distance High-pass Filter curves. For example, they can be modified to simulate a faster attenuation for high frequencies compared to low frequencies.
To help you change the curves, you can slow down the speed of sound, which is in game units per second, to differentiate the reflection sounds from the dry sound. Reflections can also be muted or soloed by clicking the buttons in the list. These mute and solo buttons only work within the scope of this Effect ShareSet. For example, if you solo one of those reflections, you will not hear any other reflections from this aux bus, but you will still hear other sounds from other busses or aux busses. It is good practice to first solo the aux bus on which the Wwise Reflect effect is inserted and then mute or solo reflections.
While soloing the Reflect aux bus, and soloing one of the room's walls, you can move around in the game and change the curve to reflect (pun intended) the kind of distance attenuation you have in mind. Having a flag indicating the reflection's distance on the curves can really help in this process.
If there are too many reflections at the same time, or when you only want to see the soloed reflection, you can use the filtering bar. You can filter by name, game object name, texture, and even IDs. On the left of the filtering, there are mute and solo reset buttons. Sometimes, the muted or soloed reflection is not active anymore, so you can use these buttons to reset everything.
What's Next?
Now that you have a satisfying mix for early reflections, you can start adding Acoustic Textures to surfaces to create multiple variations between rooms. With 2017.1, you can use Factory Presets for Acoustic Textures. They are located in ShareSets under Virtual Acoustics.
The mezzanine's walls are all made of wood. When adding a texture on the AkSpatialAudioVolume, each texture will have a different color and the name of the texture will be printed instead of the surface's number.
Here are some differences depending on the texture used in the mezzanine building.
Wood mezzanine
Anechoic mezzanine
Carpet mezzanine
None
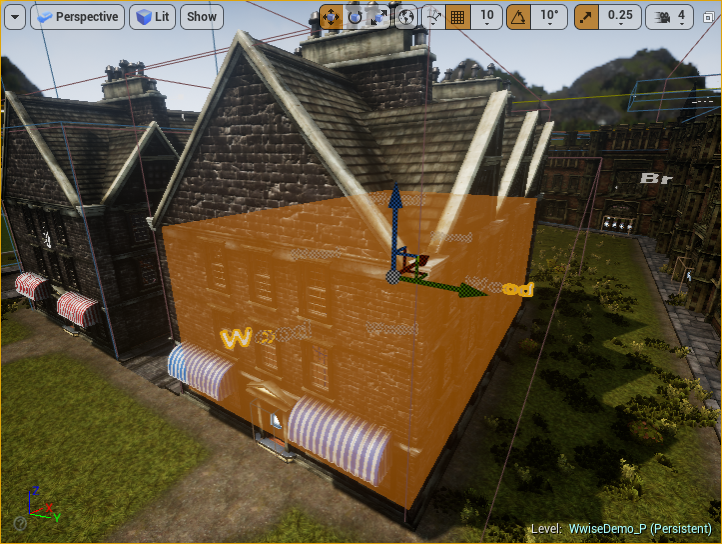
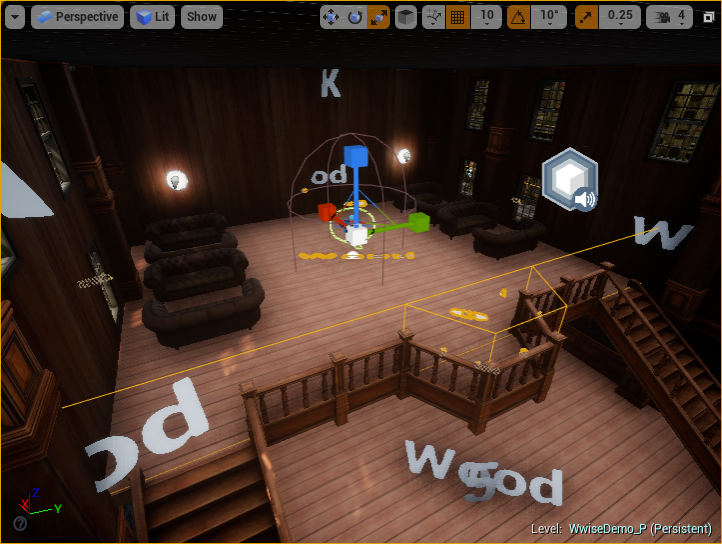
Now that we have finished mixing for one room, it is time to add more rooms and volumes to our game. In the mezzanine building, we can try to add a volume for the mezzanine floor. But, as you can see, the shape of this floor cannot be represented by a simple cube. A simple solution is to add a cubic volume for most of the floor and add a trapezoidal shape for the little balcony. Only the floor surface is enabled, so that we don't get reflections from the other surfaces. The only drawback of this solution is that the balustrade won't reflect sounds. Everything depends on the needs of your game.
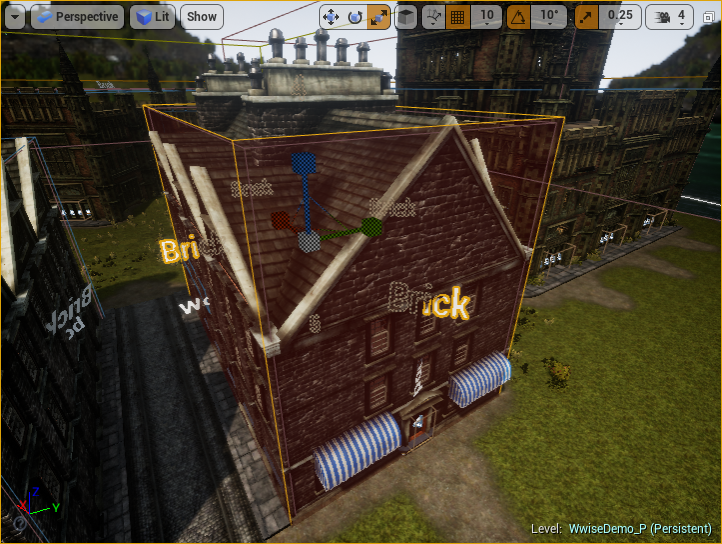
We also added a volume around the complete building with brick textures to simulate reflections on the mezzanine building when we're outside.
In a future blog, we will cover the implementation of Wwise Reflect, how it depends on 3D busses, and how it can work together with other plug-ins.
Additional Resources:



Comments
hanson huang
September 06, 2017 at 09:18 am
Have made Wwise Reflect video tutorial?
Thalie Keklikian
September 22, 2017 at 09:37 am
We are planning some video tutorials with the Wwise Audio Lab. Stay tuned!