In the first part of this two-part series, we covered how to approach mastering a game. In this part, we’ll cover how and when to use the different presets included with the Mastering Suite.
The concept of presets for mastering could be slightly misleading because no preset can adequately master your game. They can, however, be a more intuitive and convenient starting point than a full reset.
The presets discussed in this article are intended to be exactly that: a starting point on the way to your final configuration. They were created on the occasion of PS5 compatibility with Dolby Atmos and are available in Wwise 2023.1.1.
The presets were created using a number of different titles and are aimed at different audio settings in your game. You will inevitably need to fine-tune each parameter, but hopefully, you won’t have to reconfigure each module to reach your objective.
The presets are optimized to process a raw mix that would be hitting an integrated loudness of -24 LUFS without mastering, which should then still hit around -24 LUFS(±2) after the processing.
This is an important consideration for all nonlinear processes such as compression and limiting. If your mix is quieter or louder than -24 LUFS, you will need to adjust for this.
| Note: Some Mastering Suite presets that were updated in Wwise 2022.1.10 and 2023.1.1 have incorrect or unbalanced Master Volume gains for the LFE, SL, and HFL channels. To correctly follow this article, please set things up on Wwise 2022.1.11/2023.1.2 and later versions. |
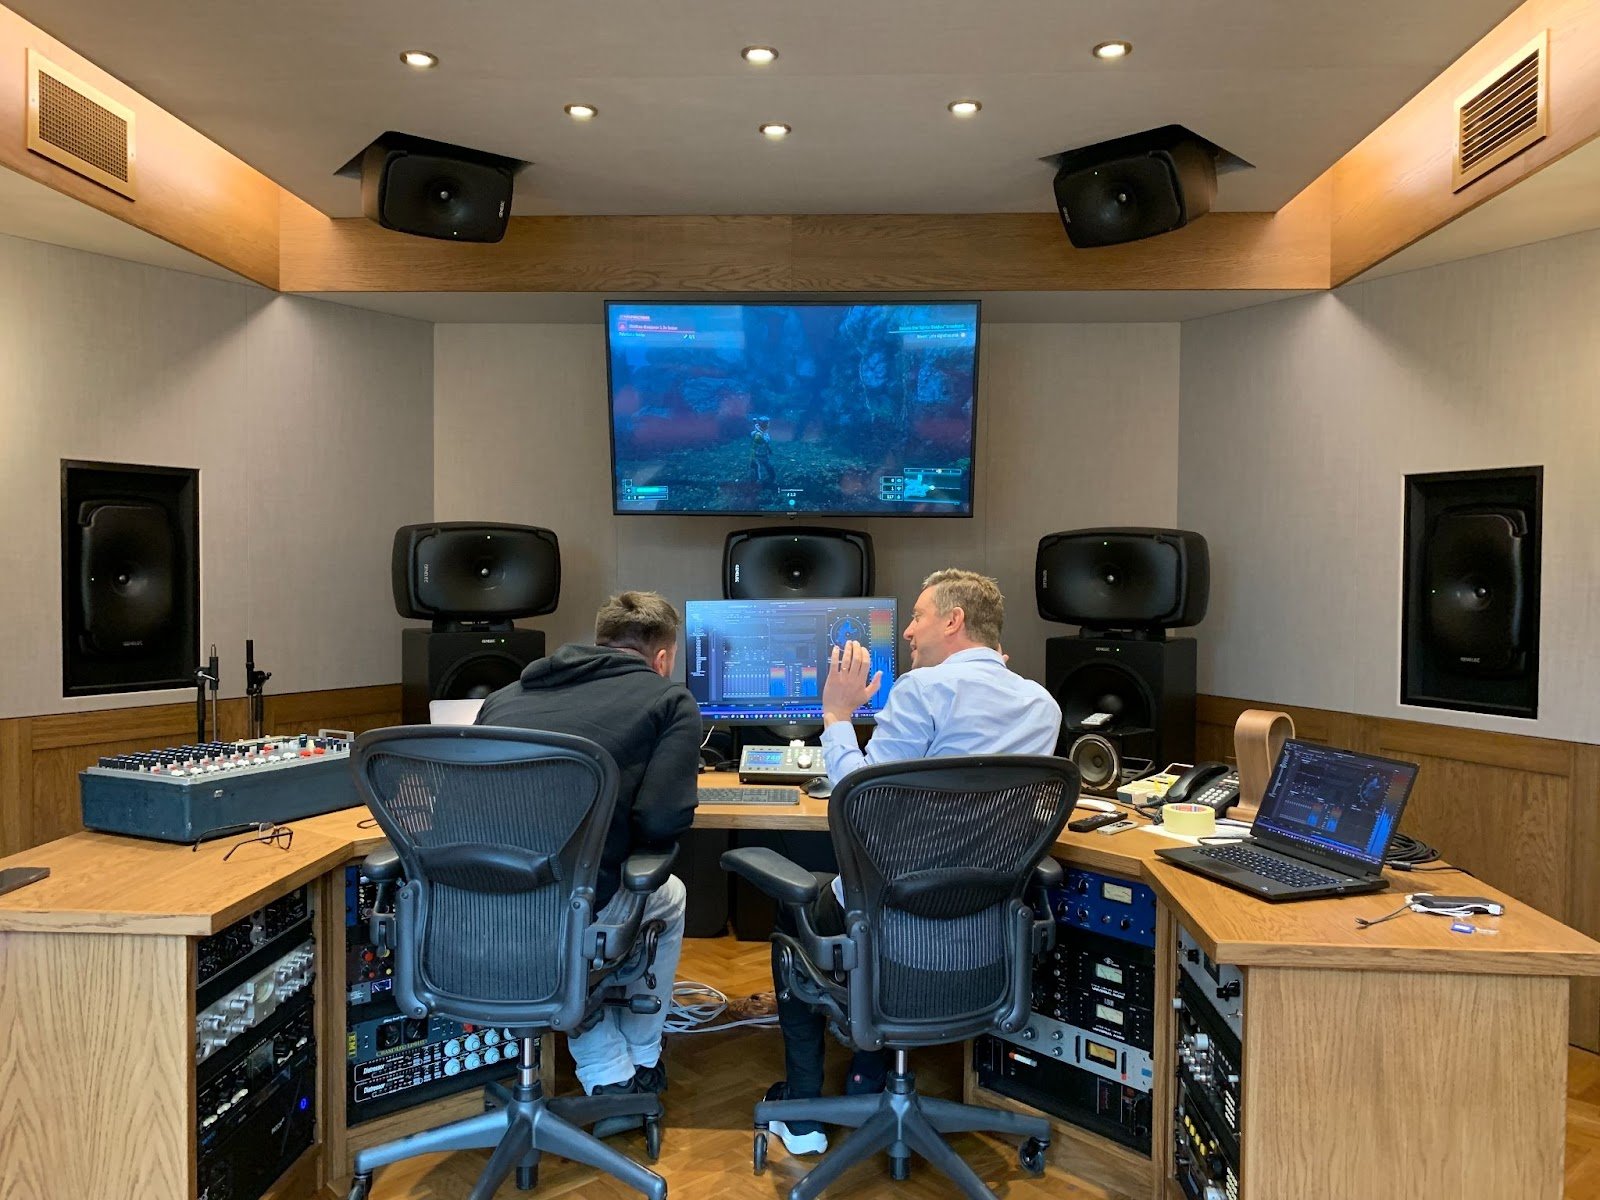
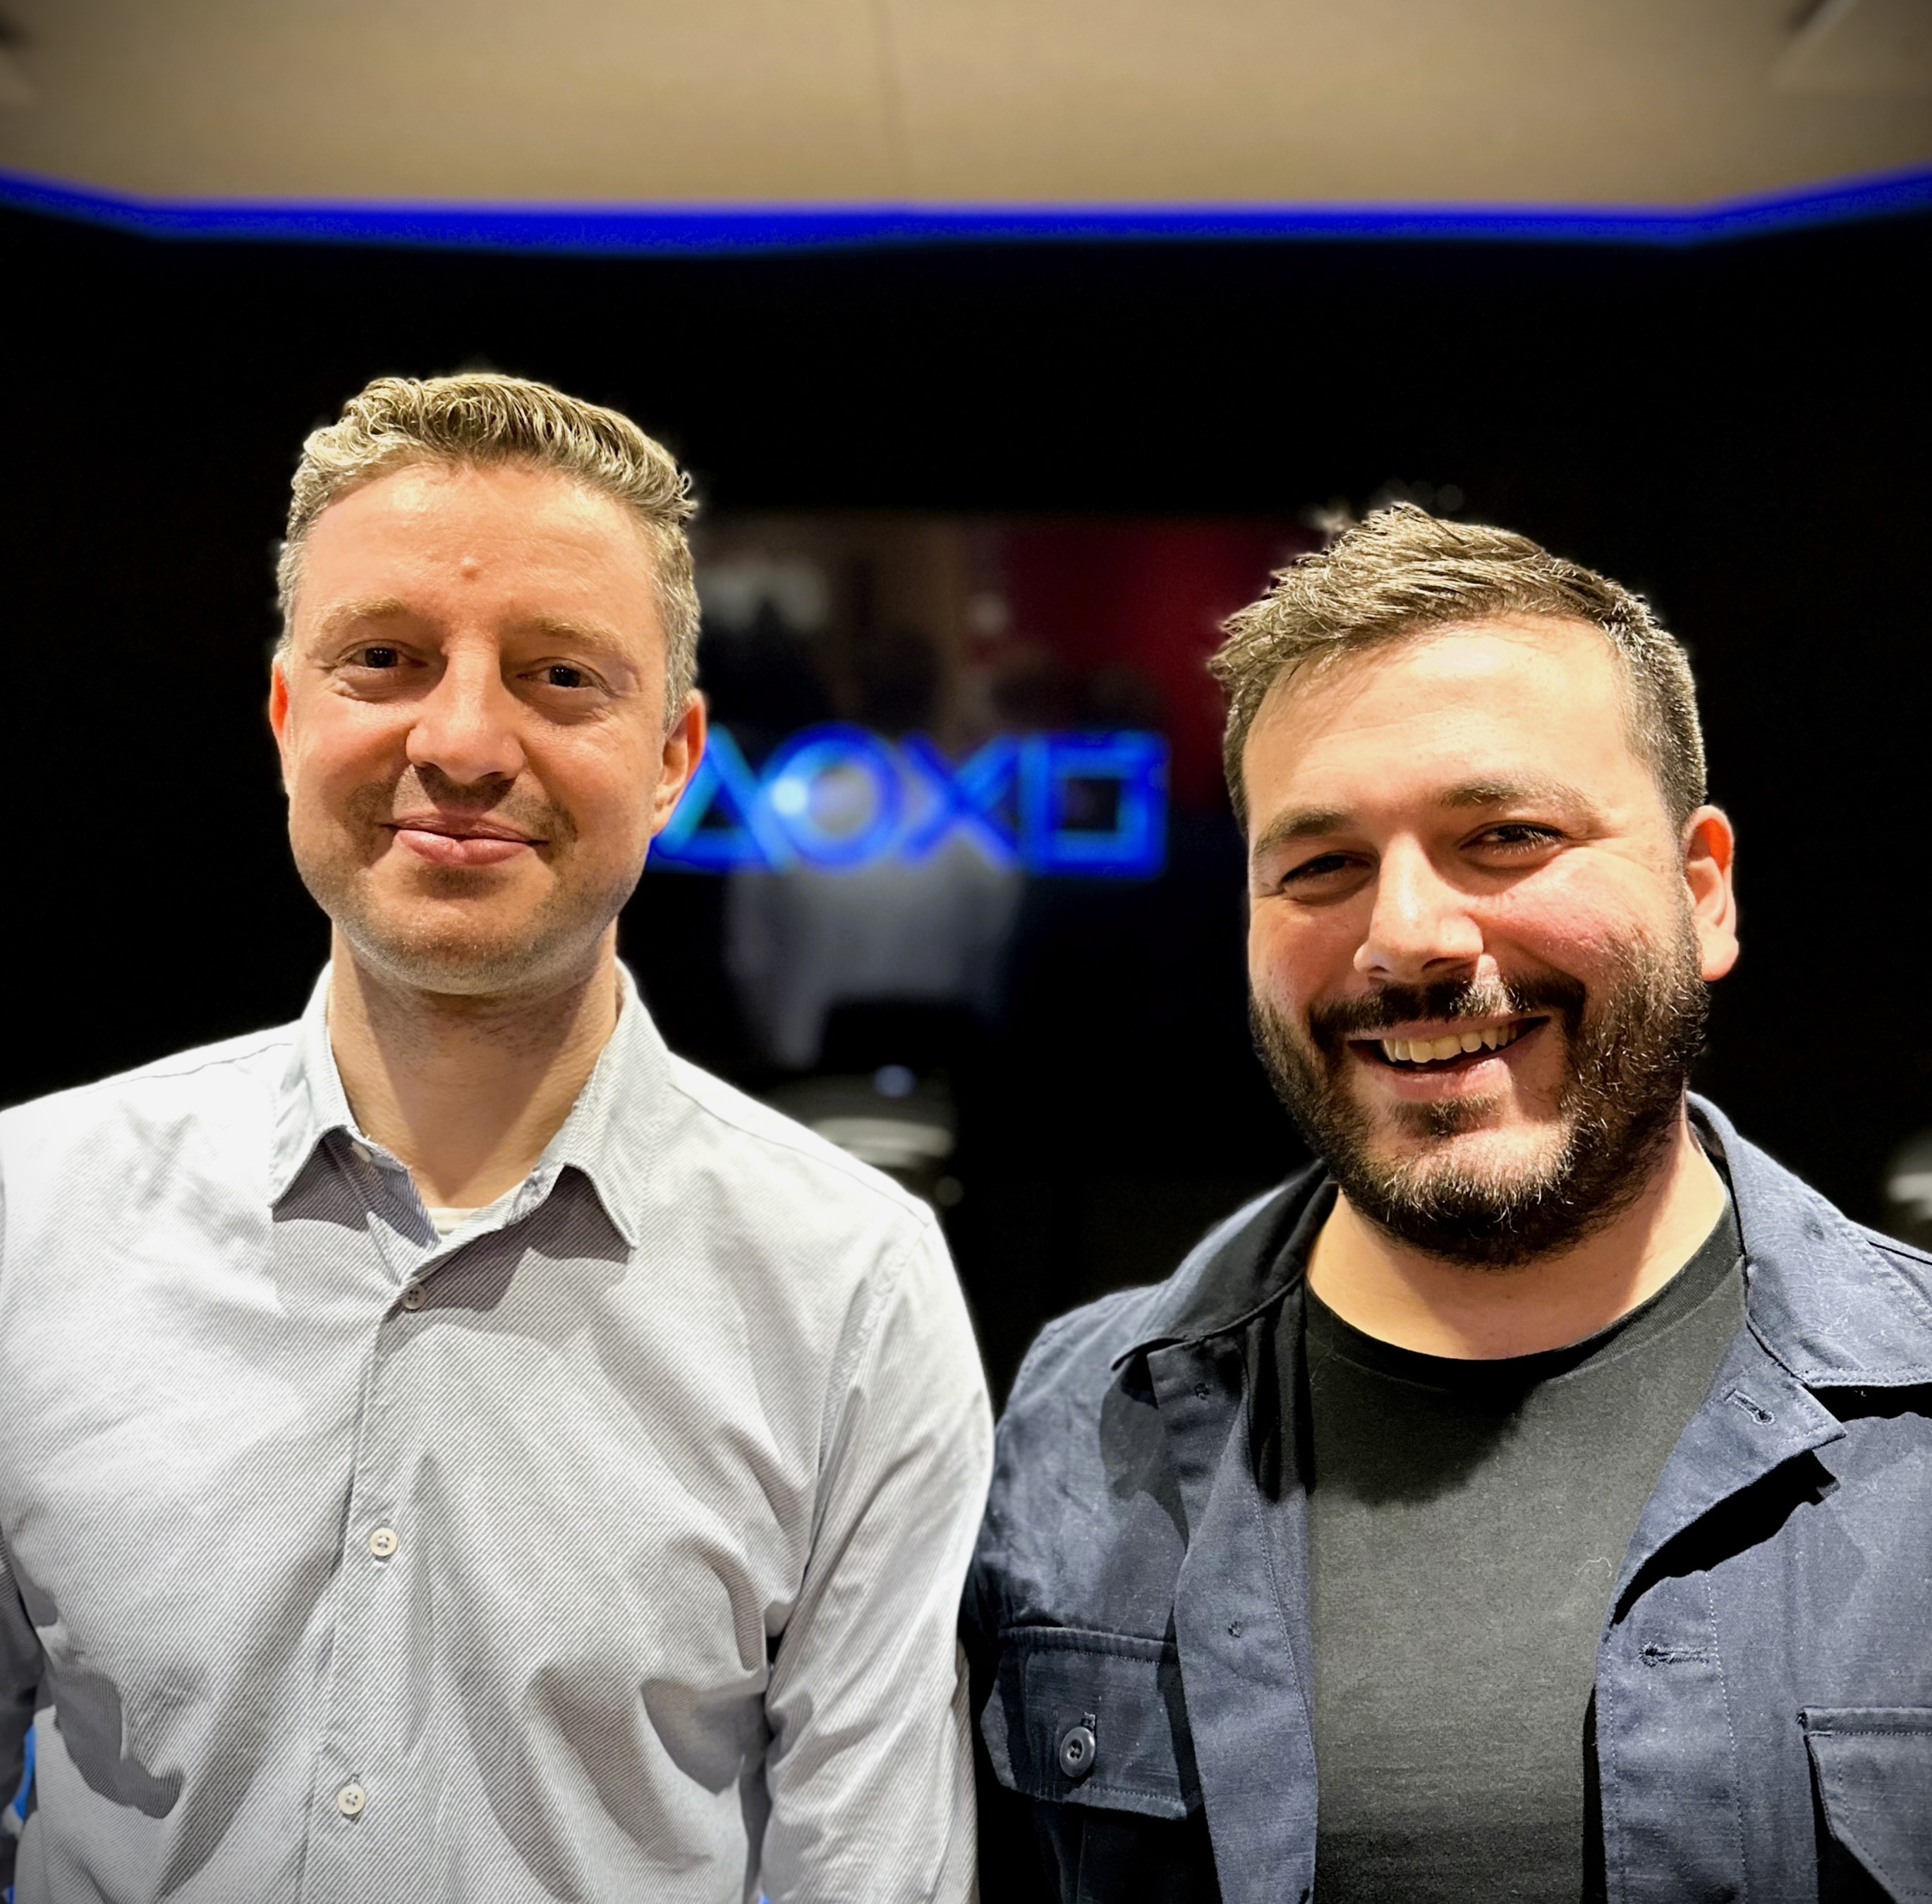
Danjeli and Loïc adjusting mastering presets in the studio. Photo by Alexei Smith.
1 - Home Cinema
ShareSet: HomeCinema
The home cinema preset only applies a safety limiting, as suggested in part one of this series.
It uses the Advanced Limiter algorithm, which is intended to be the most effective, modern, and transparent-sounding mode. The other modes are Hard mode which is a hard clipper and tends to saturate; Soft mode which is a basic limiter that tends to pump and sounds less transparent.
The higher quality of the Advanced Limiter comes at the cost of a small lookahead latency of 2.6 ms at 48 KHz.
It is not a full True Peak limiter as this would come at the cost of a greater, non-negligible latency. This means that you might want to consider bringing the threshold lower than your True Peak Maximum.
The gain module is active but with no offset applied. Other modules are bypassed but preconfigured with the settings of the "HomeCinemaHeightBoost" preset, explained below.
2 - Home Cinema Boost
ShareSet: HomeCinemaHeightBoost
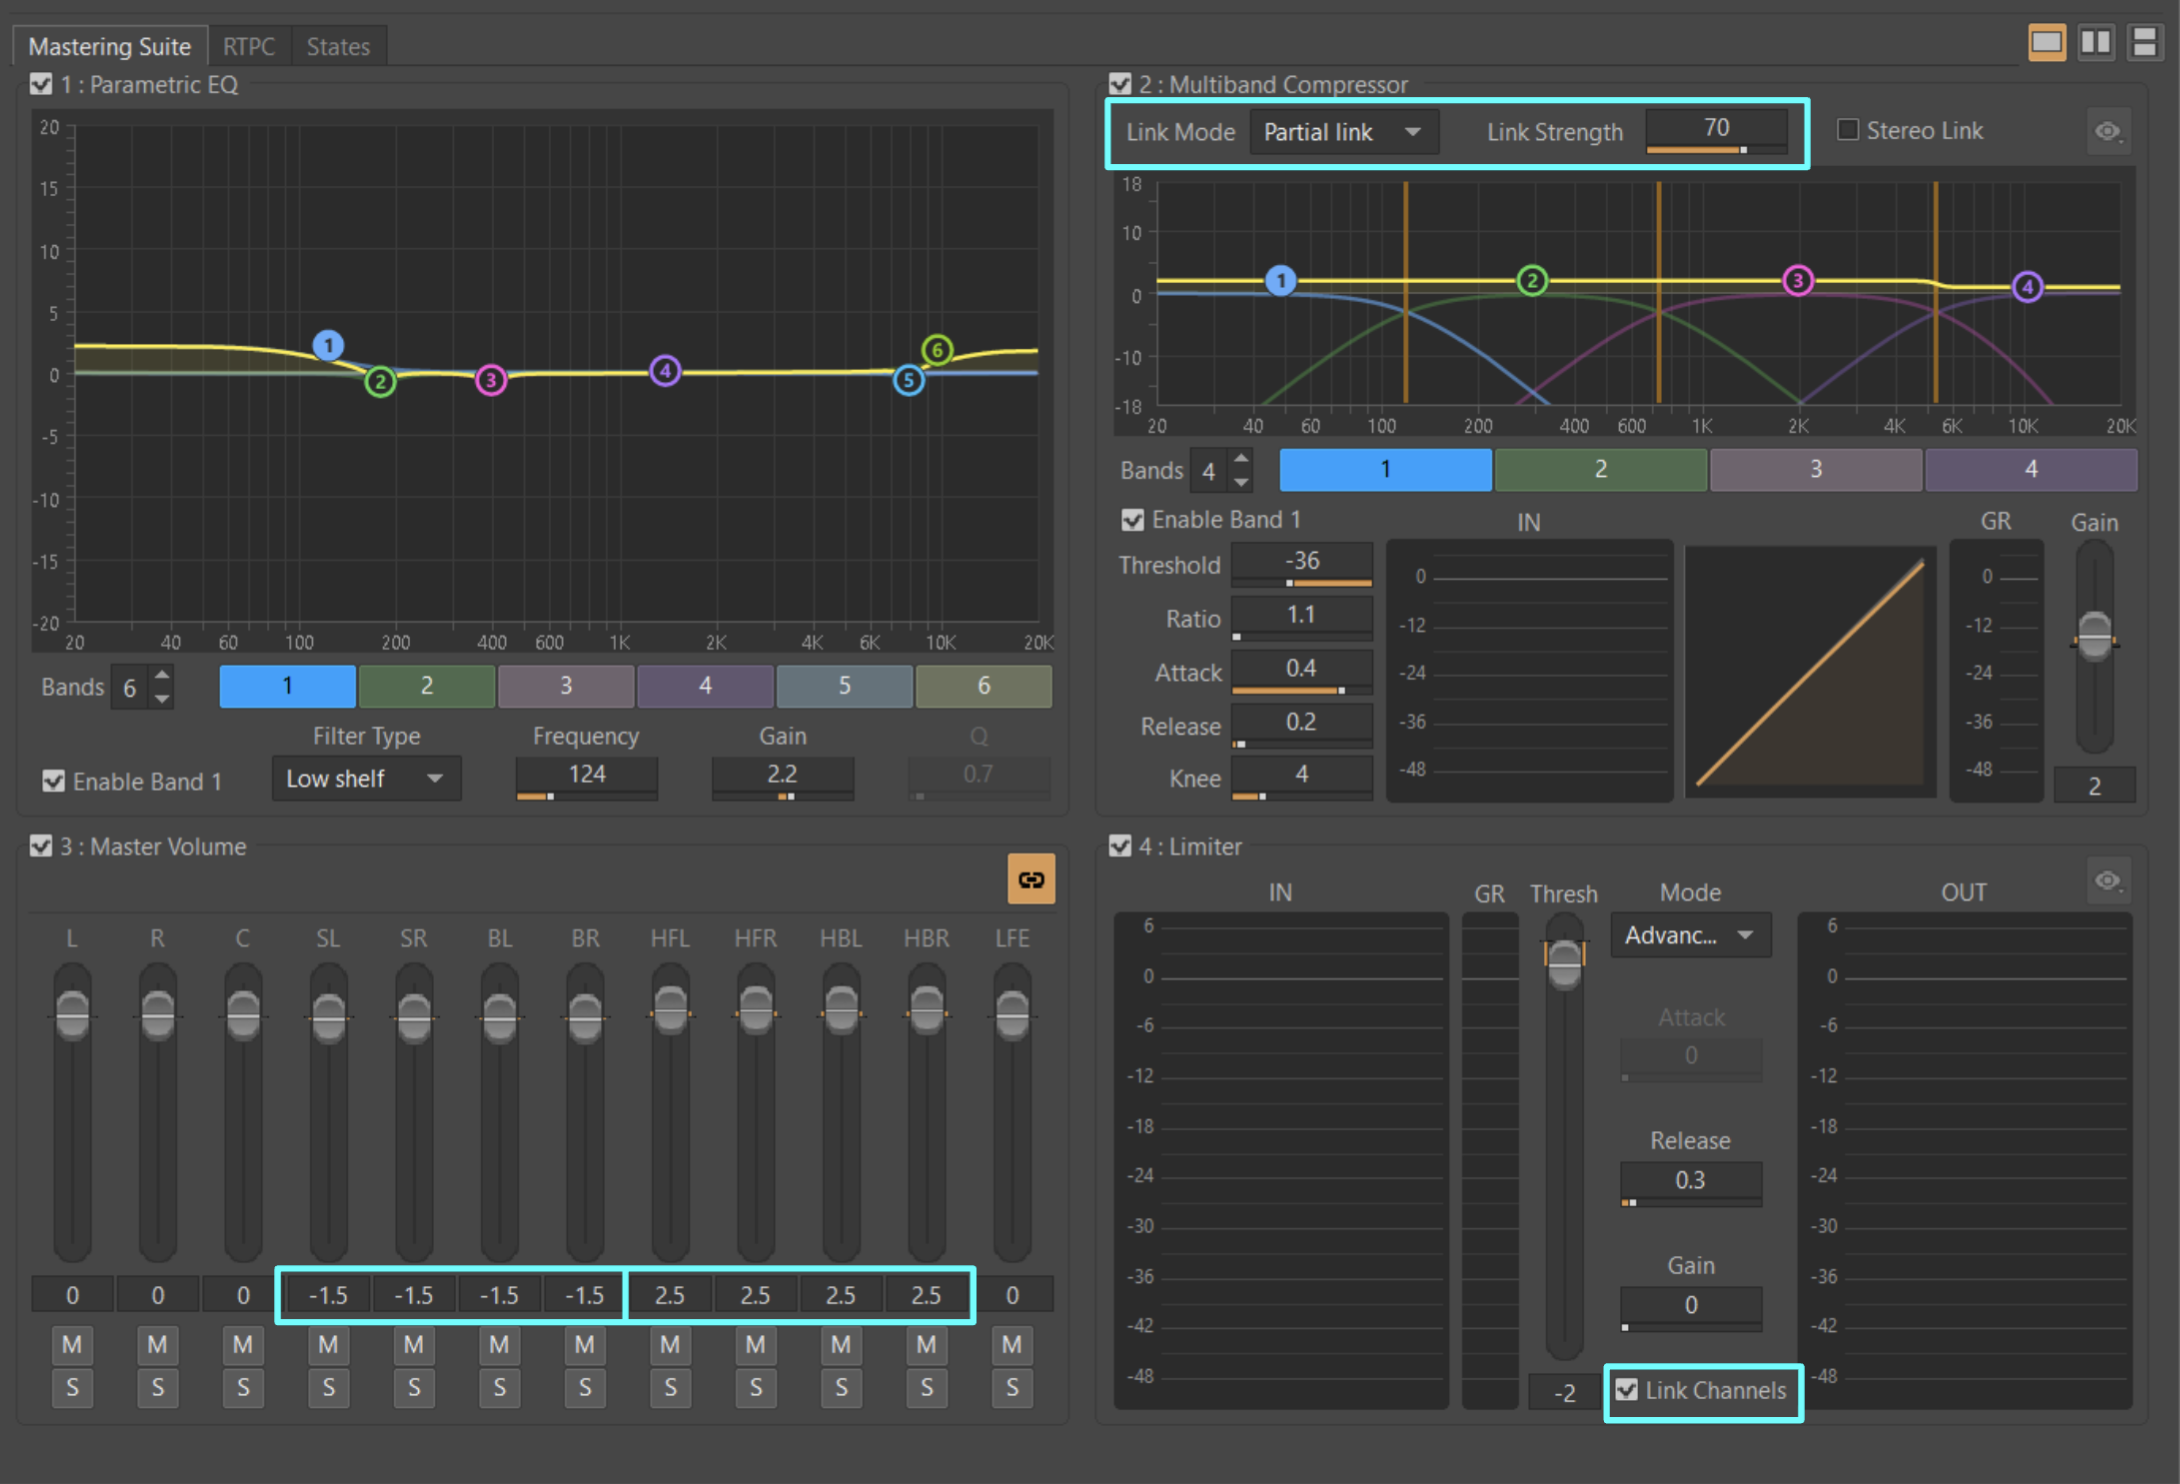
With this preset, all modules are set to a configuration that should be a good starting point for surround and Atmos applications. It applies slightly exaggerated processing that might sound flattering and colored (hence the word “boost” in its name).
The reasons for this exaggeration are:
- It should be immediately audible for you to react and be able to dial it down.
- It can be useful for new users to have the parameters set in a way that points them in the right direction.
- These settings have a high statistical chance of flattering a balanced mix. The preset makes it easy to check if these work at all for your mix; it could be an easy win.
If these settings are of any benefit to your sound, it would be a good indication of what works.
If they are a detriment to your sound, it should be quick to zero out the gains without having to reconfigure each module.
Intention
This preset suggests a combination of steps you are likely to consider for game mastering in surround and Atmos, and it is compatible with other output formats.
EQ
Configured for general-purpose mastering with flattering hifi curve gains.
All 6 bands are active and set so they are easy to adjust:
1 - Low shelf - Adjust if the lows are too light or heavy.
2 - Low control - Adjust to reduce boominess or bring weight.
3 - Low mids control - Adjust to reduce muddiness or bring thickness.
4 - Midrange presence - Reduce if it sounds too "nasal" or boost if slightly empty-sounding.
5 - High mids control - Reduce harshness or bring definition.
6 - High shelf - Adjust if the tops are too dull or bright.
Note: The shelf gains are almost certainly set too high and you will probably want to reduce the gain on them.
Compressor
Configured for light multiband pleasant “density effect”, which should be an interesting starting point for experimenting with compression.
It uses the Partial link mode, effective at protecting the intelligibility of the action in surround/Atmos as explained in part 1.
Note: The thresholds and ratios are set very low. You might also want to consider high thresholds with slightly higher ratios. The low threshold/ratio approach can be interesting to bring color and density to an overall mix, while high thresholds only affect the loudest moments, which is potentially more transparent. Explore the various approaches!
Gain
Applies the side/rear surround attenuation and ceiling speakers boost suggested in part 1. Adjust to your needs.
Note: The ceiling speakers are likely too generously boosted, but on some titles, it creates a nice enveloping effect. It’s easy to spot any excess and turn it down.
Limiter
Set to safety limiting settings in Advanced mode.
3 - Night Mode and Night Mode Strong
ShareSets: NightMode and NightModeStrong
Definition
The Night Mode presets are intended for players listening over speakers at very low volume to avoid disturbing family or neighbors, typically at night time. Because video game audio is very dynamic, this mode requires extreme amounts of compression so that the quiet moments are still clear and audible at low volume, and loud moments are never too loud. By definition, this mode is over-compressed and has no chance of sounding transparent or high-fidelity compared to the original mix. It can, however, be quite fun and experimental.
The presets
There are two Night Mode presets: Night Mode and Night Mode Strong. They rely on a relatively slow attack on the compressors and use the limiter as a way to catch peaks and transients, rather than using a fast attack on the compressors, which would trigger stronger pumping effects.
The Night Mode Strong preset was added to provide an even stronger "brute force" compression for highly dynamic titles requiring even quieter moments to be fully audible and even louder ones to remain controlled.
As mentioned earlier, these presets expect a -24 LUFS integrated loudness input and will deliver a -24LUFS (+/- 2 LU) mix so the experience is consistent with the rest of the PlayStation ecosystem. Make sure that this is the case, as this might change depending on your game.
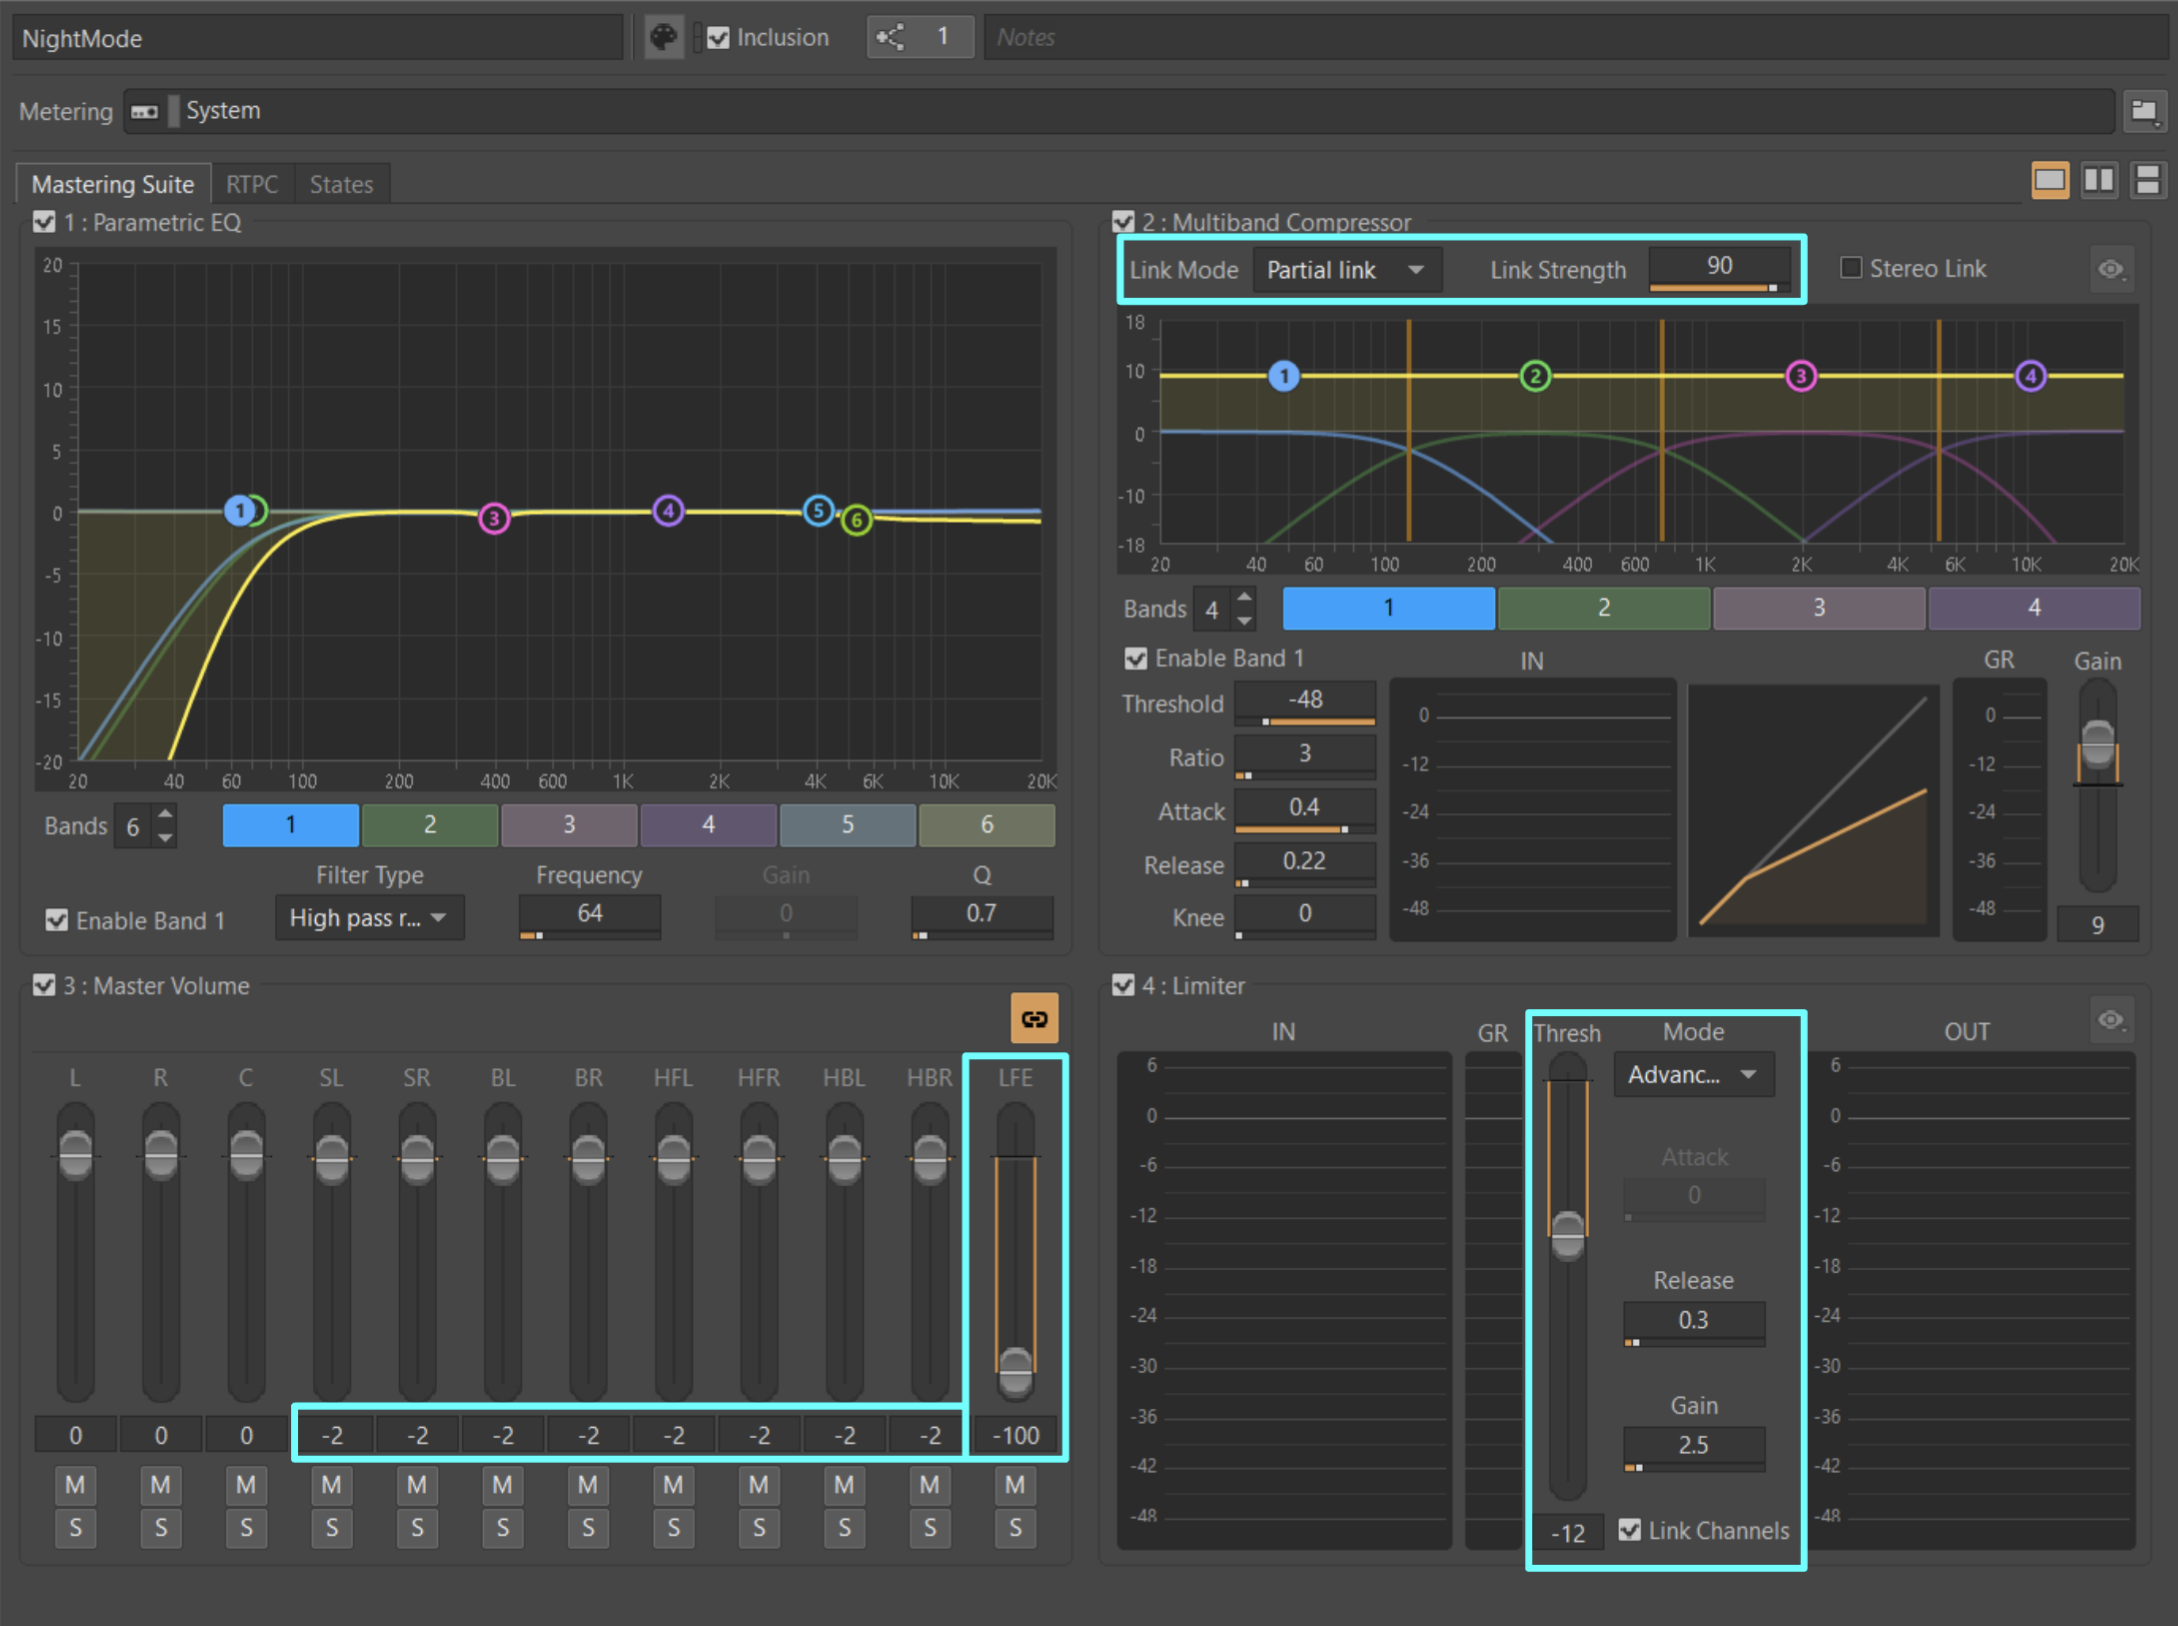
Night Mode: Reducing low frequencies, in the EQ and the Master Volume, a Partial link on the compressor and a limiter acting at a relatively low threshold.
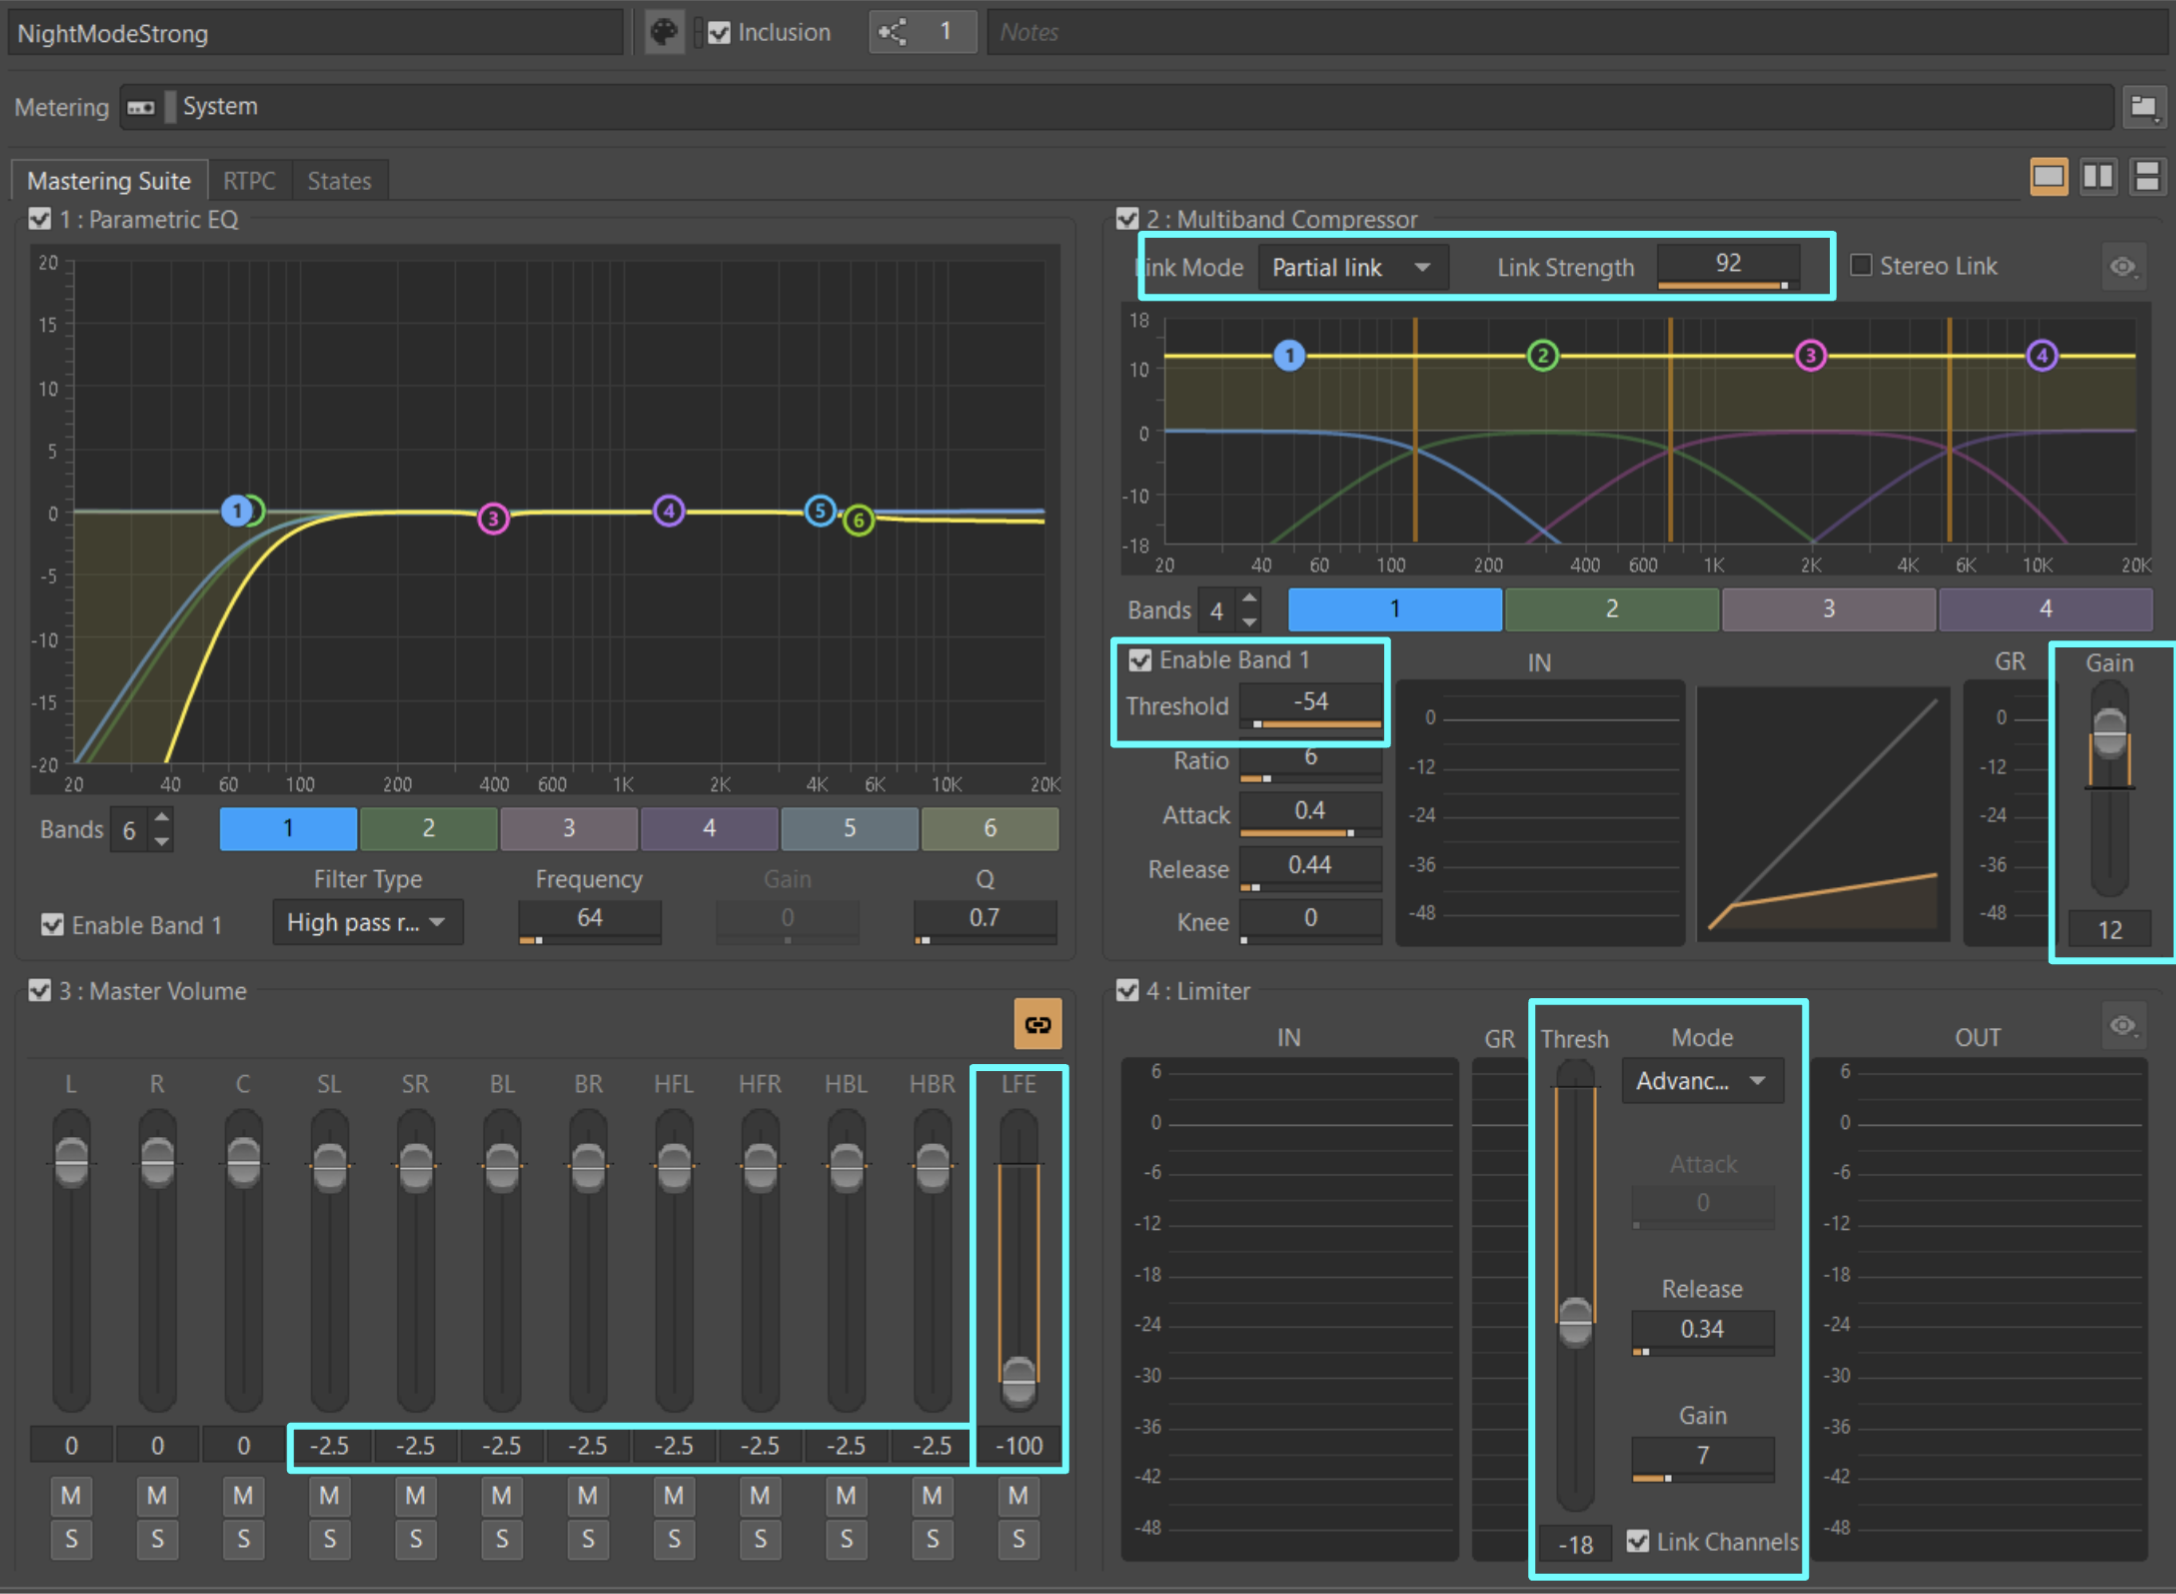
Night Mode Strong: Thresholds of Compressor and Limiter are even lower, squashing the dynamic range significantly.
Gain
The surround and ceiling speakers are turned down to facilitate the audibility of key action and narrative, which most often happens in the front speakers.
The LFE channel is muted, as Night Mode is primarily intended for minimum disturbance of the player’s surroundings. Feel free to reintroduce it if you prefer.
EQ
With these presets, the compression is so heavy that the precompression EQ is used to shape the signal to facilitate the compression stage rather than define the tonal balance, which is better achieved with the compressor bands’ make-up gains.
Note: Even though high-pass filters are used, the compression is so strong that low frequencies are still present at the end. The high-pass filters are used mainly to remove sub-frequencies prior to compression.
Compressor
As expected, the compression is extreme. There are many ways to achieve this.
Using slow attack, low thresholds, and moderately high ratios proves effective and more natural-sounding than other methods.
Link Mode is used at high percentages to preserve the intelligibility of the action.
Limiter
Because the limiter is used to actively block transients (like a second compressor), the threshold is set very low, with make-up gain to bring up the overall level to the desired target.
If your transients happen to be especially strong and seem to saturate, you might have to reduce the compressor attack time and/or raise the limiter threshold.
Final Thoughts
The Mastering Suite is an opportunity to embellish your mix and a tool in your arsenal for game audio settings such as NightMode. When time allows, tailoring the mix for different configurations and creating more subtle mastering presets leads to better results.
We hope this two-part series has enticed you to use the Mastering Suite in your upcoming title, and helps you understand it better if you were already using it.
The plug-in is available for free and is easy to install, so you can try out everything we have described in this two-part series.
We are excited to see how audio teams are making use of the Mastering Suite in their projects.

Comments
Aaron Brown
March 12, 2024 at 07:36 pm
Excellent article! For Night Mode I also found the 2 HPF bands at 40hz. and 44hz. critical in taming the low end with the levels of compression and limiting here. The Partial Link of 90 seems to be the best sounding compromise for overall compression while having all linked sounds far too linked and off with heavy compression. My 5 and 6 band shelf eq ended up extremely similar to yours as well so there must be magic in reducing the 3k+ band around 1dB to reduce sensitive and smoothing it over. I'm sure it's wildly different for every title and asset type, but for thresholds I liked -32 to -30 with fairly fast attacks (.01-.02) and releases (.02 to .05) The main addition I'd add to this article is that when you hook up the mastering suite to use a preset, also add a state group that uses the same name to be called. The key here being you can both set a mastering suite preset for night mode while using the state mix to control aspects of the mix prior to being hit by this plugin. That way you can reduce a few dB on the loudest busses/assets, hpf or eq adjust things hitting the low end, boost quiet sounds like footsteps a touch, and finesse the mix as you go to prevent having to truly squash the mix in order to fix the reduced LRA and levels a Night mode is designed for. Inevitably night mode comp/limiting/boosting will bring out undesirable artifacts in all sorts of sounds and having that state to mix along with it has been critical for me. I'd also wonder how we as an industry can better communicate what these modes do and when to use them. As I look over forums the confusion is clear. Somehow communicating better in tooltips and unifying terminology would likely help players choose the right modes for their situations while also helping to prevent hearing loss from loud levels.