I decided to dive deeper into interactive audio some time ago. I wanted to create a project related to my work that would be entertaining enough to avoid burnout, while also being educational. A project that would afford me some fun while making me a better specialist.
This thought process is how I came up with the idea of “Robotic Orchestra” (RRO). RRO is designed to be a machine that responds to, randomizes, and independently reworks my input. So, the art becomes half mine and half the machine’s. Musical pieces made by RRO are supposed to be more than compositions, they are systems from which different compositions could be derived. In other words, it’s a live looping set with all the interactive features that Wwise is able to provide.
The Prototype
There are three cornerstones of RRO: input, middleware, and output. I have a lot of plans for all three aspects, but my initial focus uses:
- A MIDI input device (Komplete Kontrol S88) I use at work
- Wwise as middleware
- System audio (stereo, headphones) as an output
An important thing to mention first, if you want to get started with MIDI in Wwise, are two awesome tutorials by Berrak Nil Boya (part 1 and part 2) where you can get all the information you need. After learning about it, I made a prototype that I immediately used at work to test the engine load and off-load sound with a piano pedal.
For an upgraded prototype, I used a simple MIDI controller called Playtron. The Playtron controller is extremely fun, as you can connect anything conductive to it. You can create music with vegetables, cutlery, other people and so on. I researched and systematized everything I could use this controller for and made a video about it recently. In this article I’ll highlight all of the tips illustrated in the video.
MIDI with Wwise: Overview
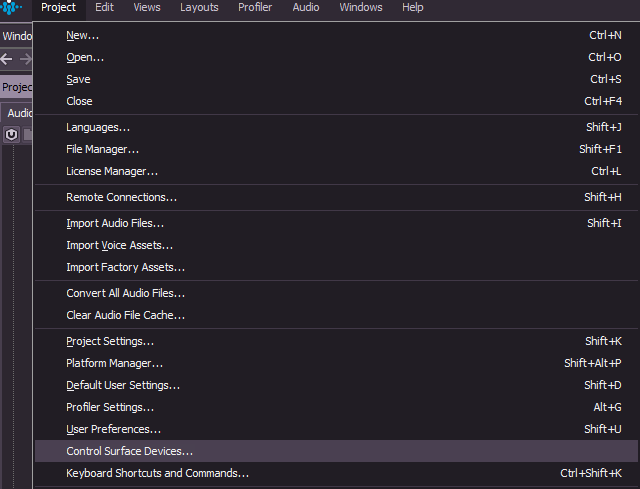
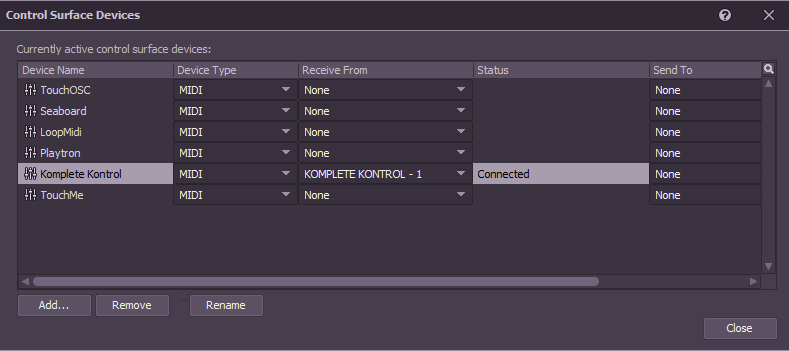
There are a few easy steps to start working with MIDI in Wwise. First, the MIDI input should be initialized by the authoring. To do that, go to “Project → Control Surface Devices”, add a new device and choose the “Received From” input device from the list.
1. The Synth
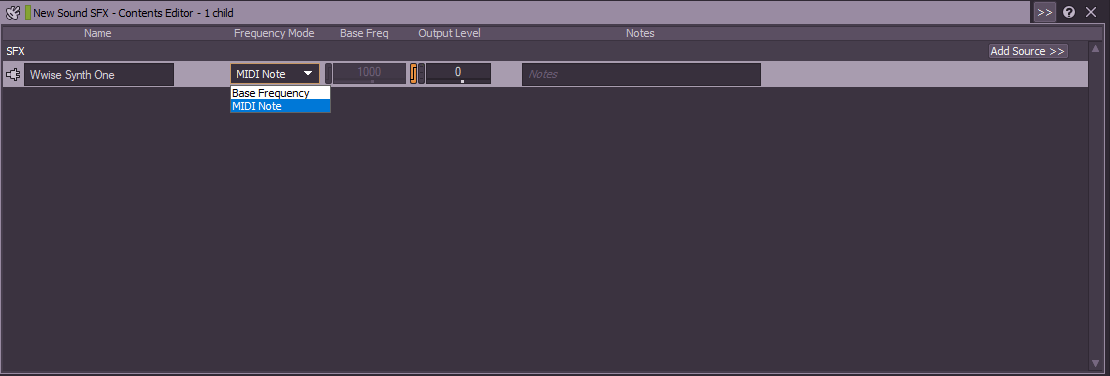
It’s super simple to start playing. If you try a Wwise Synth One or Tone Generator source, playing a MIDI keyboard or touching the Playtron’s pins can be used to trigger the notes. In order to play different notes, it's crucial that the Frequency Mode is switched to “Midi Note”.
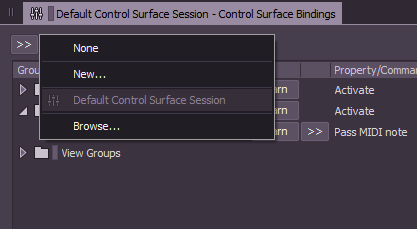
Like everything else that needs sessions in Wwise, this utility also requires choosing or making a session.
2. The Sampler
While synth is the easiest option (you can copy-paste a SynthOne preset or just tap it to make it sound) you can also make a sampler. However, this would require more time, as there will be assets and RTPCs, you can also map it to different scales. Here is a thorough article about Creating More Complex MIDI Controlled Sample Instruments Using Wwise. It’s also possible to map the sampler to a specific scale — for my purposes, I created a natural minor scale without flats or sharps and mapped it to the chromatic scale of Playtron.
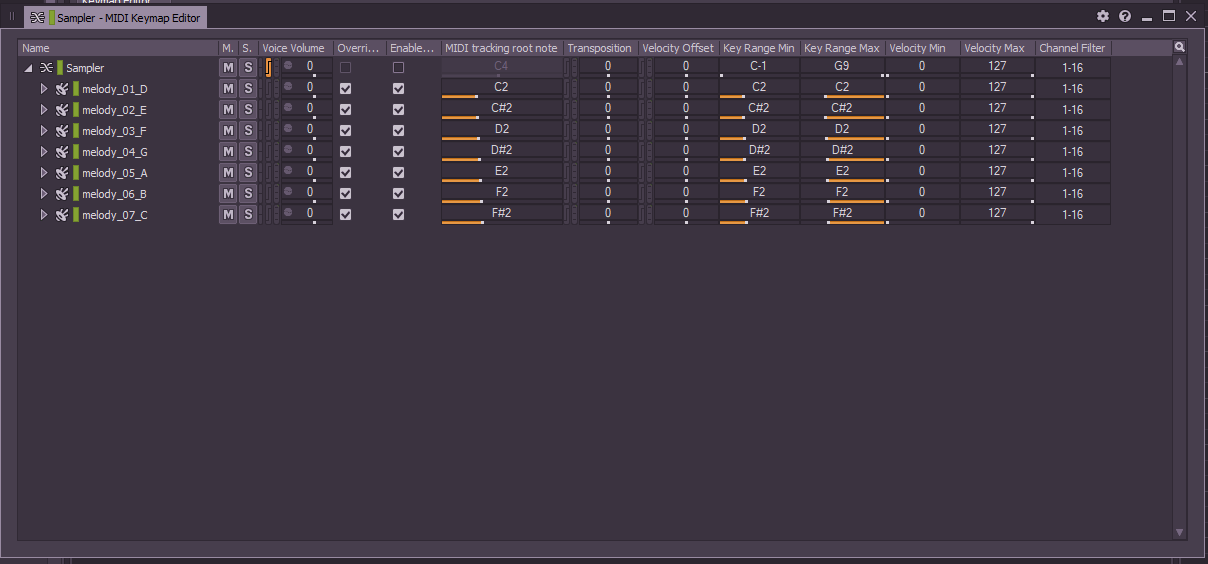
3. Control Messages
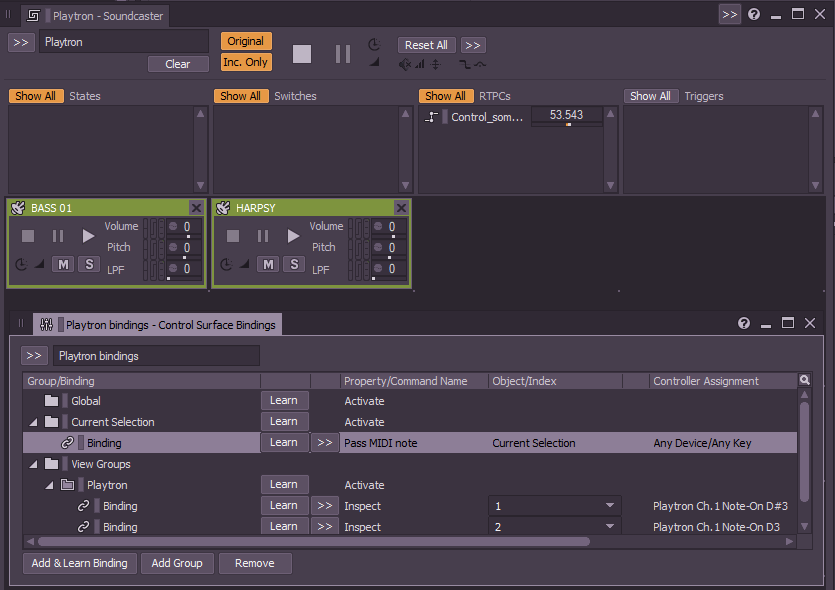
Besides simply playing notes with keys, it’s possible to toggle any Container or Event using a MIDI controller. The Soundcaster view, essentially a way to audition Sounds and Wwise Events with access to properties and parameters, works perfectly as a beatmaking console.
If you want to change the timbre on the fly, or even switch between synth and sampler sounds, it’s easy to put any container in the Soundcaster:
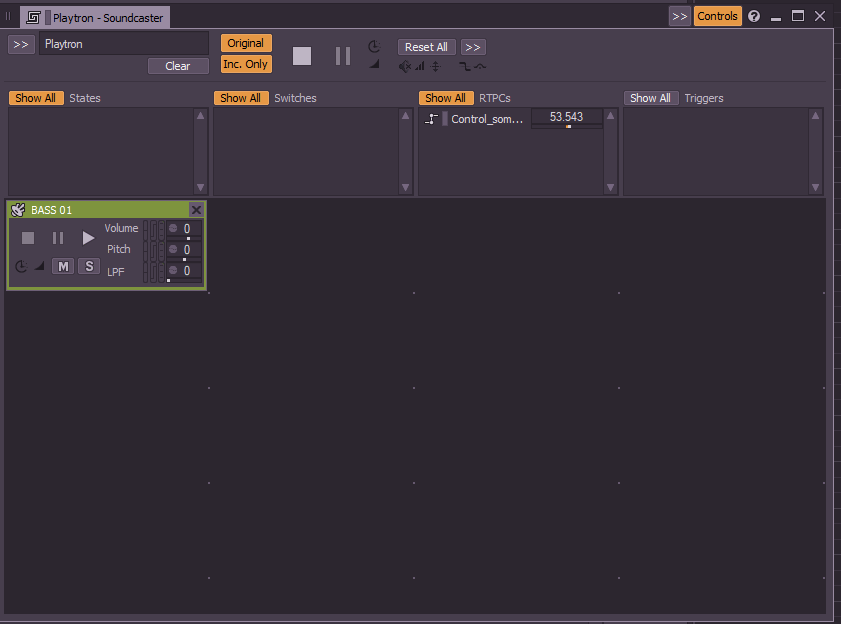
A) Switch to the Control Surface Bindings view, navigate to “view groups”, create a new folder and add a new Binding Group.

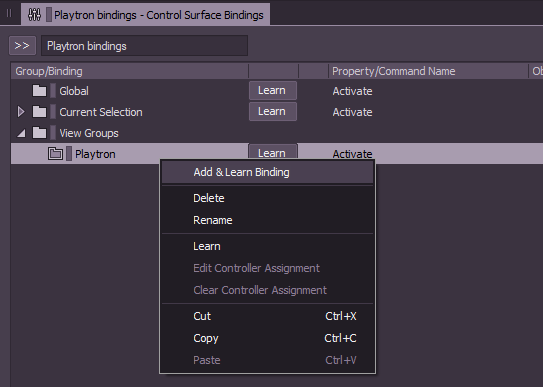
B) To bind it with the pin on the controller device, press “Learn” and touch the object/key you want to make the control switch.

C) In the menu to the right of the “Learn” button, choose “Object commands → Inspect”. If you choose “Play” it will start playing a looped synth sound.
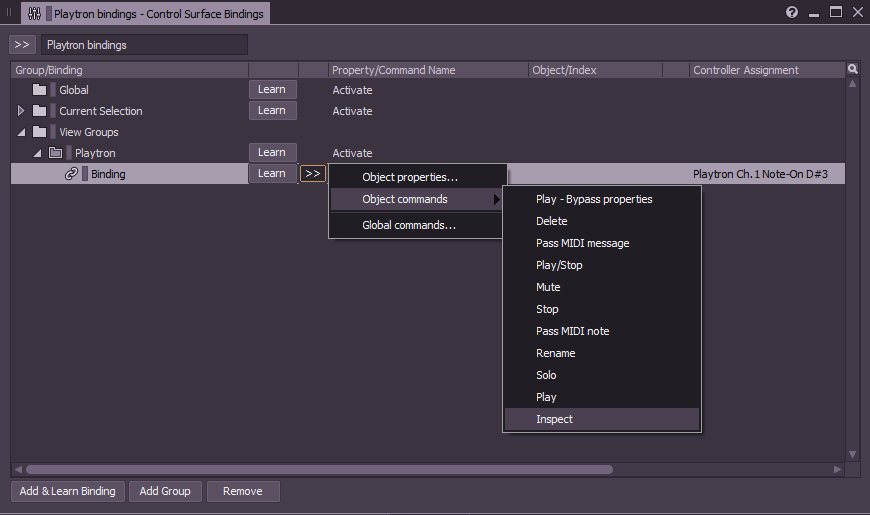
The next step is to repeat steps A-C for the second timbre. The trick is, if you “Inspect” an object in the Soundcaster with a control pin, the instrument becomes selected for the output, and the rest of the pins remain active for “Current selection/Pass MIDI note”, so you can choose which voice you give to the melodies. The number in the Object/Index column should match the object’s order in the Soundcaster.
4. Events
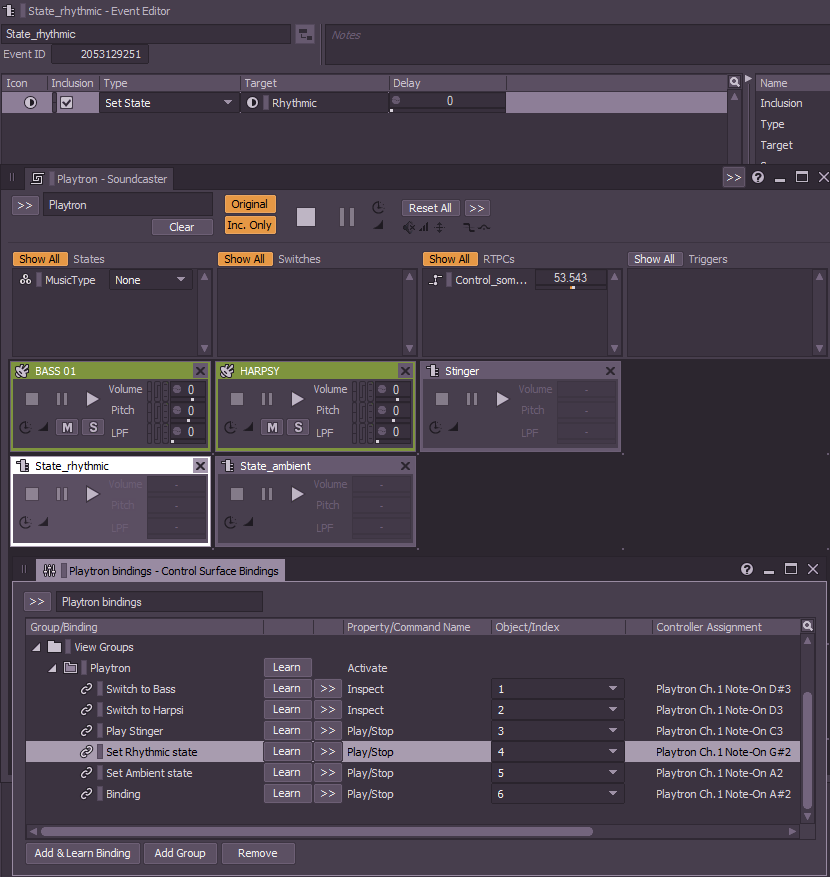
For me, the most powerful reason to use Wwise as middleware for MIDI controllers is the ability to put Wwise Events into the Soundcaster. This means that you can create dependencies to play tempo-synchronized music segments and playlists from the Interactive Music Hierarchy, including stingers and transitions while also setting States, Switches and Game Parameters..
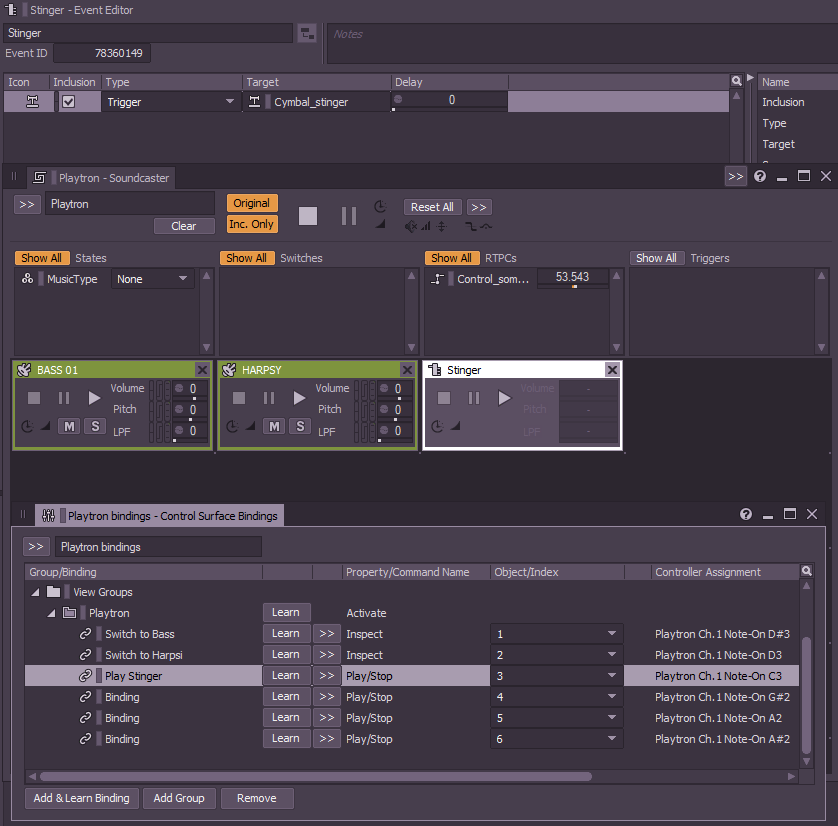
If all those things are normally triggered by the game, you, the musician, are in the “game” role now. The Soundcaster is a powerful tool that gives you access to the same things available to a game at runtime.
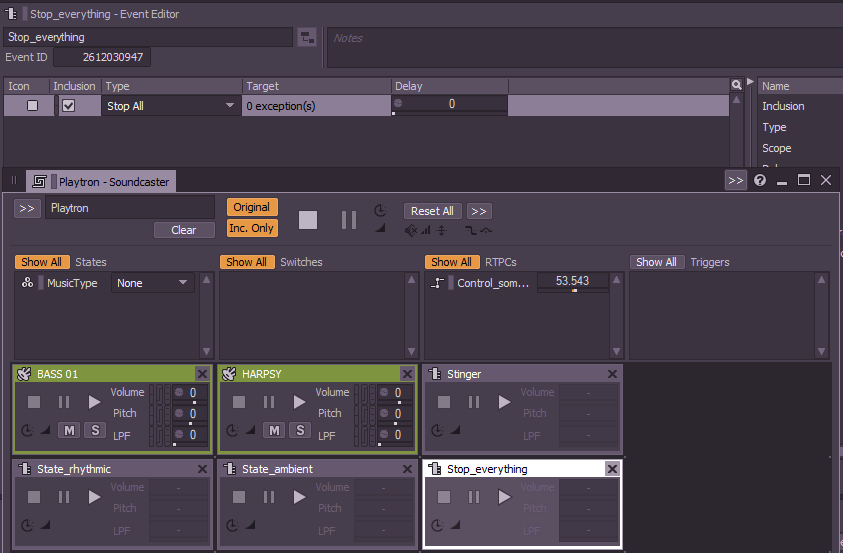
If you bind any looped sounds or containers from the Interactive Music Hierarchy to a MIDI controller, make sure there’s a Wwise Event where you “stop everything” using the “Stop All” Event action, and make sure to add the Event to your Soundcaster Session. If nothing else, this prevents chaos and super loud double layering.
5. Game Parameters
MIDI keyboards with faders or potentiometers usually control RTPCs easily. Create a new Game Parameter, then navigate to Control Surface Bindings and make a new binding in the “Global” folder. Press “Learn”, touch the fader on your controller. Then, in the Property/Command name choose “Object Properties → Simulation Value”, and in the Object/Index column choose the Game Parameter you created earlier.
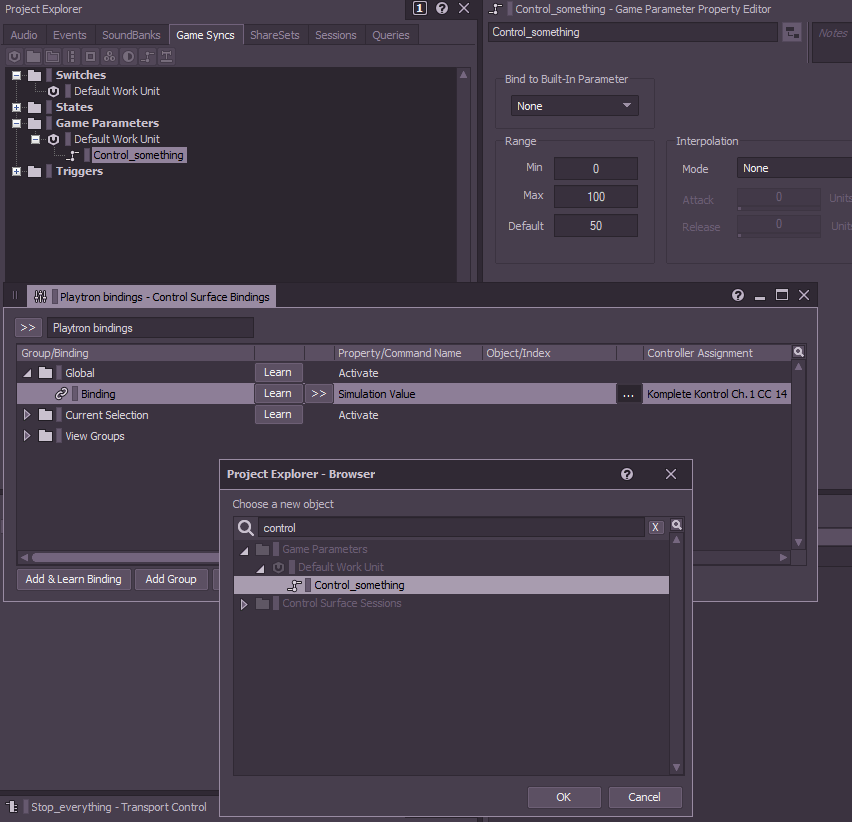
To make this study more complex I wanted to use another Playtronica instrument — TouchMe. It works as a capacitive sensor: one side of the controller is attached to yourself and the other side to something else the device senses when there is a capacitive connection. The controller is already pre-mapped by the developer by default to transmit MIDI Note messages, not the CC we need to bind with the Game Parameter. I tried to make a simple MIDI Note to CC converter using a PureData patch and some Python magic. There is a great tutorial here in the blog (part 1, part 2) and even a One Minute Wwise with a slightly different approach to this process. Anyway, I failed, as it appears that Wwise Authoring wouldn't understand a source MIDI plug-in, and an Effect MIDI plug-in wouldn’t make sense as it works with the digital audio stream.
I just took a chance and found the Bome MIDI Translator. It’s a tool that converts any MIDI message to any other MIDI message.
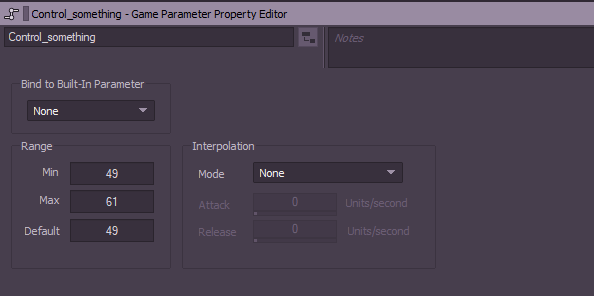
Now we can bind the TouchMe controller to the Game Parameter we created earlier, which can control volume, pitch, filters, and even some of the plug-in properties. To make it efficient, take a look at the data received by Wwise from the TouchMe controller and set the minimum and maximum values you see when playing it as the “Min” and “Max” values in the parameter Range. Now, any movement of the TouchMe controller will result in a parameter value change.
That’s the basics of using Wwise with MIDI controllers. All those manipulations done in Wwise Authoring can be used with any other controller, including self-made controllers, like Arduino or Raspberry Pi. But that’s another story to tell...

Comments
Mads Maretty Sønderup
February 26, 2021 at 06:19 am
Thank you so much for sharing this Ressa! Very inspiring :)
Pan-Pan Gou
December 04, 2023 at 05:36 pm
Hi there! Thanks for sharing your project. So inspiring! I am currently trying to set up an installation playback system with Wwise cued by Max/MSP via midi. I was wondering if there is a way to control switches via midi? I've looked around and haven't found a solution yet.