Introduction
In this article, we focus on Unreal Engine's AudioLink.
The operation has been confirmed using the following versions:
- Wwise 2023.1.3.8471
- Unreal Engine 5.3.2
Please note that different versions may operate differently.
Table of Contents
Introduction
Table of Contents
What is AudioLink?
Diagram: How Does It Work?
Preparing for a new project
Integration and project creation
AudioLink - Setup
Wwise Project Settings
Configuring Unreal Integration
Unreal Settings (Optional)
Sound Attenuation Settings
Sound Submix Settings
AudioLink - Playing the sound
When specifying Sound Attenuation (Blueprint node)
When specifying Sound Attenuation (Audio Component)
When specifying Wwise AudioLink Settings
Sound Submix
Conclusion
What is AudioLink?
AudioLink is an Unreal Engine feature available in Unreal Engine 5.1 onwards that allows Unreal Audio Engine to be used alongside middleware.
This allows you to simultaneously use UE's own sound solutions, such as MetaSounds, in combination with audio middleware like Wwise.
Diagram: How Does It Work?
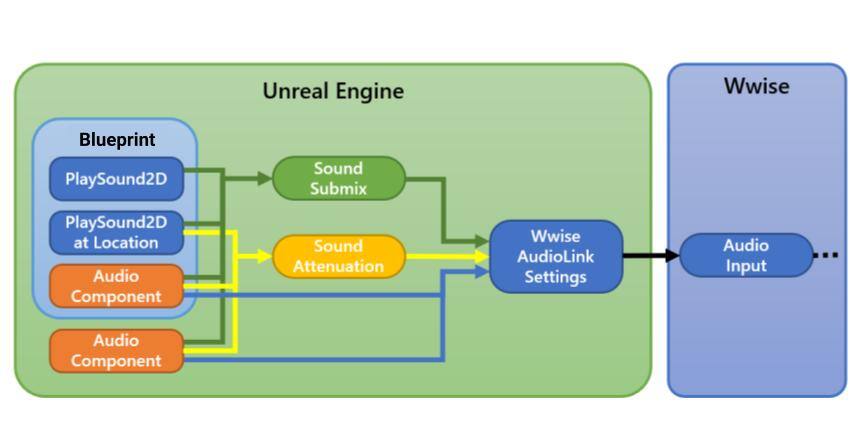
Starting from the right, on the Wwise side, the Audio Input plug-in receives the output from AudioLink, and the Wwise AudioLink Settings manage the AudioLink output to Wwise. And the Sound Attenuation holds the settings for the Wwise AudioLink Settings. (Note: Here, Sound Attenuation is an Unreal asset from their Audio system. AudioLink only works if your Unreal sound is using a Sound Attenuation.)
In the Unreal Engine, there are some Blueprint nodes that allow you to specify Sound Attenuation as the output method, and some that do not allow you to specify anything.
Audio Components such as Sound Cue and MetaSound, allow you to specify Sound Attenuation, as well as Wwise AudioLink Settings directly.
You can also route the output to the Sound Submix in the Wwise AudioLink Settings. The Sound Submix can capture most audio output within Unreal, although some plugins, such as Text-to-speech, cannot be used out of the box.
The following table briefly summarizes the information.

Preparing for a new project
Integration and project creation
Please refer to the previous blog and complete the steps up to "Creating a Project".
AudioLink - Setup
(Note: If you don't hear any sound after making these settings, try restarting Unreal Engine.)
Wwise Project Settings
Starting in Wwise Authoring:
- Create any Sound SFX. Let's name it AudioInput.

- Set Audio Input as Source.
![]()
- Create an Event to play that SFX.

This completes the sound input settings on the Wwise side.
Configuring Unreal Integration
Now switch to Unreal Editor:
- Edit - Project Settings… – Wwise – Integration Settings – Initialization - Set Unreal Audio Routing to “Route through AudioLink [UE5.1+]” . After this, you will be asked to restart.
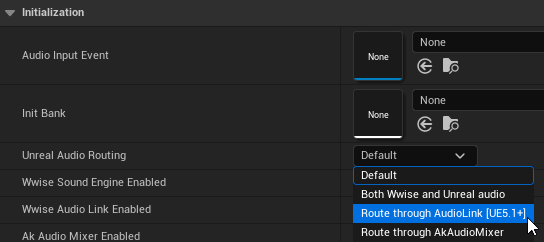
- Click the Generate SoundBanks… button and go through the following Generate SoundBanks dialog to generate a SoundBank containing the Events from the added Play_AudioInput.

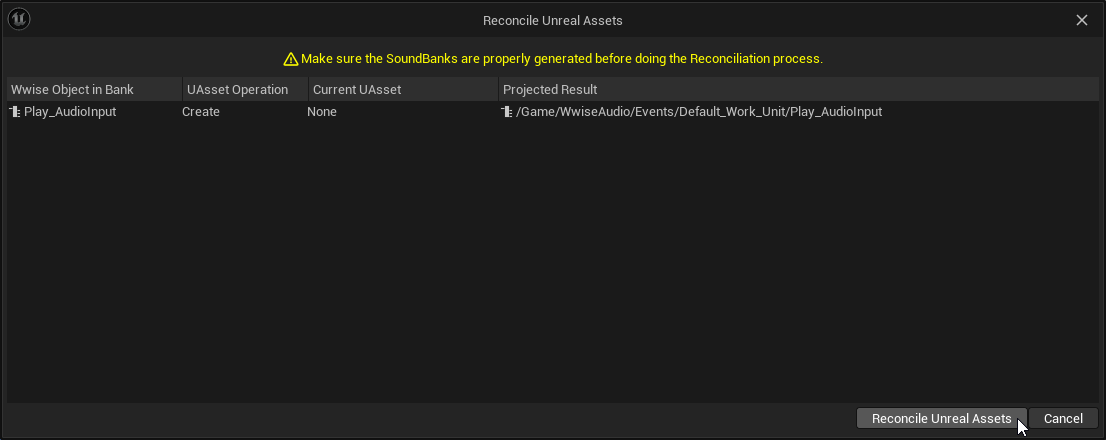
- Press the Reconcile button.

- In the Reconcile Unreal Assets dialog, click the Reconcile Unreal Assets button to generate a UAsset. (You can generate a UAsset in several other ways.)
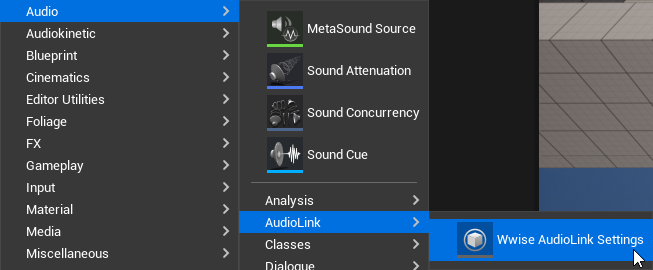
- From the Add button in the Content Browser, create Audio - AudioLink - Wwise AudioLink Settings.
- Edit the generated NewWwiseAudioLinkSettings and set the Play_Audio Input (AkAudioEvent asset) created above to the AudioLink – Start Event.
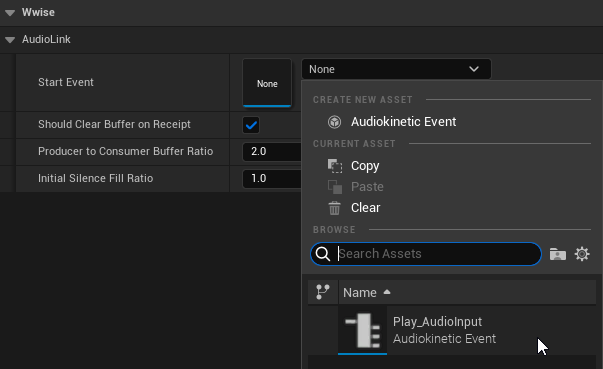
Now that we're ready to feed the AudioLink output into Wwise, we'll need to configure the Unreal Engine audio output to feed into AudioLink.
Unreal settings (Optional)
Sound Attenuation Settings
It can be used for sound methods that allow you to specify Sound Attenuation, such as PlaySound2D at Location and Audio Component.
1. Create Audio – Sound Attenuation from the Add button in Content Browser.

2. Edit the NewSoundAttenuation you created and set the NewWwiseAudioLinkSettings you created above to Attenuation (AudioLink) – AudioLink Settings Override. Also, if you do not need attenuation, uncheck Enabled for Attenuation other than AudioLink.
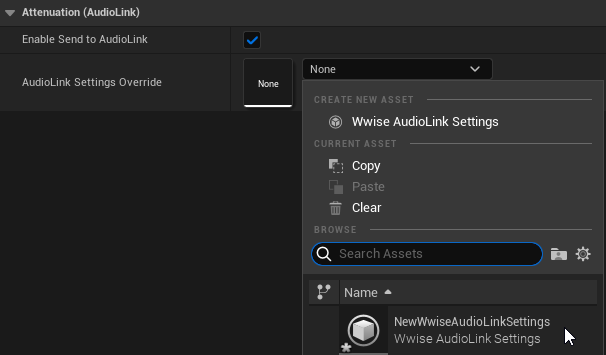
Sound Submix Settings
Create this configuration if you want to output sound to AudioLink using Sound Submix.
Attenuation, such as PlaySound2D, but please note that it is always enabled.
1. From the Add button in the Content Browser, create an Audio – Mix – Sound Submix.
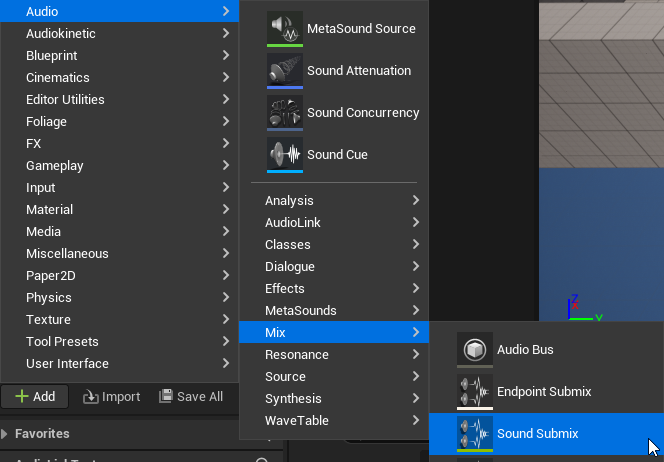
2. Edit the generated NewSoundSubmix, enable Send to AudioLink in Audio Link, and set Wwise to AudioLink Settings. Specify AudioLink Settings.
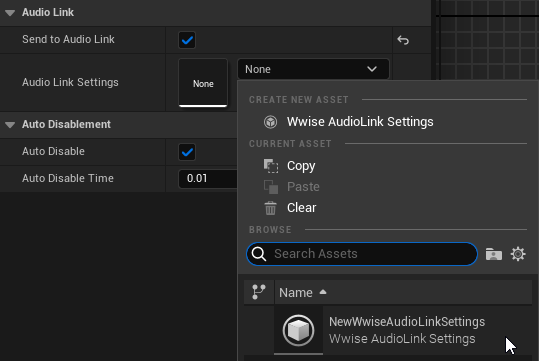
That's all for the settings. If you don't want to use it, you can disable it by unchecking Send to Audio Link.
AudioLink - Playing the sound
When playing a sound with Sound Attenuation or Wwise AudioLink Settings specified, the AudioInput will only appear in the Voice Graph during playback.
If Sound Submix is enabled, it becomes difficult to understand the behavior when specifying Sound Attenuation / Wwise AudioLink Settings, so we recommend not using Sound Submix when checking these operations.
When specifying Sound Attenuation (Blueprint node)
To set Sound Attenuation for sound playback from a Blueprint node:
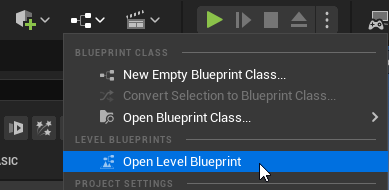
1. Open Level Blueprint from the menu below.
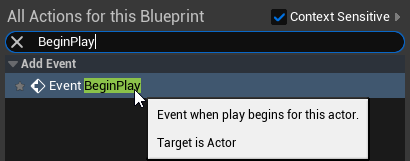
2. Right-click on the Blueprint screen and create a BeginPlay Event.
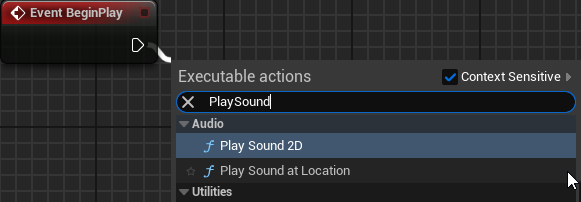
3. Draw a connector off the BeginPlay Event and create a PlaySound at Location node.
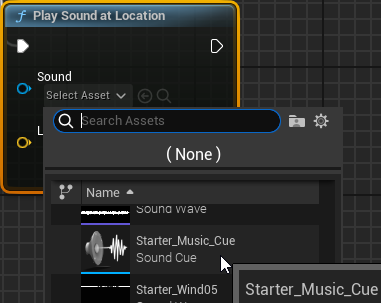
4. Set Sound to Starter_Music_Cue.
5. Set NewSoundAttenuation in Attenuation Settings.
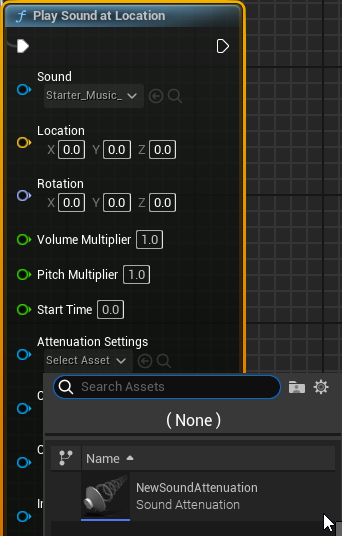
Print in this state and run it from the editor, you should be able to see in the Wwise Profiler that the Starter_Music_Cue is playing via the Play_AudioInput (the meters will work, but you won't be able to see what's playing in Wwise.)

When specifying Sound Attenuation (Audio Component)
Now let's try it with MetaSounds.
1. Create Audio – MetaSound Source from the Add button in Content Browser.

2. Double-click on the NewMetaSound Source you created, and then right-click on the screen that appears to create a Noise node.
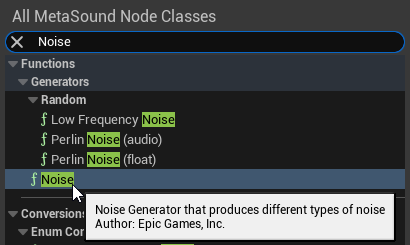
3. Connect the Audio output to Out Mono.

4. Drag and drop the NewMetaSound Source from the Content Browser into the viewport.
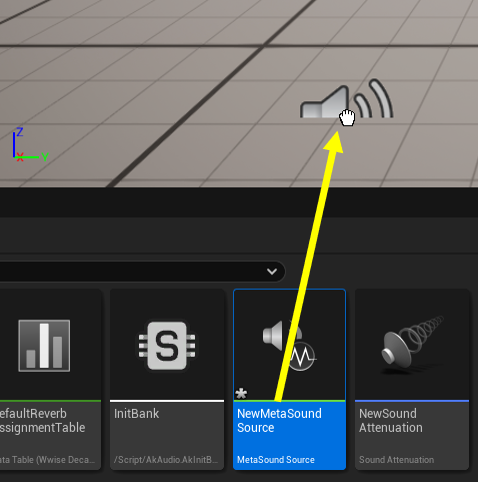
5. Click on the object placed in the viewport and select AudioComponent from Details.

6. Set NewSoundAttenuation in Attenuation Settings.
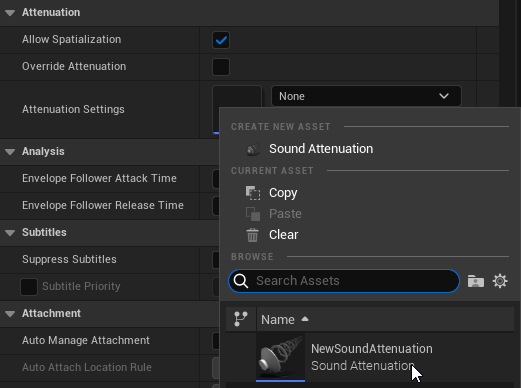
If you start the device in this state, you will be able to listen to MetaSounds’ pink noise via AudioLink.
When specifying Wwise AudioLink Settings
Let's try setting it up using the NewMetaSound Source installed above.
1. In the Audio Component, open Attenuation and enable Override Attenuation.

2. In Attenuation (AudioLink) - AudioLink Settings Override, set the Wwise AudioLink Settings.

In this case, instead of referencing the Sound Attenuation, you can use the settings in the Wwise AudioLink Settings directly.
Sound Submix
Let’s use PlaySound2D and confirm that it can be played via AudioLink without setting Sound Attenuation, etc.
1. Draw a connector off the BeginPlay Event of the Level Blueprint and create a Play Sound 2D node.

2. Set Sound to Collapse_Cue.
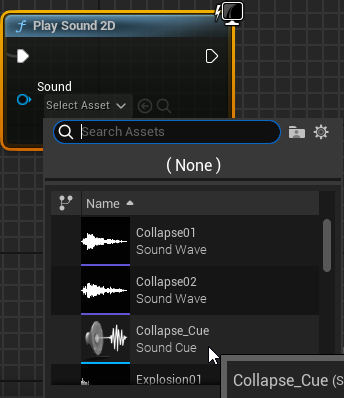
Please note that Play Sound 2D does not have a place to set Sound Attenuation, etc.
If you compile and run it in this state, you should hear the sound of the Collapse_Cue that has been set.
Even if Sound Submix is disabled, you will still hear the sound, but since it does not pass through Wwise, the meters in Wwise will not move. Conversely, if it is enabled, the meters in Wwise will move.
Conclusion
Using AudioLink to deliver sound from Unreal Audio opens the door to creative tools and techniques that can work in concert with Wwise towards the best representation for your interactive audio experience. It is a way to aid in the prototyping of systems, speed up the development of deeply synchronized audio-visual feedback, and unlock the potential available using both Unreal Audio and Wwise. We would like to continue to provide easy-to-understand explanations of features that work reliably, so if you have any requests for further explanations of these features, please let us know!


Comments